{{item.name}}
Price: {{currency}}{{item.price| numberThousandsCommas | numberDecimalPoint}}
Qty: {{item.amount}}
Remote Work & Learning
Projector
Monitor
Lighting
Interactive Display | Signage
Remote Work & Learning
Store
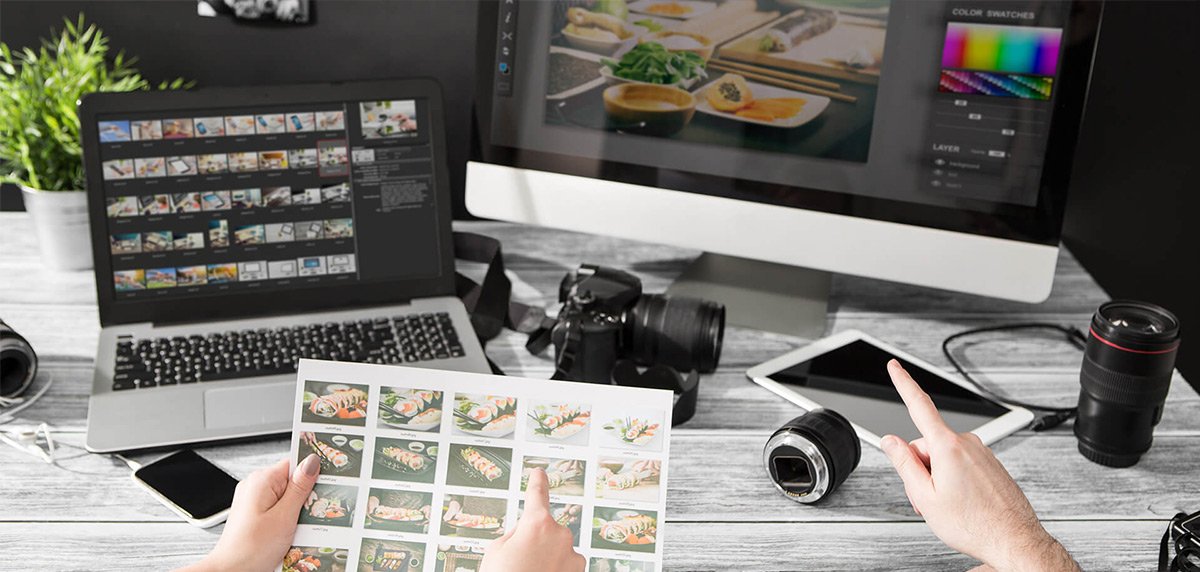
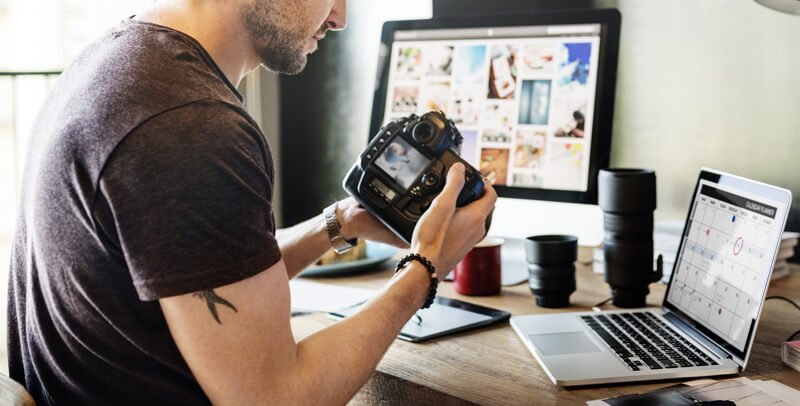
As a photography enthusiast or even a professional photographer, aside from having suitable camera lenses, excellent photography skills, a clear train of thought, and a unique “photographer’s eye,” what other key factor is indispensable? The answer is: a monitor. The “monitor” mentioned in this article is the one you place on your work table for viewing, selecting, and editing photographs. The quality of the monitor is critical for the final appearance of the images, but its quality can vary substantially. In general, we are used to browsing the photo on the camera screen right after snapping a picture. However, we will still upload the captured images to a computer, then select images we would like to keep, and edit them on a large monitor. Have you ever thought about this? Can the monitor reflect the exposure and color of a retouched image in the way you expected? They usually don't. This is an aspect that most photography enthusiasts neglect. How many people actually give the thought to the specifications and color accuracy of their monitor? The answer shouldn’t be difficult to guess.
The quality of a monitor is not just about its value for budget, its price, its appearance, or how saturate the monitor could display. To identify a monitor with excellent quality, consumers need to do some research on the specifications, material, and technology involved. Do not worry if you are not a tech wiz. Finding a good monitor is not as difficult as you imagine. Simply remember the following guidelines, and you should have no trouble finding a monitor that suits your needs.
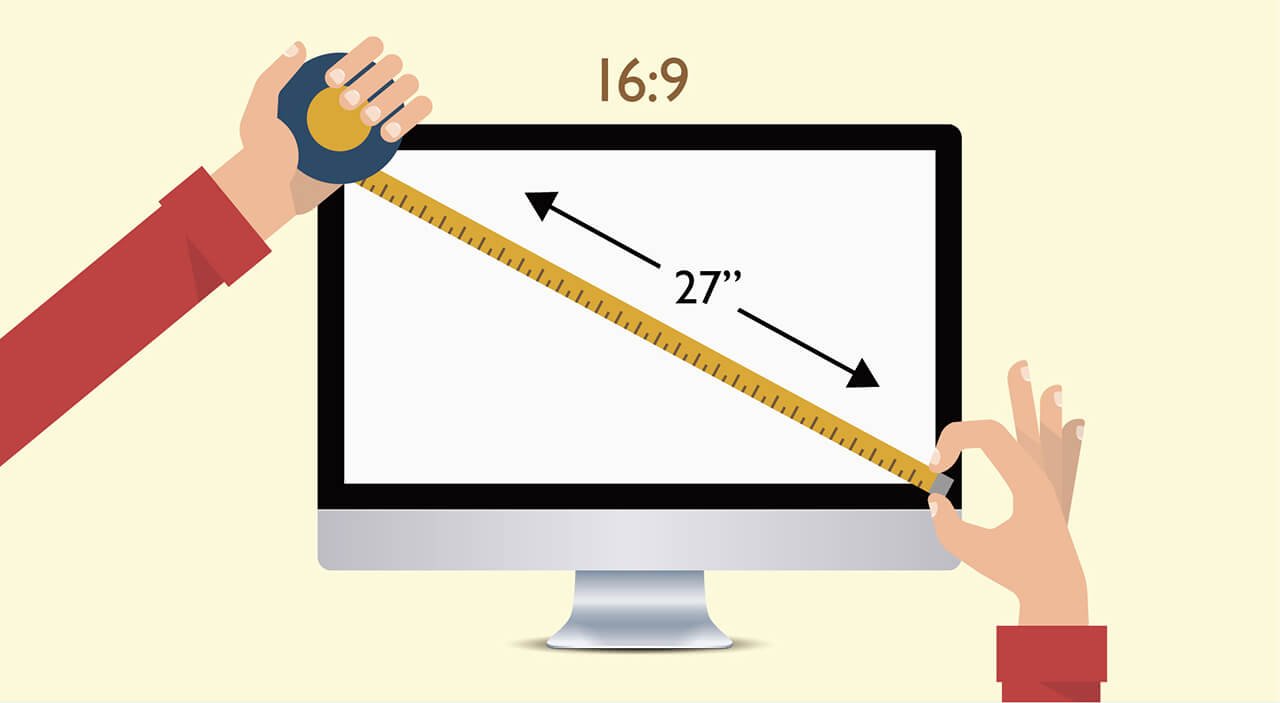
If you browse an E-commerce platform online, or visit a electronics retail store, the first thing you will notice are monitors with different sizes. The numbers 23-, 24-, 27-, 28-, and 29-inch seem to scream for your attention. But what do these numbers mean? Monitor size represents the dimensions of a monitor, and it is usually measured in inches. The size of a monitor is the diagonal length of its display area, and converts from centimeters into inches (1 in = 2.54 cm). Large wide-format monitors are the current trend in the market, (e.g., 27-inch monitors; 16:9). Other than offering a bigger screen real estate, large wide-format monitors delivers more details, which is especially important for photographers, who edit images on a regular basis. In addition, these monitors can accommodate more windows and tool bars at the same time when using editing software such as Photoshop, Lightroom, VEGAS, and iMovie. Hence, work efficiency can be improved.
To measure the size of a monitor, simply convert the diagonal length of the display area to inches. The monitors that are the current trend in the market for image processing are predominantly 27-inch monitors with a 16:9 aspect ratio.
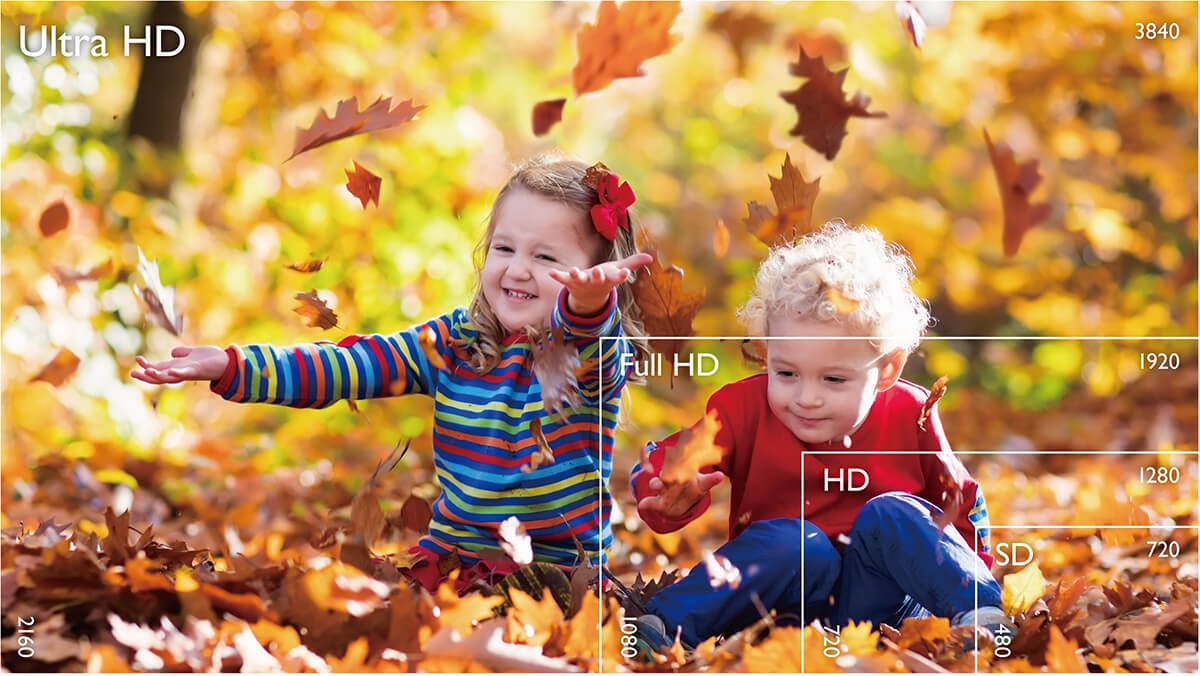
Resolution is another factor that is often misunderstood by photographers when picking out monitors. A monitor’s resolution refers to the number of pixels it can display. Any image, picture, or text we see on monitors is made up of a dense pack of pixels. For different monitors of the same size, ones with higher resolutions (more pixels) are able to display more details and realistic images, and offer more content.
Resolution refers to the number of "pixels" contained on the display. A 4K display means 3840 pixels in length and 2160 pixels in width, 4 times the detail of a Full HD.
Monitor size and resolution are two completely different entities. The former refers to the dimensions of a monitor, whereas the latter refers to how many pixels are displayed. A common misconception is that larger monitors have a higher resolution. Unfortunately, this is not correct. Imagine to compare a 25-inch monitor with Full HD resolution (1920×1080) and a 23-inch monitor that has 4K resolution (3840×2160). The 23-inch monitor with 4K resolution (eight million pixels displayed on the 23-inch monitor) will definitely offer more details. Although the 25-inch monitor is bigger, it has a lower resolution (only two million pixels displayed on a 25-inch monitor), which means that the displayed image will be pixelated. Thus, a large monitor also requires a higher resolution to satisfy both visual effect and image quality.
Pixel per inch (PPI), or the pixel density, represents the number of pixels contained in 1 square inch of area.
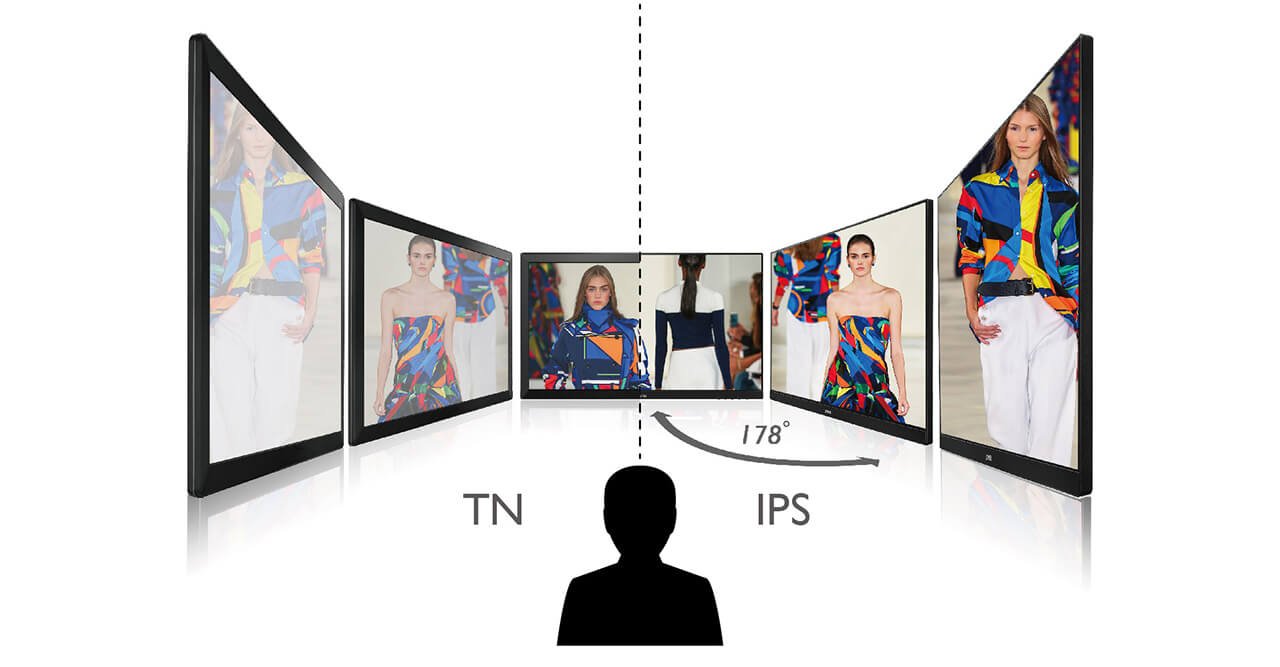
Have you ever experienced this? You and a friend or client are discussing while looking at a photo on a monitor, but find that the colors are different from different angles? This phenomenon is caused by narrow viewing angle. The majority of monitors used for image processing incorporates an IPS panel. Comparing to TN panels used in mainstream products, or monitors using VA panels, the greatest advantage of IPS panel is the 178° viewing angle that does not exhibit color shifting from different viewing angles. Additionally, IPS panels deliver better color ranges and accuracy. From photography enthusiast and imaging professional’s perspective, the monitor using IPS panel is the right choice.
The biggest flaw of a TN panel is the phenomenon of color cast from the narrow viewing angle. It is ill-suited for a photographer’s work. The IPS panel contains a wide 178° viewing angle and high color accuracy, a first-choice for many professional photographers.
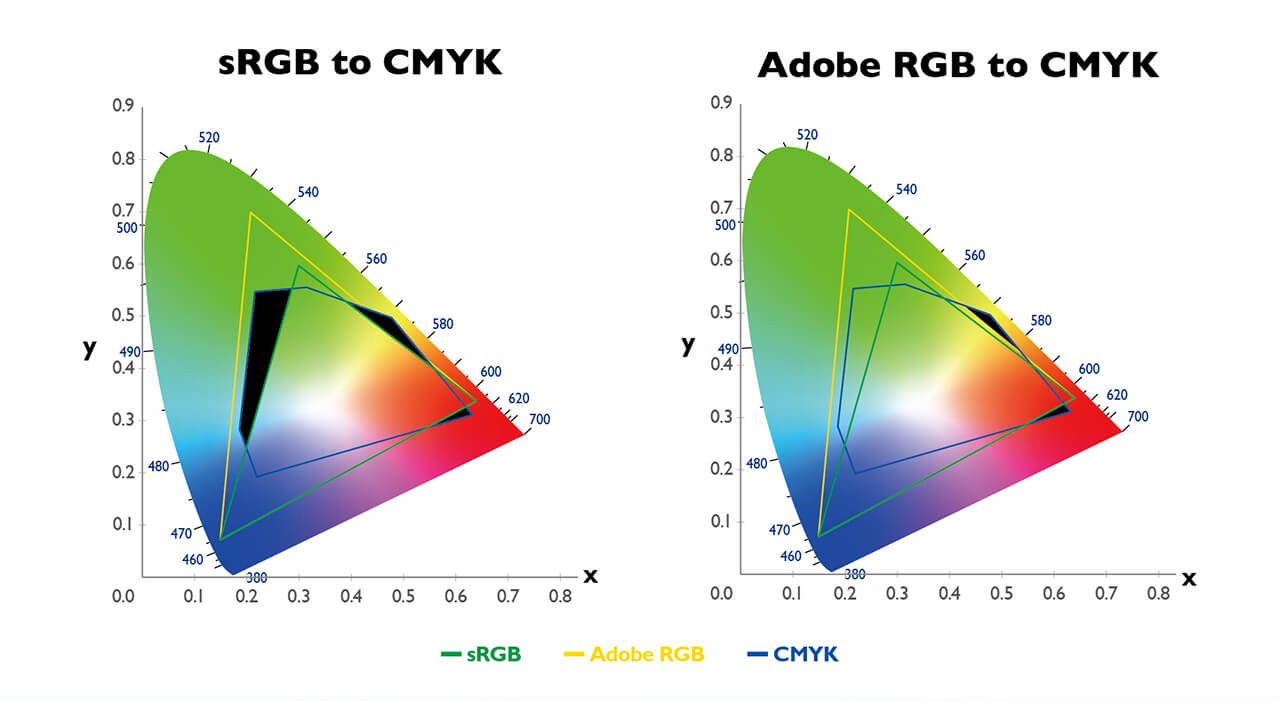
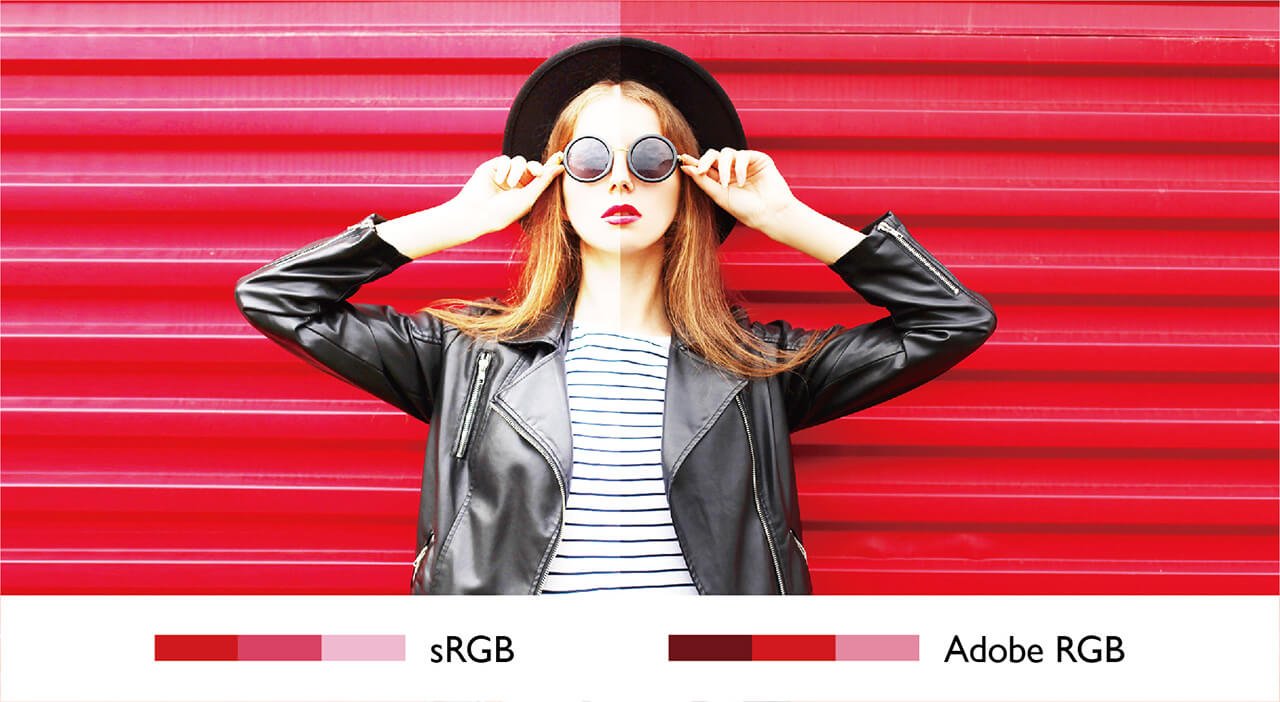
There is usually an option in camera menu to switch between AdobeRGB and sRGB, and these are referred as color space. Color space is also known as color gamut, the range of colors that can be displayed. In general, AdobeRGB has a wider color spectrum compared to sRGB (by 35%). From the perspective of a photographer, a monitor that is capable of presenting more colors is a plus. However, besides selecting AdobeRGB on the camera, the output device, such as monitor, must also support AdobeRGB. A monitor that supports AdobeRGB provides more accurate color details. AdobeRGB color gamut is able to cover CMYK color space used in printing, and allows users to preview the color of the printed image on the monitor without actual print out.
AdobeRGB has a wider gamut than sRGB, and covers the blue-green color in the CMYK gamut which sRGB is unable to accommodate.
The monitor supports AdobeRGB, and in turn could display richer colors more akin to colors in nature.
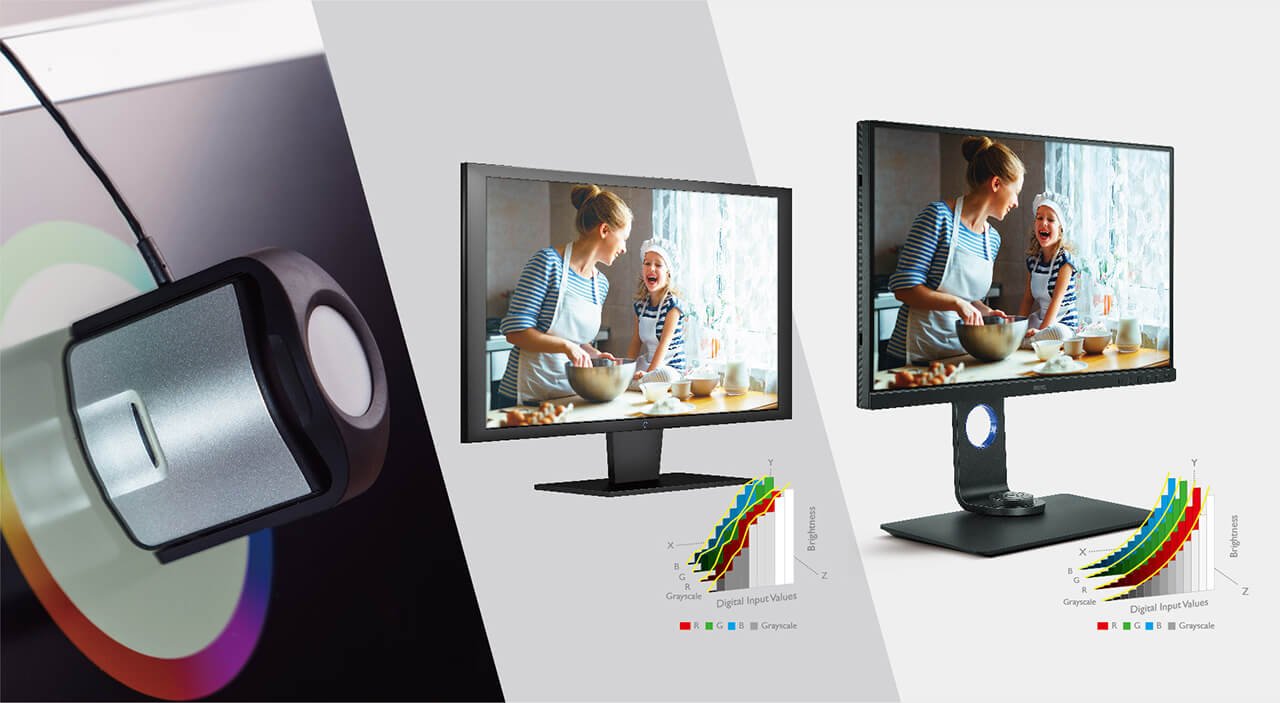
Since color has such significance for photographers, then we should not be worried if we purchased an IPS monitor, right? Not really! Any monitor will experience brightness decay and color shift after being used for a while. When these issues are ignored, they will not only lead to loss in image quality, but also exhibits severe color shift when compared to hardcopy prints. Therefore, users are recommended to conduct monitor calibration at least once every six months. Some photographers who hold strict standards for color may even calibrate their monitor every month to ensure that the colors displayed are always accurate.
There are two types of calibration, namely software calibration and hardware calibration. Compared to software calibration, which is limited to adjusting RGB values in the graphics card, hardware calibration calibrates the monitor by storing data directly into 3D-LUT inside the monitor. The advantages of hardware calibration include delivering more accurate colors and retaining the maximum number of color steps on the monitor to maintain color continuity and prevent contour.
Monitor calibration is very important to imaging purpose worker, it is the only way to ensure that the colors displayed are always accurate.
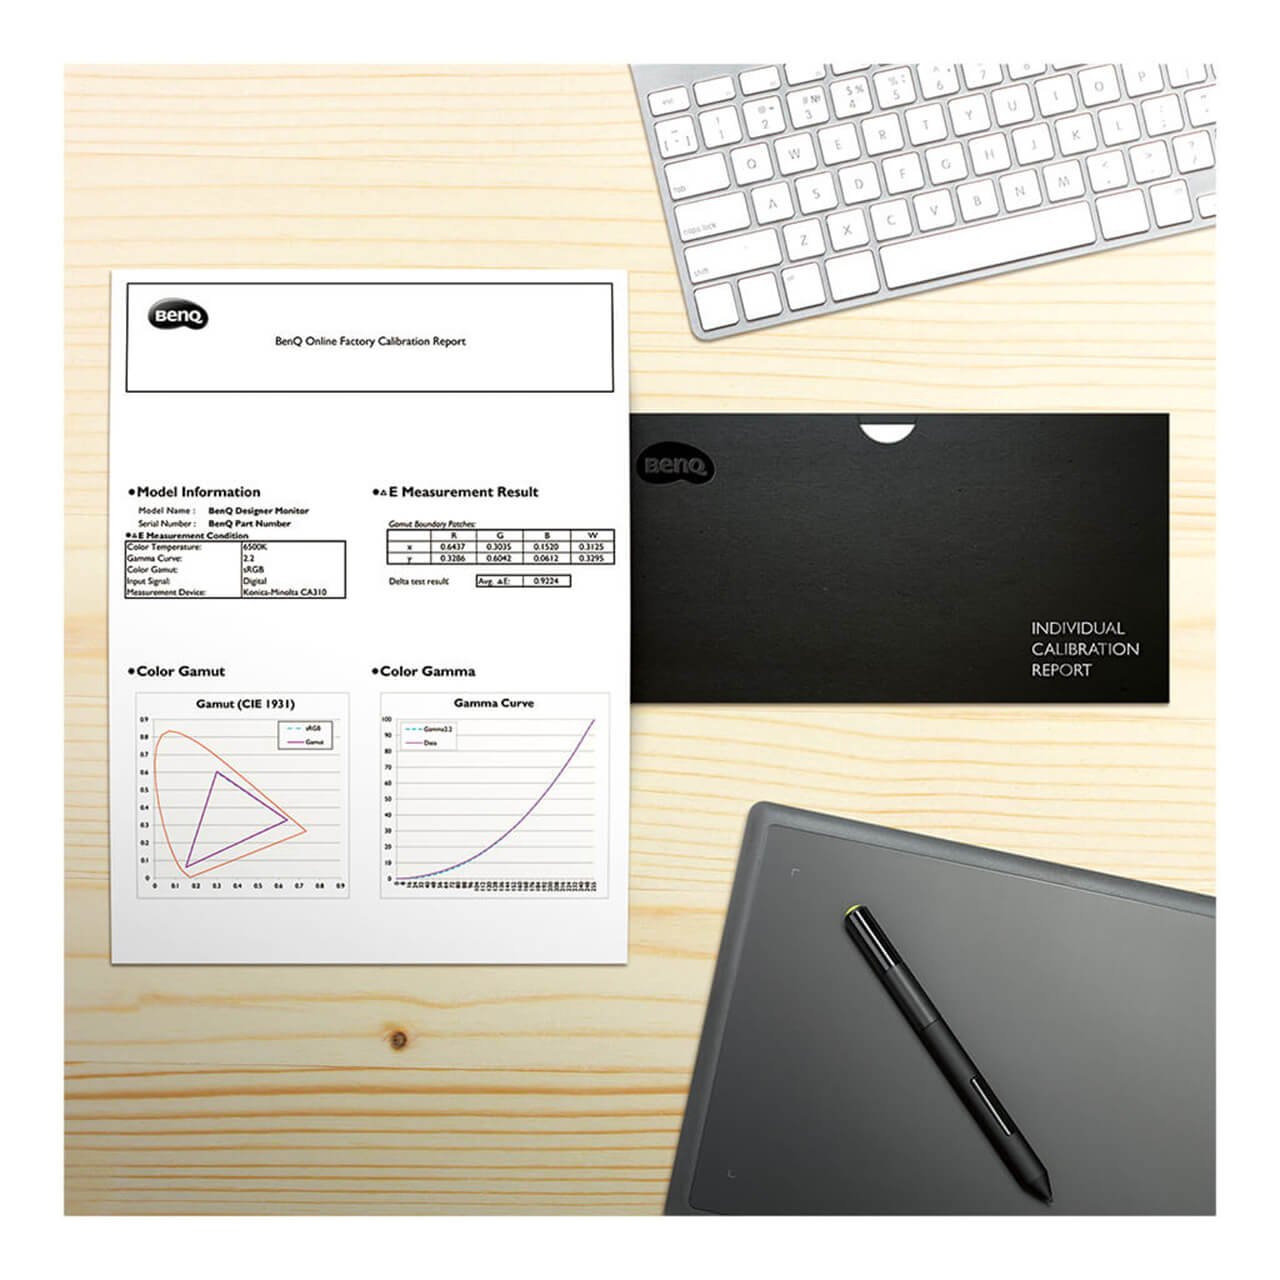
Monitor calibration is something needs to be studied. Not all photography enthusiasts or even professional photographers have a detailed understanding of it. Do not worry if you know nothing about monitor calibration. Some professional monitors designed for imaging purpose have undergone color calibration before hitting the shelves, and some of these monitors are delivered with a color calibration report, which is a bonus for photographers who know little about color calibration. In addition, users are recommended to purchase monitors with Delta E≤2 in terms of color accuracy. The smaller value entails a more faithful reproduction of colors, and this is critical for photographers, who are highly sensitive to colors.
BenQ professional monitors have undergone color calibration before hitting the shelves, and are released with the color calibration report.
The previous paragraphs include basic criteria for selecting a monitor suitable for imaging purpose. However, there are several additional features that you can keep an eye out for. These features offer additional bonuses for your work.
Do you often find yourself becoming agitated for not being able to see properly when your monitor is placed directly under a light source or when the sun is shining directly on your monitor? This is where a shading hood comes in handy. Much like a lens hood, a monitor shading hood blocks scattered ambient light to prevent it from affecting the image displayed on the monitor and ensuring consistent brightness and colors.
A shading hood blocks scattered ambient light to prevent it from affecting the image displayed on the monitor.
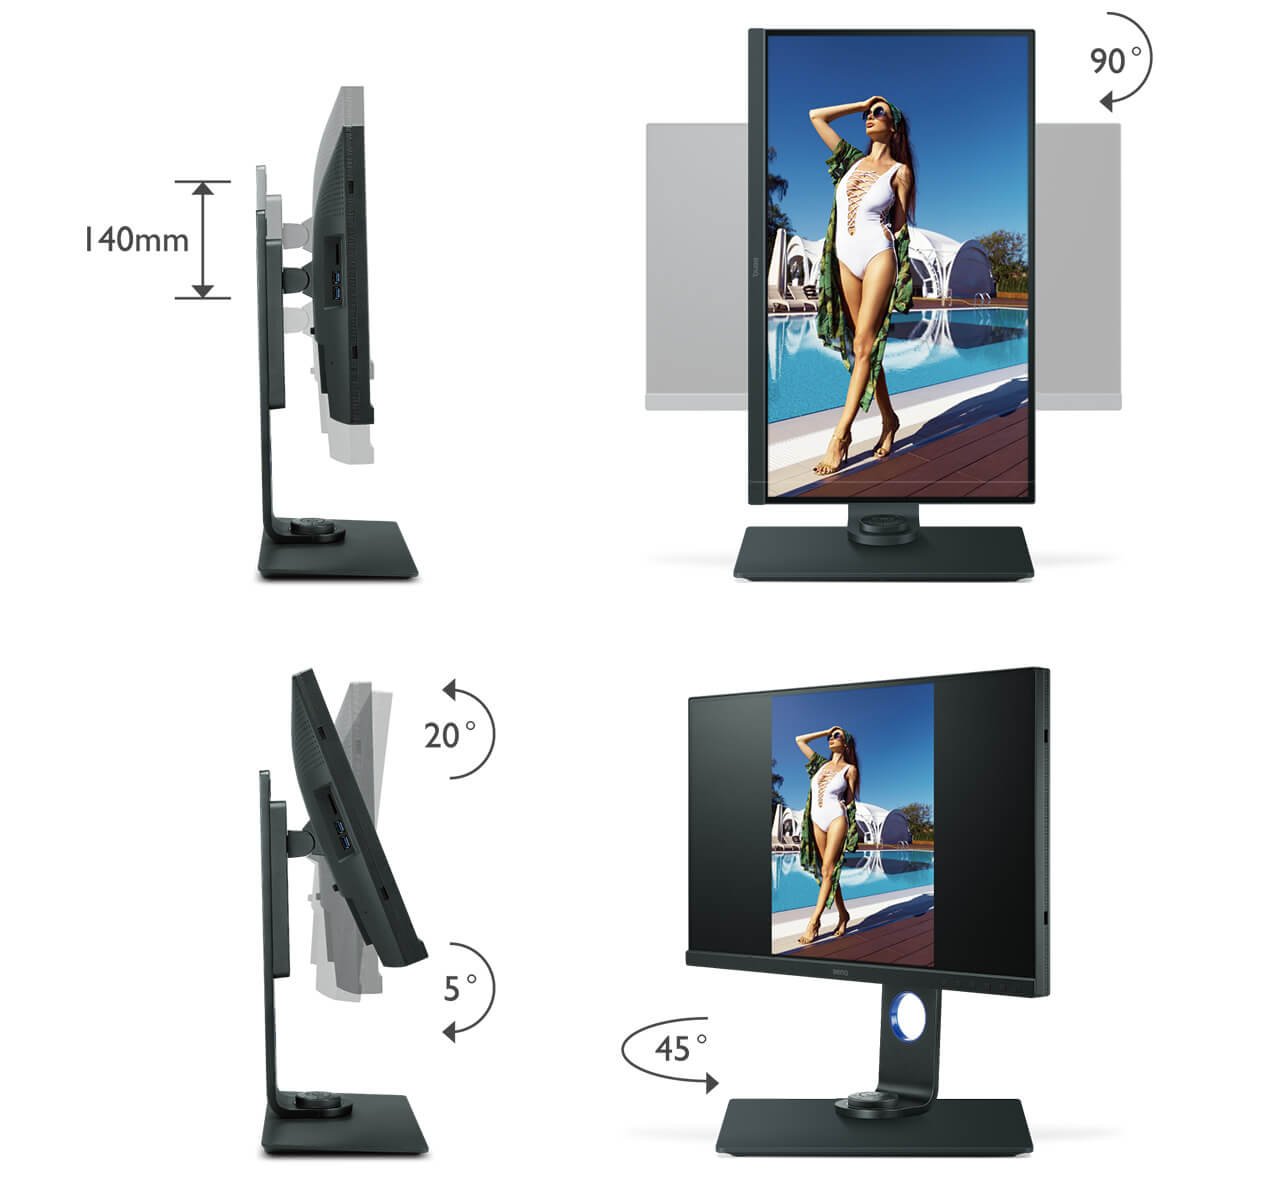
For photographers, who often have to enlarge images to confirm details for editing, a monitor with rapid adjustment to height, swivel and pivot is crucial. For example, when a group of people look at an image on a single monitor at the same time, having a monitor with rapid height and swivel adjustment features help users to adjust the optimal monitor position in the shortest amount of time. A pivot adjustment feature allows photographers to quickly adjust the monitor to a vertical position, which utilizes the whole screen real estate when editing portrait photos.
A monitor with rapid adjustment to height, swivel and pivot, which utilizes the whole screen real estate when editing portrait photos
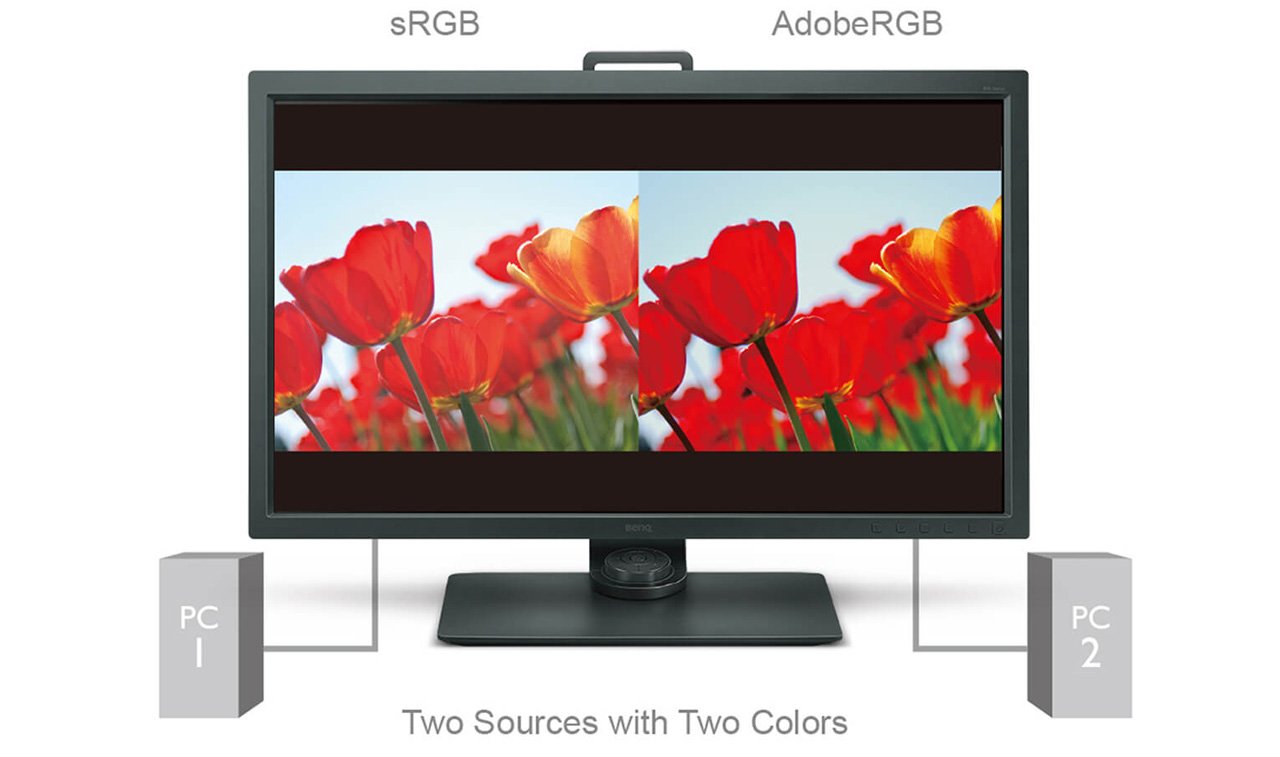
As previously mentioned, AdobeRGB and sRGB are the two most commonly used color gamuts for photographers. Although AdobeRGB is generally the preferred option, sRGB is often used when the retouched image is only being posted online. When you need to process two images taken by different photographers and they are different color gamuts, a monitor capable of switching between different color gamuts will allow users to preview and compare immediately. This will benefit the workflow afterwards.
A monitor made for photographers as it is able to display images in two gamut models.
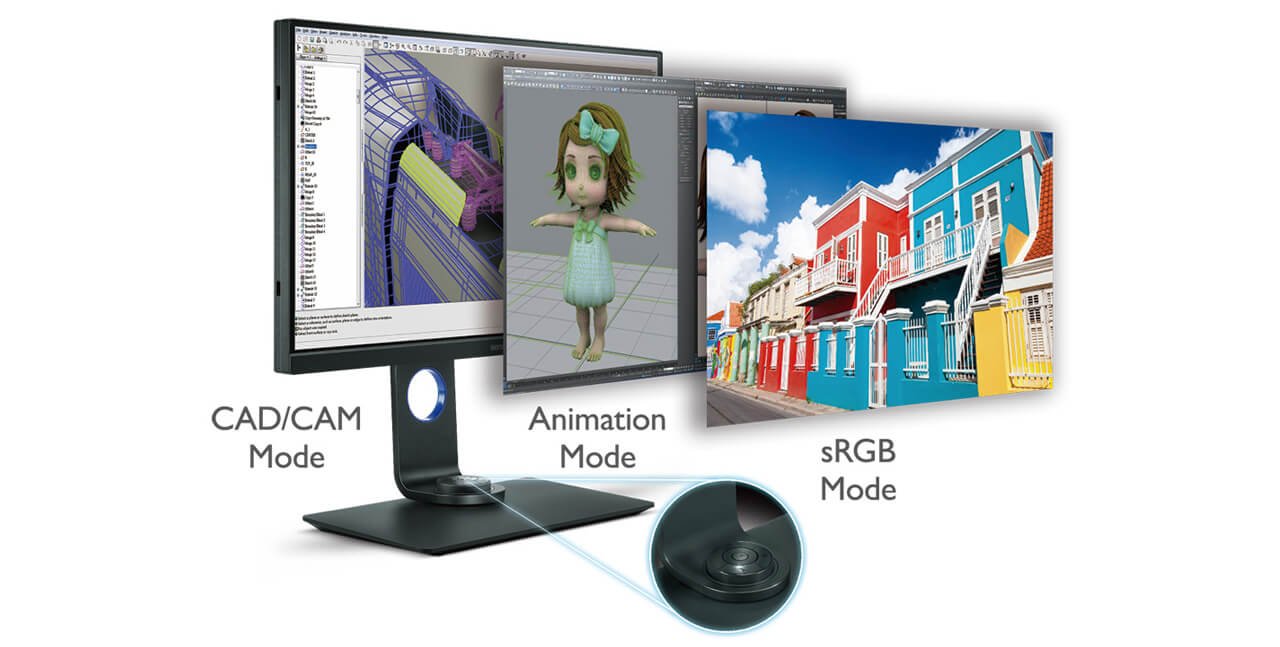
In addition to being equipped with all of the features mentioned previously, an excellent, professional monitor with a hotkey that enables the user to make rapid changes in parameters is a big plus. Time is the photographer’s greatest asset. Therefore, having the means to rapidly adjust monitor settings or switch between modes will definitely boost a photographer’s work efficiency.
The monitor is equipped with a Hotkey Puck to facilitate editing and improve productivity.
The tips mentioned above offer photography enthusiasts and professional photographers advices and some basic understandings of how to select an suitable monitor for their workflow. At this point, it is clear that there are many factors for the consumers to consider when selecting a monitor. As the saying goes, “the devil is in the detail.” Although none of these know-hows are profound and complex, taking time to understand them and upgrading your monitor will double your efficiency at work.
{{productsCount}}Result
{{item}}
{{item.productWordingTag}}
{{currency}}{{item.finalPrice| numberThousandsCommas | numberDecimalPoint}} Save {{currency}}{{item.saveAmount | numberThousandsCommas | numberDecimalPoint}} Save {{item.savePercent | numberThousandsCommas | numberDecimalPoint}}%
new device price {{currency}}{{item.regularPrice| numberThousandsCommas | numberDecimalPoint}}
{{item}}
{{itemTag.title}}
Max 4 products to compare reached.