- Topics
- Release Information
- X-Sign Quick guide
-
X-sign User manual
- Account (4)
- Licence (4)
-
Manager (15)
- Pairing the device with X-Sign Manager
- Creating the channel
- Scheduling the content by channel
- Scheduling the content by device
- Editing the device management structure
- Pushing Real-Time Message to your BenQ Smart Signage remotely
- Controlling the device remotely
- Updating device Player remotely
- Managing the calling system
- Creating an API table in X-Sign Manager
- Setting Verification
- Getting the system notification
- Updating device status immediately New
- Player report (proof-of-play) New
- Using Designer Express New
-
Designer (18)
- Creating a new project file in X-Sign Designer
- Uploading your content from Designer
- Creating content in X-Sign Designer
- Creating content from Designed Templates
- Creating a clock widget in X-Sign Designer
- Setting a weather widget
- Creating an Image or Video slideshow
- Rotating an image or video
- Generating a QR Code
- Adding a data connection
- Setting a timer widget
- Creating an API template using the demo kit
- Creating a TV Input source widget in X-Sign Designer
- Setting background music in X-Sign Designer
- Changing the playing order of pages
- Sealing a file in X-Sign Designer
- Opening an X-Sign 1.x project file
- Changing your language in X-Sign Designer
- Player (6)
- Local Delivery (3)
- Report (2)
- Video Wall (3)
- Interactive (Premium) (6)
- API (Premium) (1)
- GPL/LGPL Software Licenses Used by X-Sign
- X-Sign OpenAPI
X-Sign User Manual
In this section, we'll explain how to manage content in X-Sign, control the player, and set up playlists.
X-sign 2.0 / X-sign User manual / Manager
Scheduling the content by channel
2020 / 08 / 21
With X-Sign Manager, you can easily play the same content on multiple devices remotely. You can also play different content whenever you want. Click here to watch the demonstration video.
1. Be sure that the device’s license in the channel hasn’t expired yet.
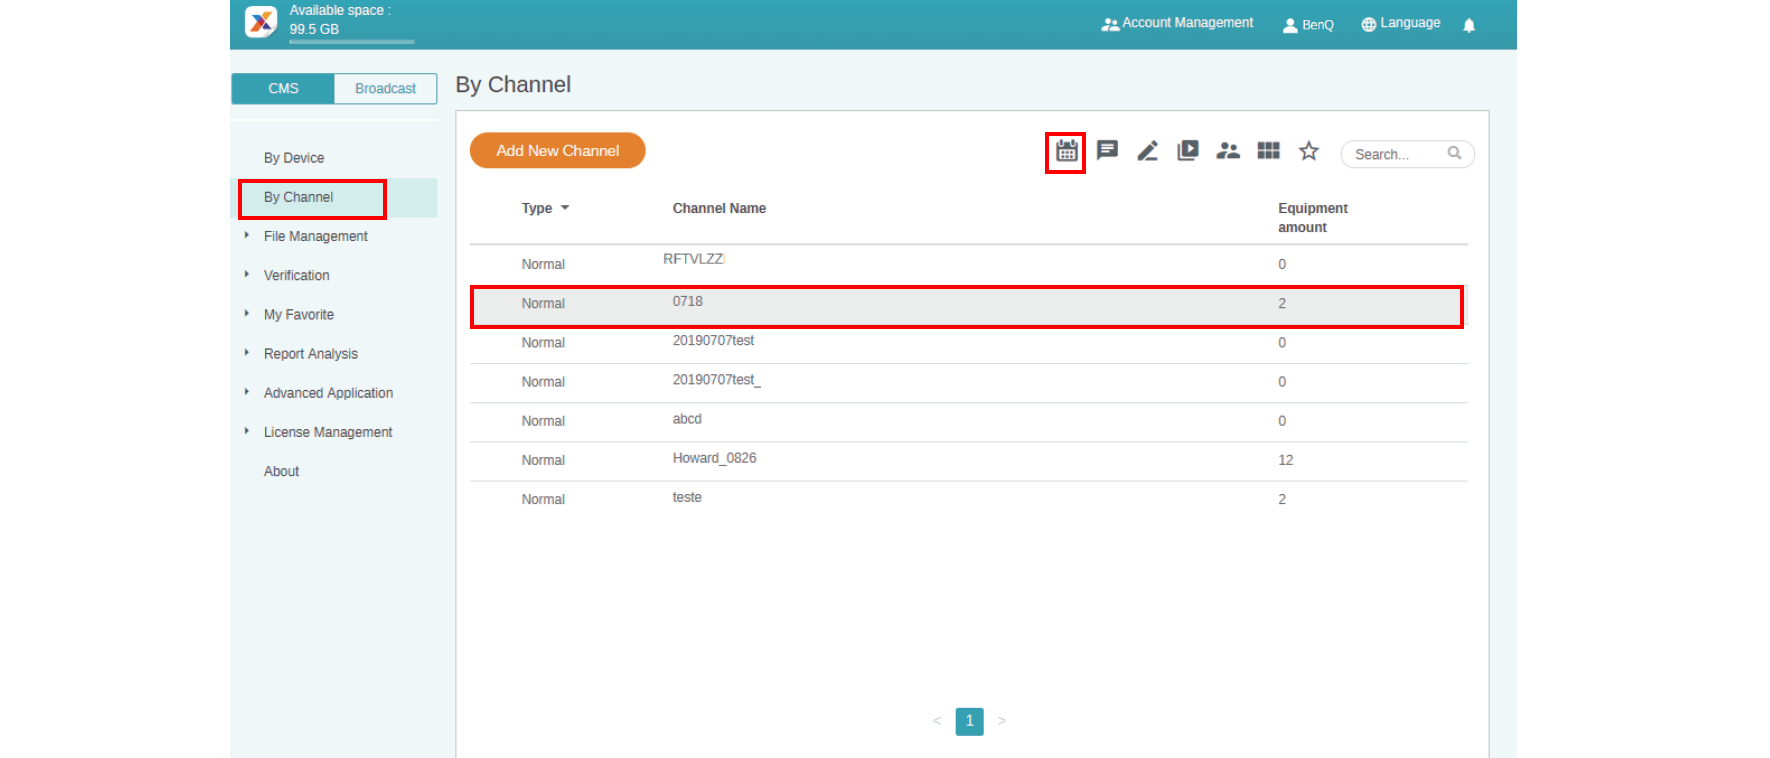
2. Go to By Channel, then choose the channel you want to play the content.
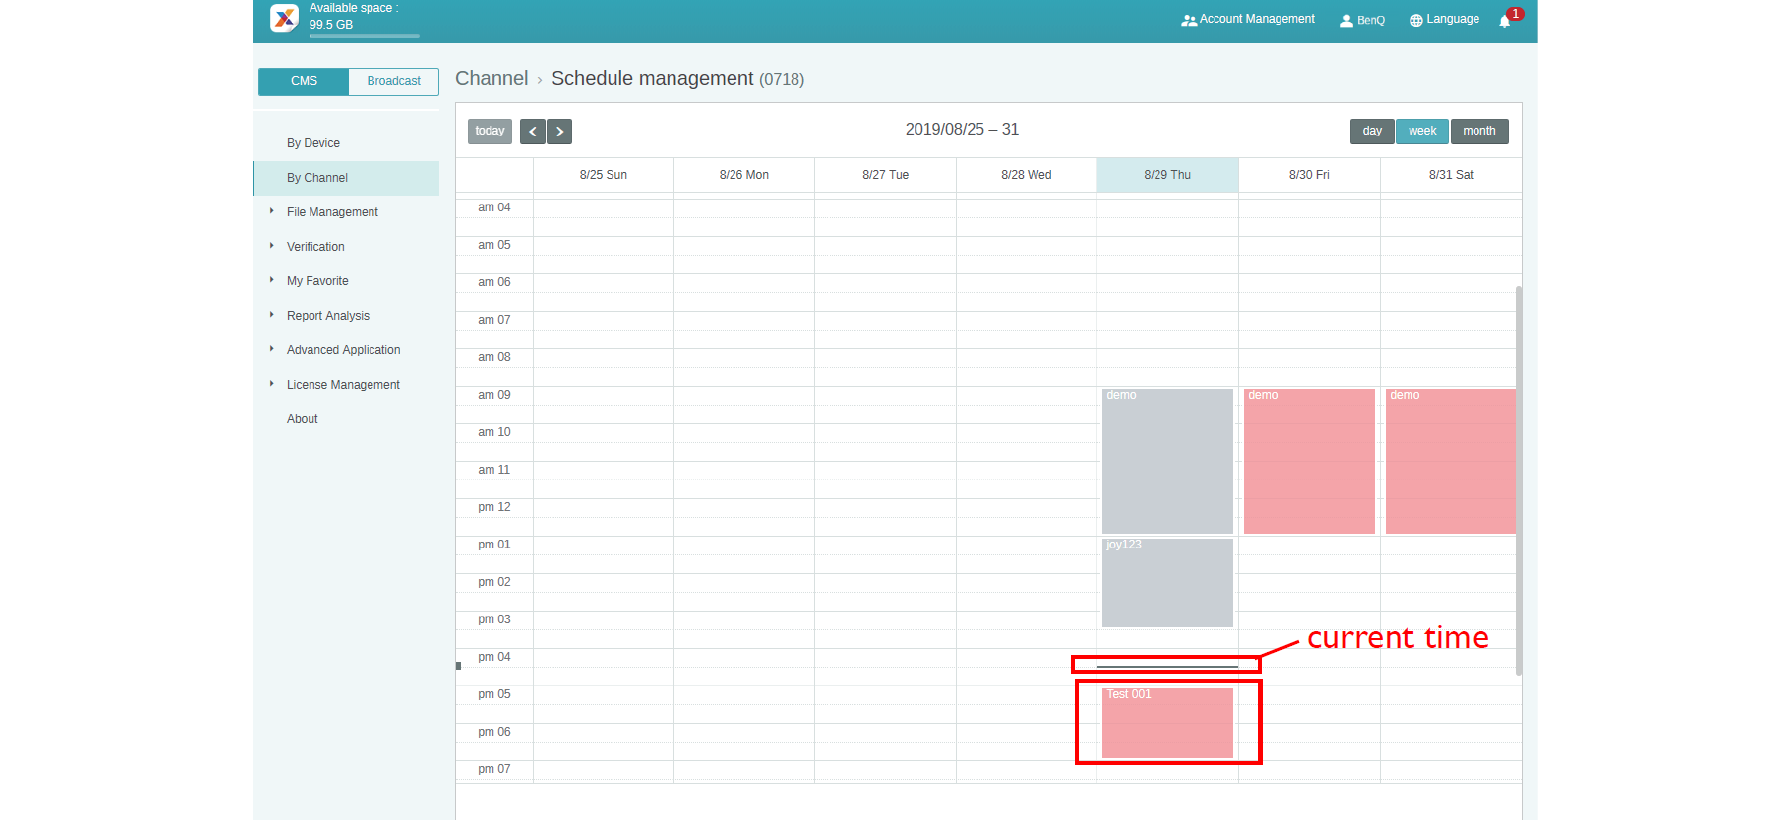
3. Click the icon and you will see the schedule management page of Channel. Click the time slice you want to set schedule.
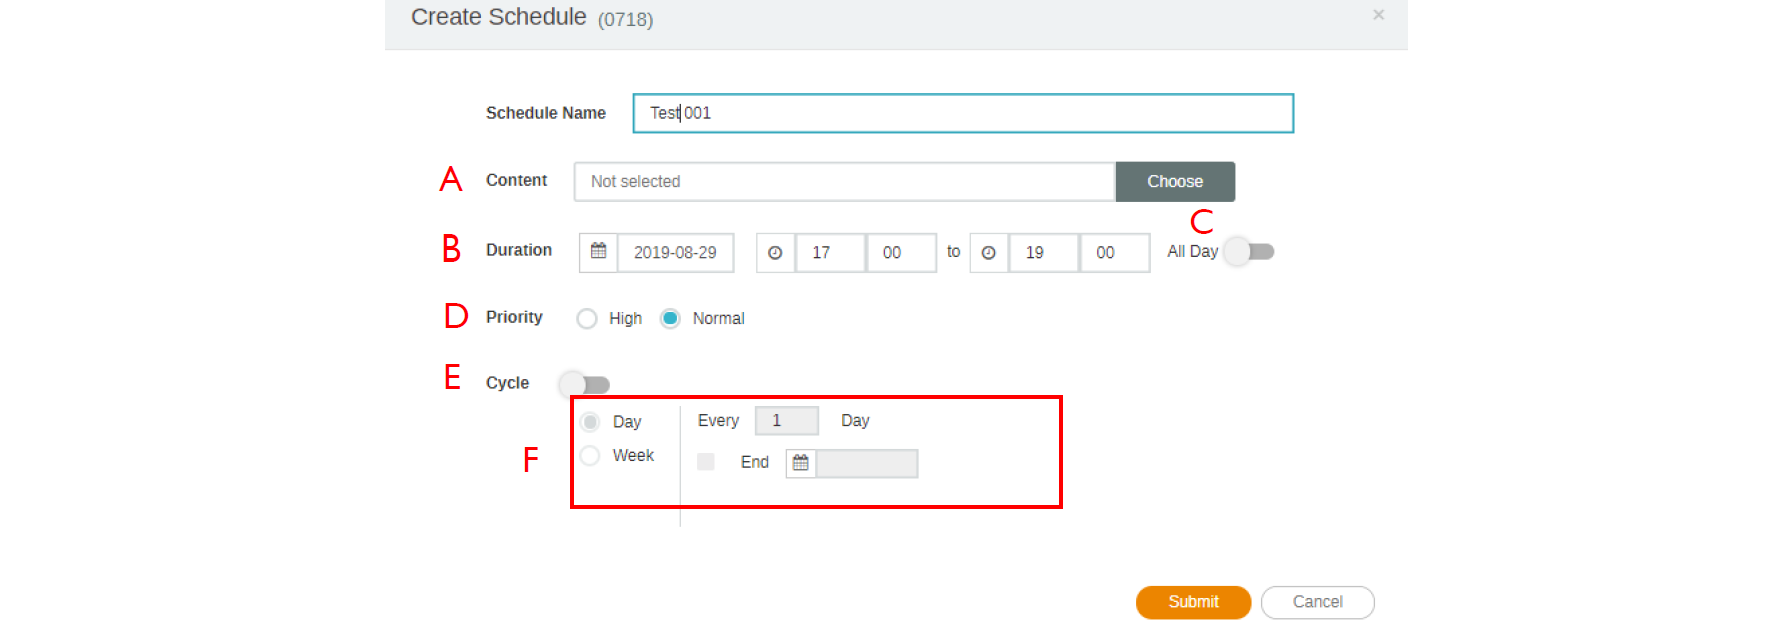
4. You will see the schedule setup window. Below is some required information.
A. Select the project you want to play on the channel. Be sure to upload your project file to Manager first.
B. Set the schedule time you want to play the content.
C. Enable to play content all day long.
D. Select the priority of the project. If it is urgent, select High for interruption scheduling. High priority schedule can overwrite Normal priority schedule by overlapping time blocks.
E. Enable to play content periodically.
F. You can set time here. You have to set the end date and choose to repeat by day or week.
5. After all configuration is set, click Submit.
6. You will see the schedule on the management page.