How can I change my BenQ cookie settings?
Some essential features on BenQ sites just won’t work without cookies. And having other cookies switched off can seriously affect the way you’ll be able to enjoy our services.
Please check your cookie settings below and turn on any cookies you’re happy with.
“Strictly necessary” cookies can’t be turned off. But Functional and Performance cookies can be turned on or off below. You can learn more about cookies and what they do on our other pages.
If you've chosen to block third-party cookies on your browser, your cookie preferences won't carry over from benq.eu to benq.xx and vice versa. Please make sure to set your cookie preferences in both places.
-
On
Strictly necessary cookies
These cookies are essential so that you can move around the website and use its features. Without these cookies services you have asked for cannot be provided.
-
On
Off
Functional cookies
These cookies allow the website to remember choices you make to give you better functionality and personal features.
-
On
Off
Performance cookies
These cookies help to improve the performance of BenQ. If you want to opt-out of advertising cookies, you have to turn-off performance cookies.
BenQ Europe respect your data privacy. We use cookies and similar technologies to ensure you get the best experience when visiting our website. You can either accept these cookies by clicking “Accept Cookies”, or click “Only Required Cookies” to refuse all non-essential technologies. You can customise your cookie settings here at any time. For further information, please visit our Cookie Policy and our Privacy Policy.
Search history
Clear

- Topics
- Release Information
- X-Sign Quick guide
-
X-sign User manual
- Account (4)
- Licence (4)
-
Manager (15)
- Pairing the device with X-Sign Manager
- Creating the channel
- Scheduling the content by channel
- Scheduling the content by device
- Editing the device management structure
- Pushing Real-Time Message to your BenQ Smart Signage remotely
- Controlling the device remotely
- Updating device Player remotely
- Managing the calling system
- Creating an API table in X-Sign Manager
- Setting Verification
- Getting the system notification
- Updating device status immediately New
- Player report (proof-of-play) New
- Using Designer Express New
-
Designer (18)
- Creating a new project file in X-Sign Designer
- Uploading your content from Designer
- Creating content in X-Sign Designer
- Creating content from Designed Templates
- Creating a clock widget in X-Sign Designer
- Setting a weather widget
- Creating an Image or Video slideshow
- Rotating an image or video
- Generating a QR Code
- Adding a data connection
- Setting a timer widget
- Creating an API template using the demo kit
- Creating a TV Input source widget in X-Sign Designer
- Setting background music in X-Sign Designer
- Changing the playing order of pages
- Sealing a file in X-Sign Designer
- Opening an X-Sign 1.x project file
- Changing your language in X-Sign Designer
- Player (6)
- Local Delivery (3)
- Report (2)
- Video Wall (3)
- Interactive (Premium) (6)
- API (Premium) (1)
- GPL/LGPL Software Licenses Used by X-Sign
- X-Sign OpenAPI
X-Sign User Manual
In this section, we'll explain how to manage content in X-Sign, control the player, and set up playlists.
X-sign 2.0 / X-sign User manual / Manager
Setting Verification
2020 / 08 / 24
Verification in X-Sign Manager functions to control content and schedules to be played on X-Sign Player. Click here to watch the demonstration video.
Files
Before a file is delivered publicly, it has to be checked by the administrator. Only when the administrator clicks Approve can the file be added to the schedule.
To verify a file:
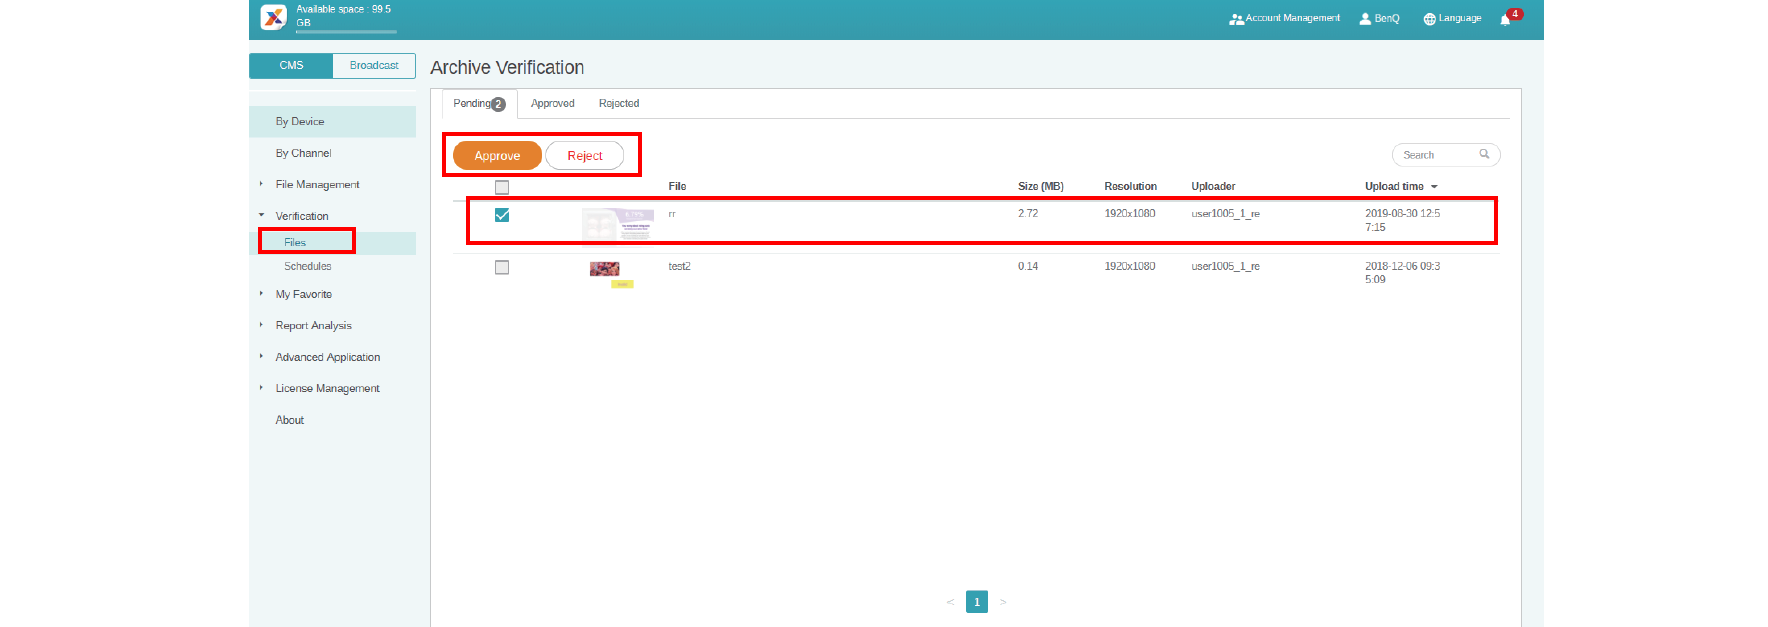
1. Go to Verification > Files to check the files uploaded via X-Sign Designer.
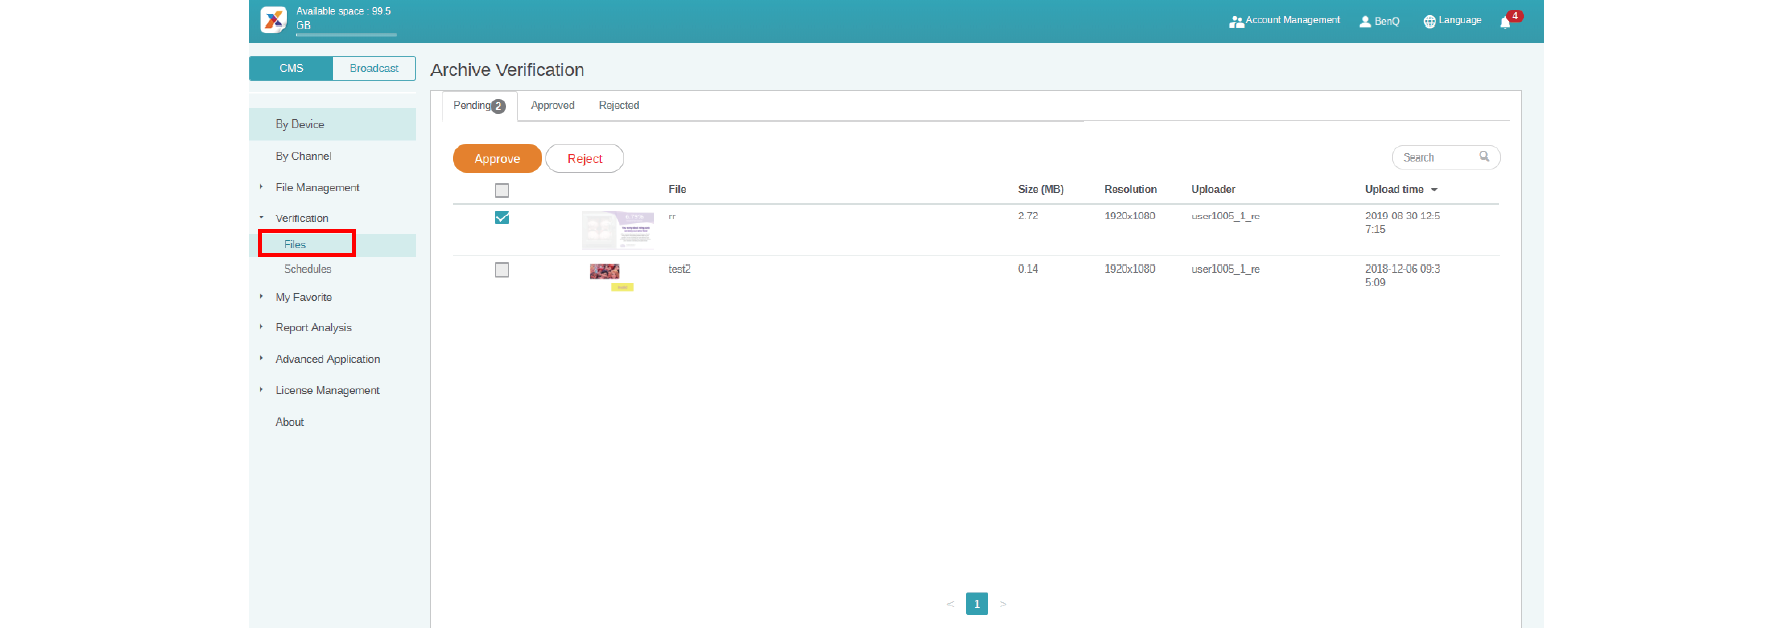
2. Select the file to be approved or rejected, then click Approve or Reject.
3. You need to fill in the reason you reject the file to be added to the schedule. This is a required field. Click Submit to proceed.

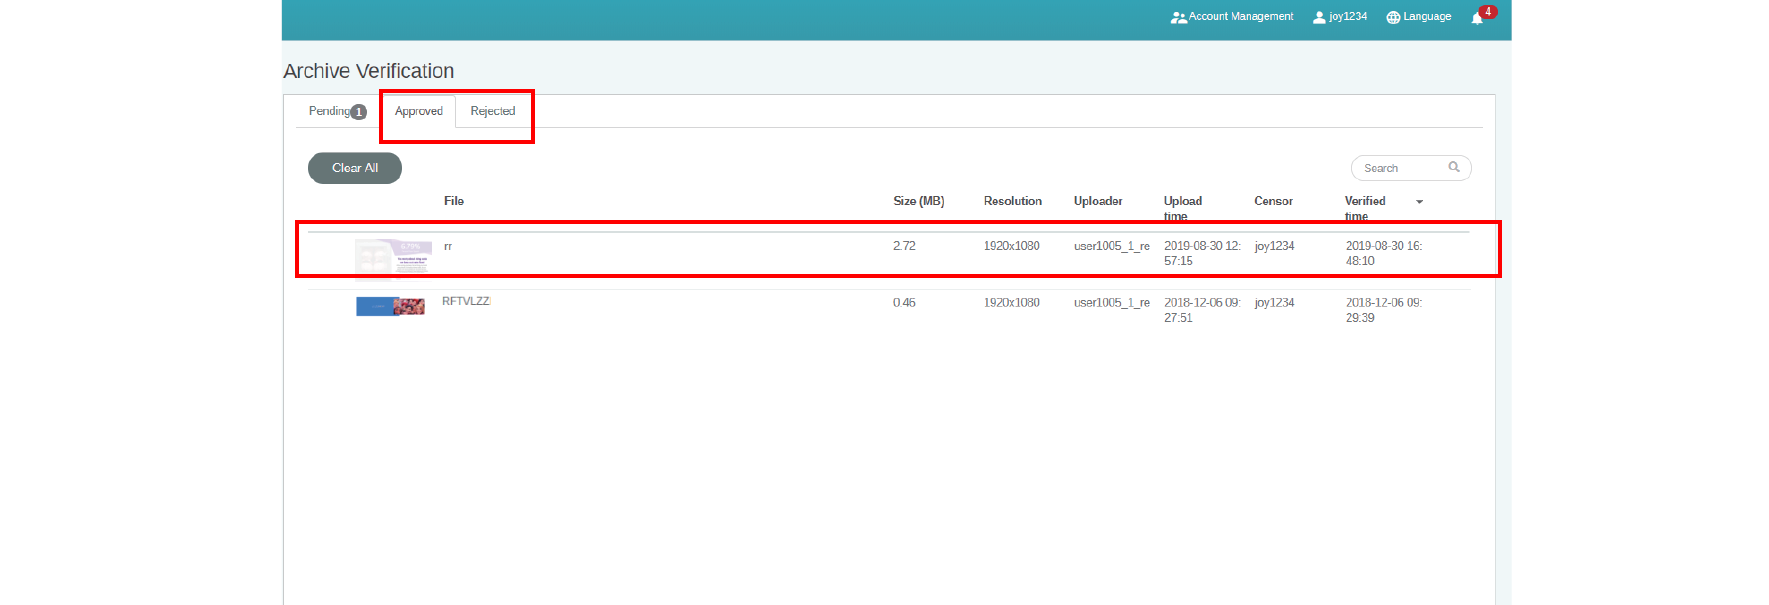
4. The file now is under the approved (or rejected) section.
Schedules
After a scheduled time is set, it has to be checked by the administrator. If the scheduled time is not appropriate, the administrator can reject the schedule. Only when the administrator clicks Approve can the file be played at the scheduled time on X-Sign Player.
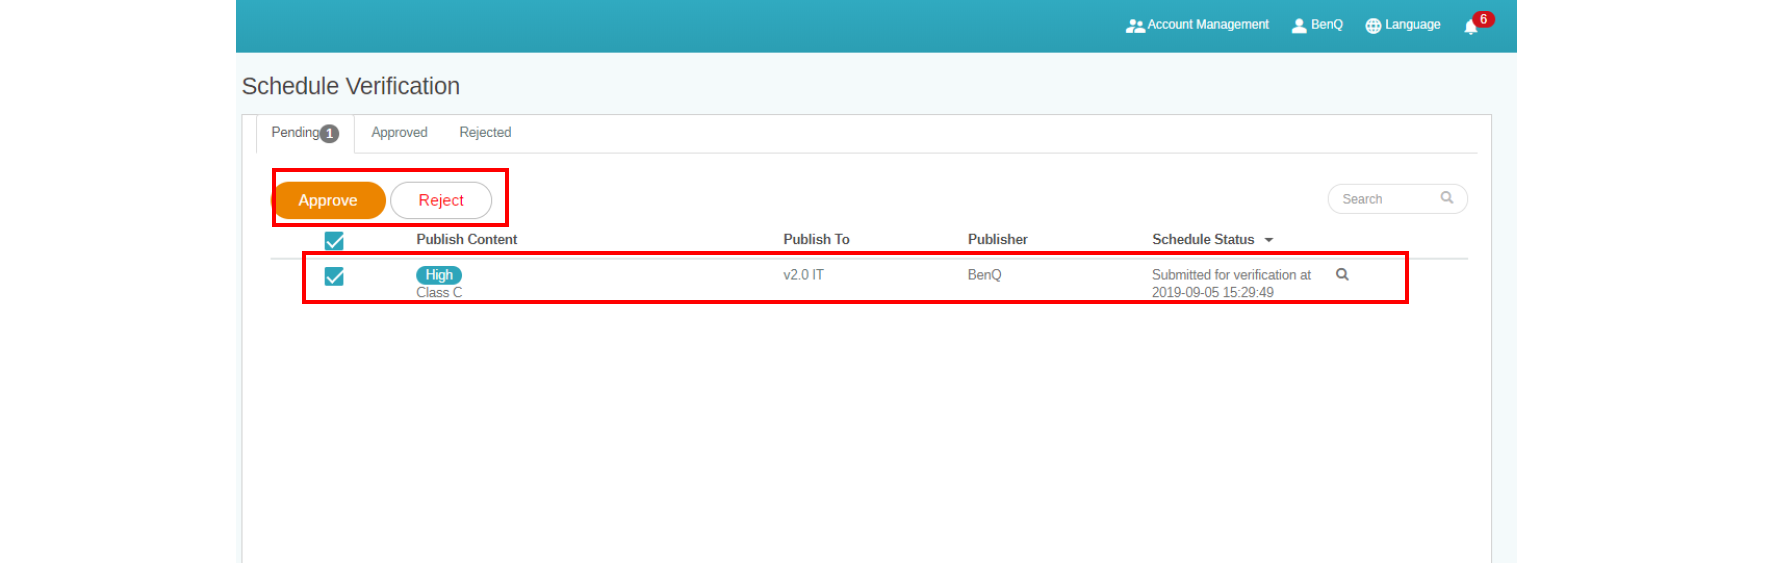
To verify a schedule:
1. Go to Verification > Schedules to check the schedule(s).
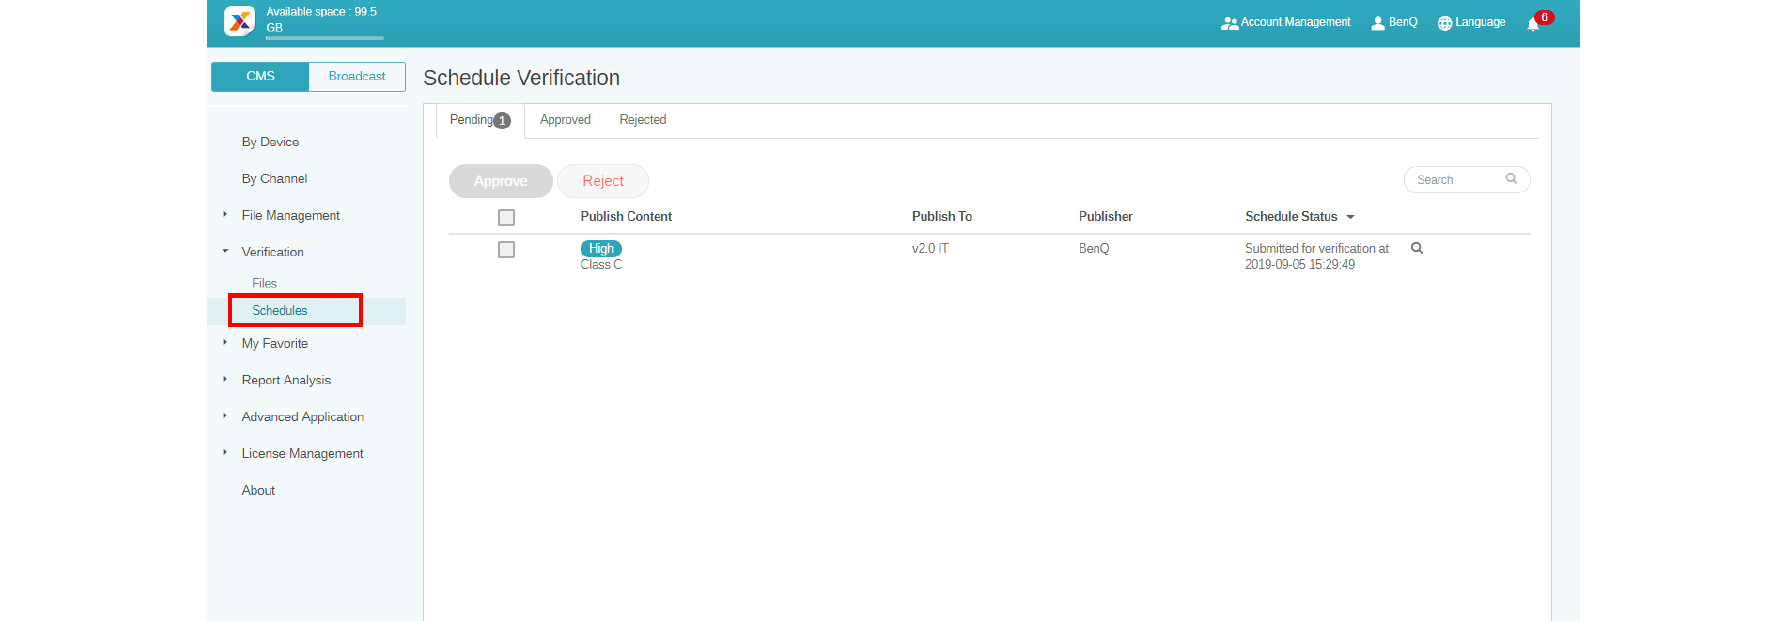
2. Select the schedule to be approved or rejected, then click Approve or Reject.
3. You need to fill in the reason you reject the scheduled time. This is a required field. Click Submit to proceed.

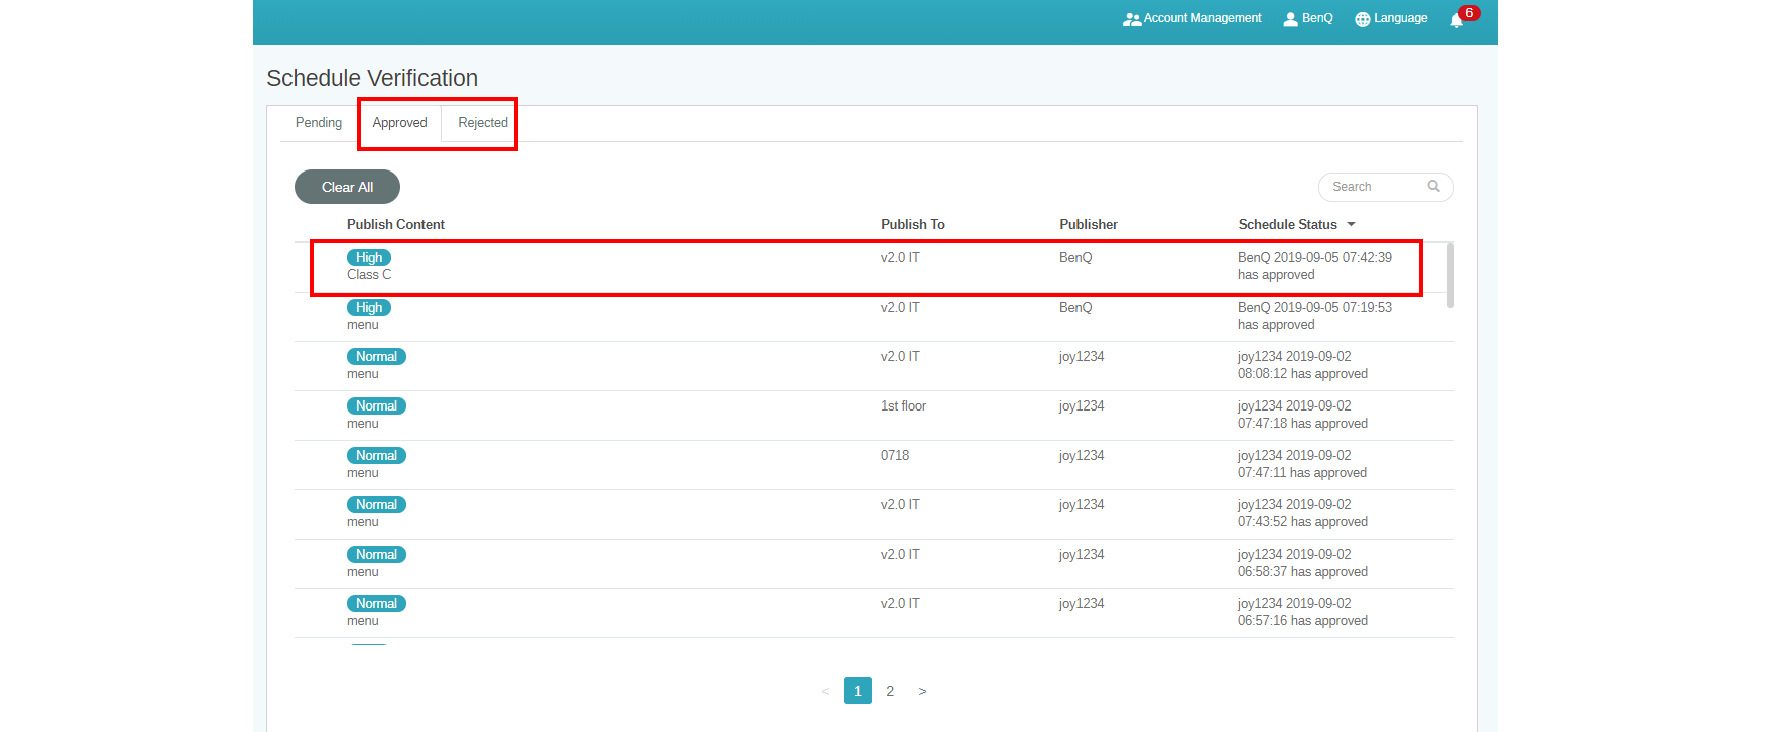
4. The file now is under the approved (or rejected) section.
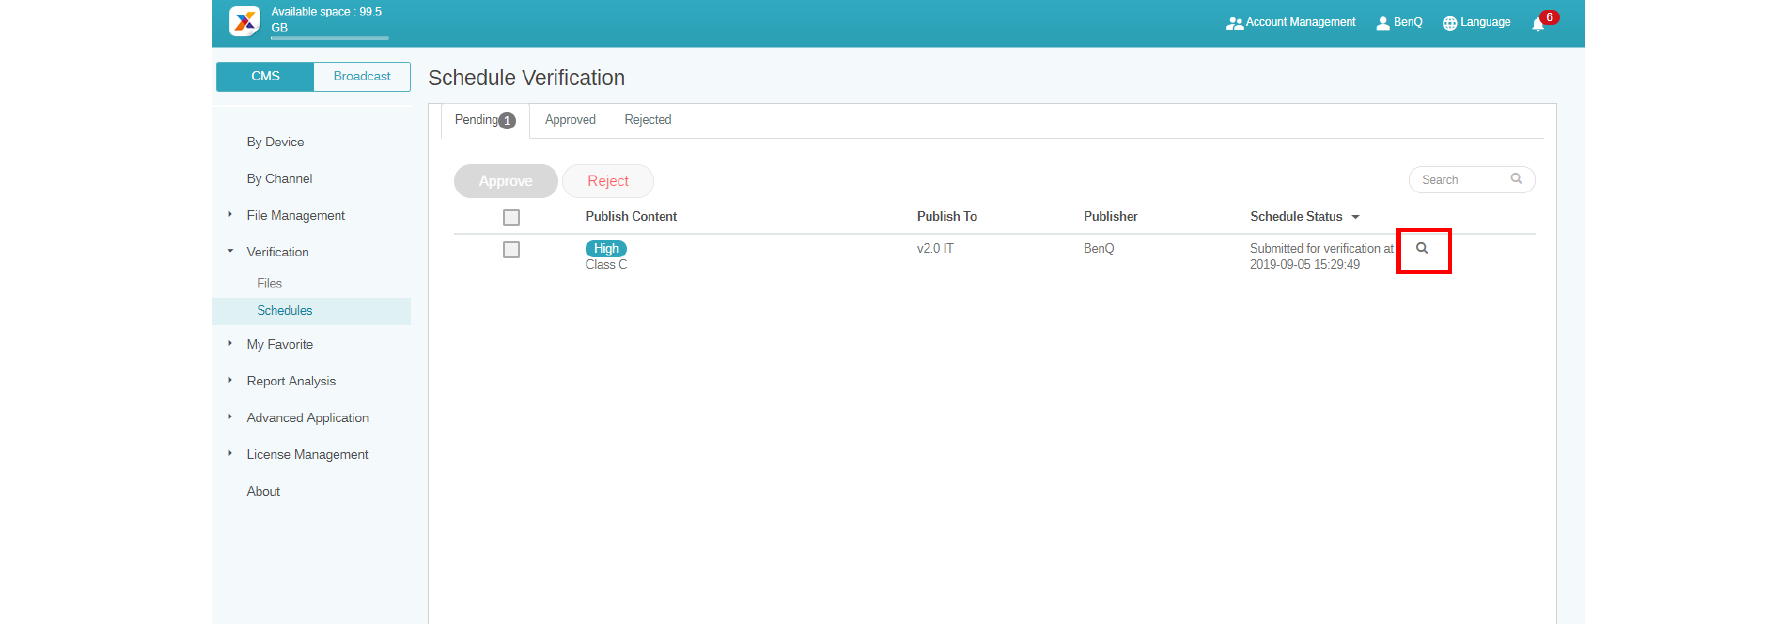
5. You can click the icon to preview the file uploaded from X-Sign Designer.
6. You can view the file on X-Sign Player and edit schedule. Click Approve and Publish or Reject to proceed.

Find Your BenQ
BenQ Europe B.V.
Meerenakkerweg 1-17, 5652 AR Eindhoven, The Netherlands
Tel: +31-88-888-9200
Fax: +31-88-888-9299
Copyright © 2024 BenQ. All rights reserved.
TOP