{{item.name}}
Price: {{currency}}{{item.price| numberThousandsCommas | numberDecimalPoint}}
Qty: {{item.amount}}
Remote Work & Learning
Projector
Monitor
Lighting
Interactive Display | Signage
Remote Work & Learning
Store

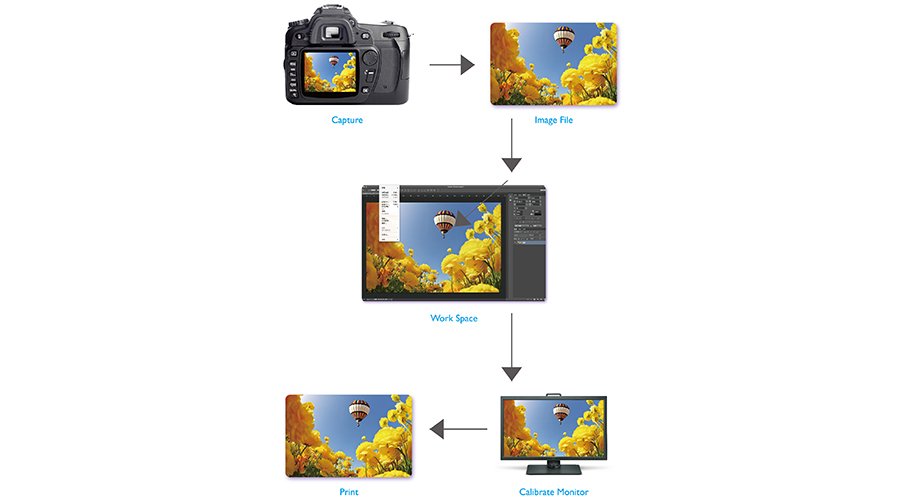
Soft Proofing in Photoshop So now that we’ve gone through the Soft Proofing process using Lightroom, here’s a quick look at how we can do the same using Photoshop.
Step 1 :
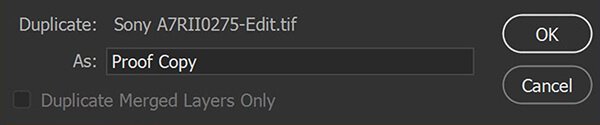
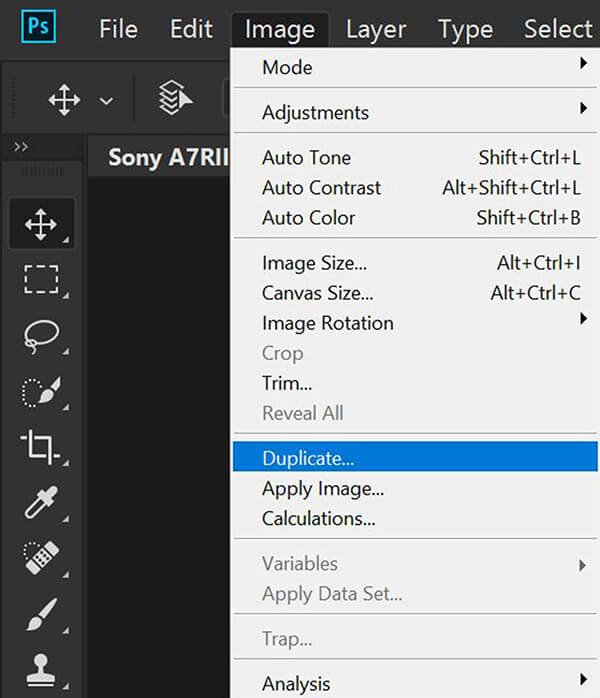
With a picture open in Photoshop that you’ve already retouched and now want to send off to be printed go to IMAGE > DUPLICATE and in the dialog box, give this duplicate copy a name; something like PROOF COPY so you know which is the Soft Proofing version you’ll be working on.
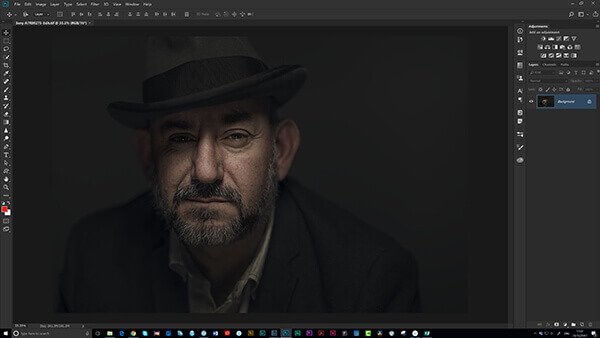
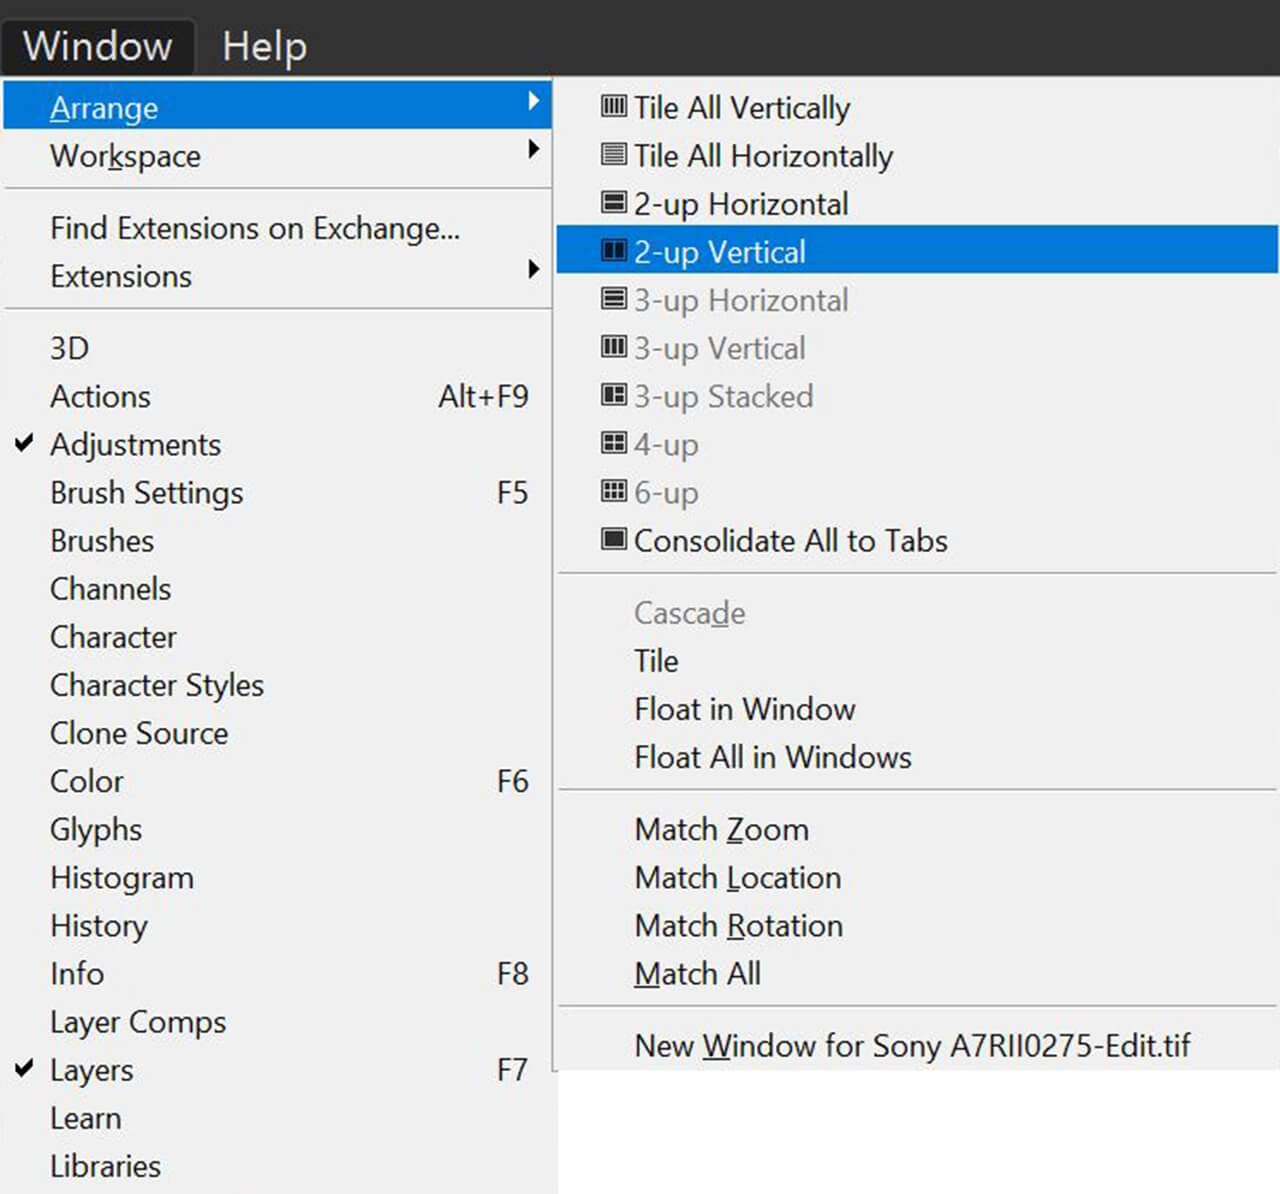
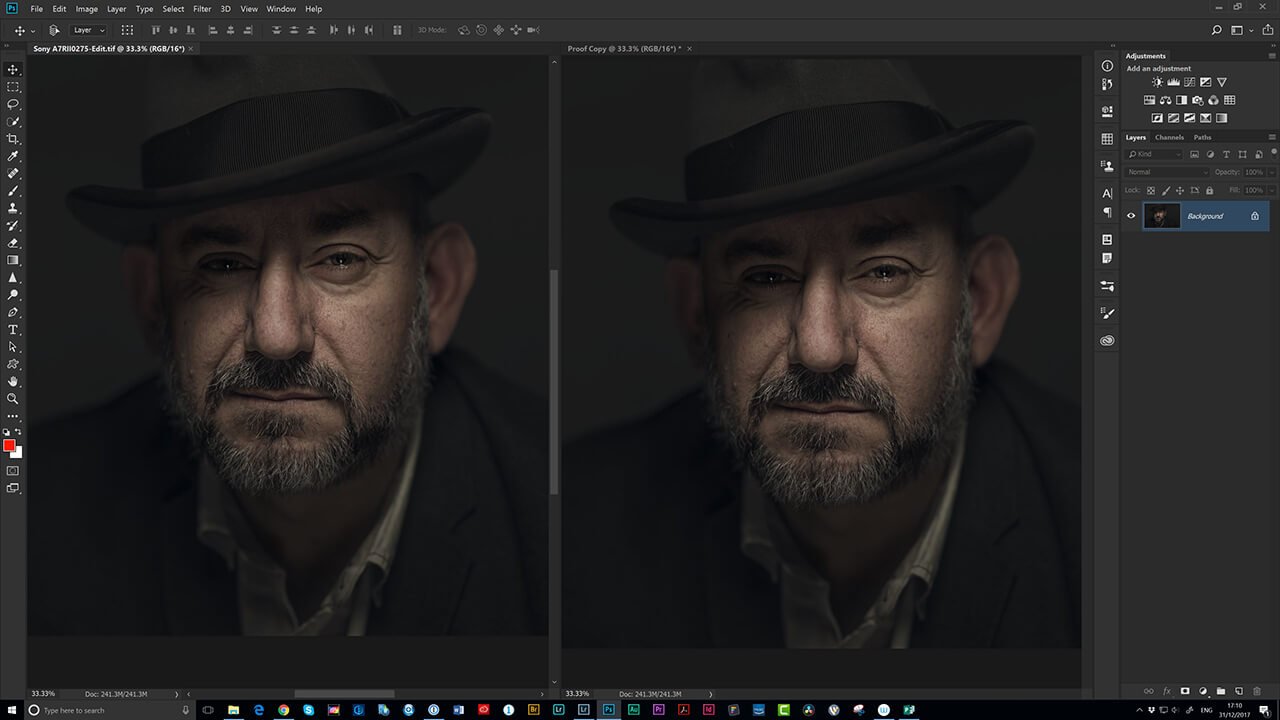
Having done this we now want to set the screen up so that we have the Original Image on the left and the Proof Copy on the right; just like we did in Lightroom. To do this click on the tab of the Original Image then go to WINDOW > ARRANGE > 2 UP VERTICAL (figure 13).
So now we have Original on the Left and the Proof Copy on the Right (figure 14)
Step 2:
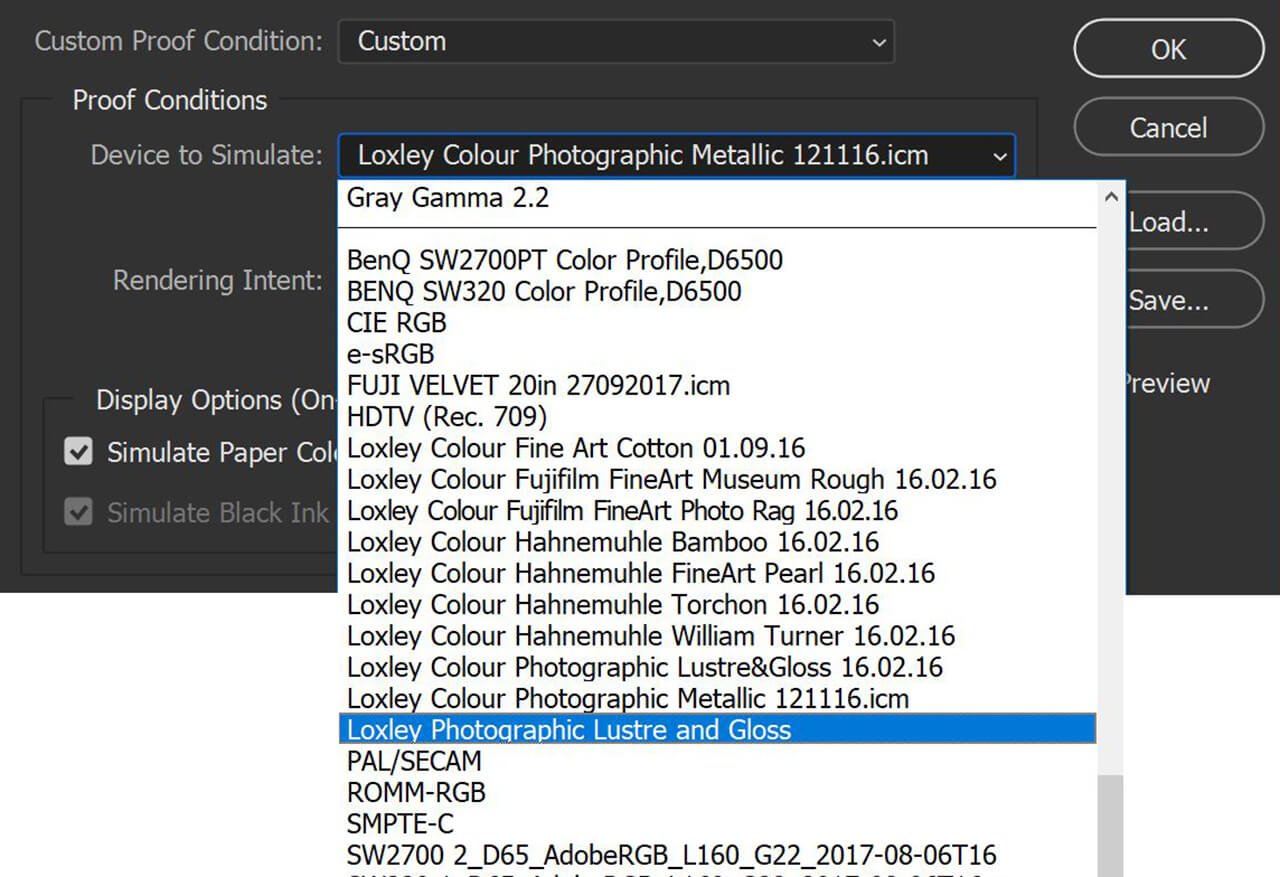
Now go to VIEW > PROOF SET UP > CUSTOM (figure 15)
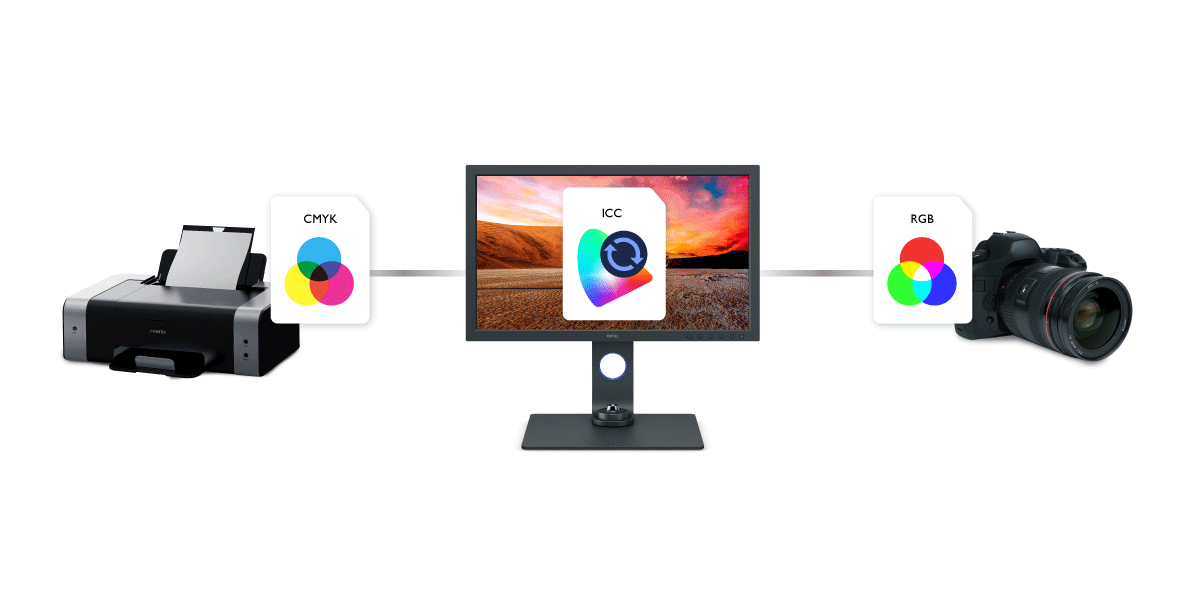
This is where you’ll see all the ICC Profiles listed that you have installed plus a bunch of other profiles such as profiles created when you calibrated your monitor etc… All we need to do now is simply choose the relevant ICC Profile for the paper / medium we’ll be wanting our image file printed on and the process is exactly the same as that I ex-plained earlier for Lightroom; only this time you can use all the functions in Photoshop to make the Proof Copy on the right match the Original Image (Before) on the left.
Once you’ve done that simply save it and then upload to your preferred printing Lab.
So that’s pretty much Soft Proofing in a nutshell and the process (in Lightroom) that I go through and is consistently giving me results I’m incredibly happy with.
When I covered this process during a LIVE Broadcast over on my YouTube Channel I did get quite a few questions posted in the chat room so I thought I’d include the most common ones and the answers I gave here:
Question 1: Do you add any extra sharpening into your workflow?
If you’ve seen any of my retouching videos you’ll see that I do add sharpening selectively across the image to draw the viewers’ eye and to give added depth and dimension. However I do also add extra sharpening to entire image when I export from Lightroom before sending off to be printed. Lightroom offers 3 additional sharpening processes on Export; Low, Standard and High. Which one I use depends on the medium the picture is being printed on but as a rule: Canvas would be High, Regular Lustre Paper would be Medium and Metallic / Alumini would be Low.
Question 2: Do you export images into sRGB before sending to the Lab?
In a word, No. The printers I use is Loxley Colour and they can print in Adobe RGB. So, as I shoot in Adobe RGB and edit in Lightroom and Photoshop in Adobe RGB, I keep to the same for printing. For me it makes sense to keep everything consistent when it comes to colour and printing.
Question 3: There’s an option for free Colour Correction when I’m ordering prints from the Lab. Should I use this too?
Absolutely 100% … NO! If you’ve calibrated your monitor and gone through the Soft Proofing definitely do not choose colour correction by the Lab too. You’ve done everything you can to guarantee great prints; choosing this is then going to throw a curve ball into the mix and mess things up.
Question 4: Is there a Safe / General ICC Profile to use if my client is going to get them printed themselves?
Again, in a word, No. ICC profiles are produced by manufacturers for particular paper and printer combinations and also provided by the majority of Labs for the paper they use. In my opinion if you don’t know what they’re going to use I wouldn’t apply any ICC Profile.
Question 5: I’ve installed an ICC Profile but the option to Simulate Paper and Ink is greyed out. Why is this?
Not all ICC Profiles are created equal and by that I mean that not all ICC profiles have the Simulate Paper and Ink functionality built into them.
Question 6: If you’re sending off lots of image files to the Lab to be printed on a variety of mediums, how do Loxley know?
This is all down to how I name the files before I send them off. For example a filename would be made up like this: name_size_profile/paper which would look something like this: brian_24x16_LoxleyColour-Alumini
Bearing in mind that Loxley Colour only receives the file I want to have printed, so labelling like this just helps to remind me the size of template and the paper / medium to choose.
{{productsCount}}Result
{{item}}
{{item.productWordingTag}}
{{currency}}{{item.finalPrice| numberThousandsCommas | numberDecimalPoint}} Save {{currency}}{{item.saveAmount | numberThousandsCommas | numberDecimalPoint}} Save {{item.savePercent | numberThousandsCommas | numberDecimalPoint}}%
new device price {{currency}}{{item.regularPrice| numberThousandsCommas | numberDecimalPoint}}
{{item}}
{{itemTag.title}}
Max 4 products to compare reached.