{{item.name}}
Price: {{currency}}{{item.price| numberThousandsCommas | numberDecimalPoint}}
Qty: {{item.amount}}
Remote Work & Learning
Projector
Monitor
Lighting
Interactive Display | Signage
Remote Work & Learning
Store

Figure 01: On location, Yosemite National Park, USA.
This is my third post in a series of tutorials, essays, and videos that aim to mystify Colour Management. The first article gave a general overview of the topic, and the second dealt with the mundane topic of Color Settings in Photoshop. As ever I will stick to the essentials in hoping to be clear and concise.
Colour Management is the art and science of predictably translating environmental colours through digital input devices into reliable, high-fidelity, output. An essential part of the colour workflow is your monitor. Not only should it be fit for purpose, you will need to tune it up. Monitors need to be calibrated and profiled to give predicable results. Calibration is setting devices to an appropriate set of values. Profiling is a record of the colours available in a device whether that is your camera, printer, or monitor. Using profiles aids the translation of colour from one device to another.
Colour Management helps make colour translations predictable, because there is really no such thing as totally accurate colour matching system. The tonal range of monitors vary depending on the type of monitor used, and the tones and colour of a print are dependent on the printer and paper used.
The emphasis here is part 2, tuning a colour critical monitor so that it give the best window on your work possible. I will be hardware calibrating a BenQ SW320 using a X-rite i1 Display Pro /Calibrite ColorChecker Display Pro.
Please take heed of the following: ‘Make your monitor look like a print. Do not try to make a print look like your monitor.’
A factory–fresh monitor will probably be set with a high contrast ratio. Meaning the tonal range of a display would be vast, with the brightest whites looking very bright. Our aim is to make the brightest white of your monitor mimic the whiteness of generic paper. Using a monitor that can be hardware calibrated means that white and black can be set accurately, furthermore all the greys in-between can be mapped properly. Tone comes before colour, so one the tone range is set, the colours can be tuned-up.
Before launching the BenQ Palette Master Element software I make sure my SW320 has been up and running for several minutes before I connect it to my computer using a USB cable, and that my calibrator is plugged into my display; extra guidance on how to connect can be found in your monitor’s instructions. I tilt my monitor backwards so that my calibrator will sit firmly on the surface of the screen.
One final step before launching the Palette Master Element software is to make sure any energy and screen savers are disabled. You do not want your monitor to dim or screen savers to engage during the calibration process.
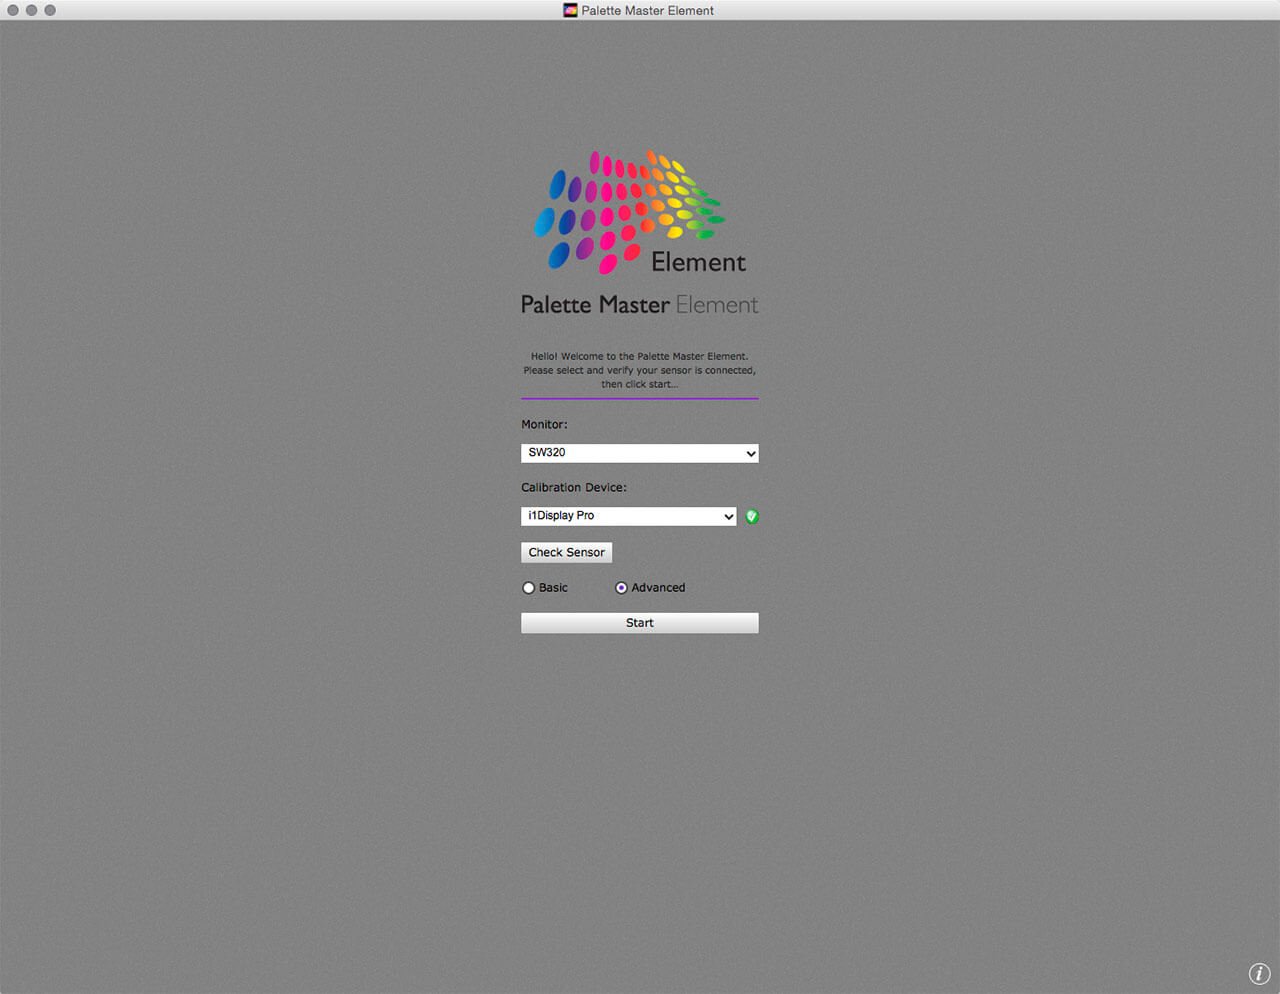
Figure 02: The launch screen for the Palette Master Element software. I recommend using the Advanced option.
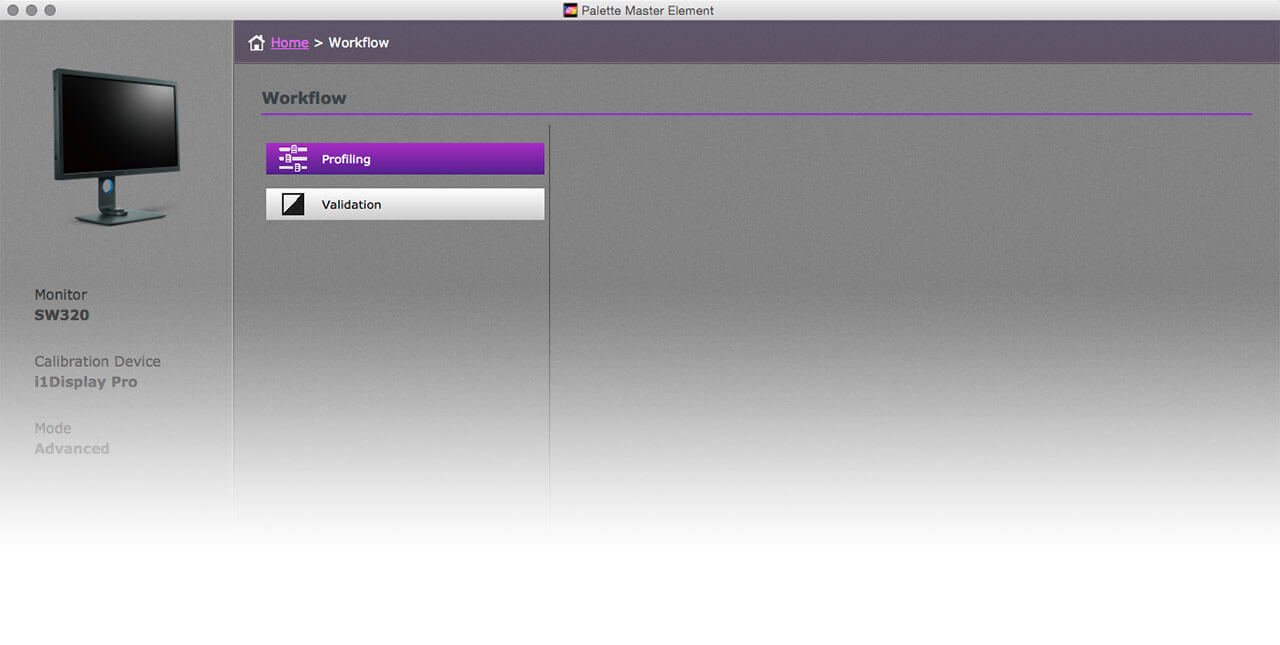
Figure 03: The second Palette Master Element window lets you select either a Profiling or Validation Workflow, choose Profiling, then click Next.
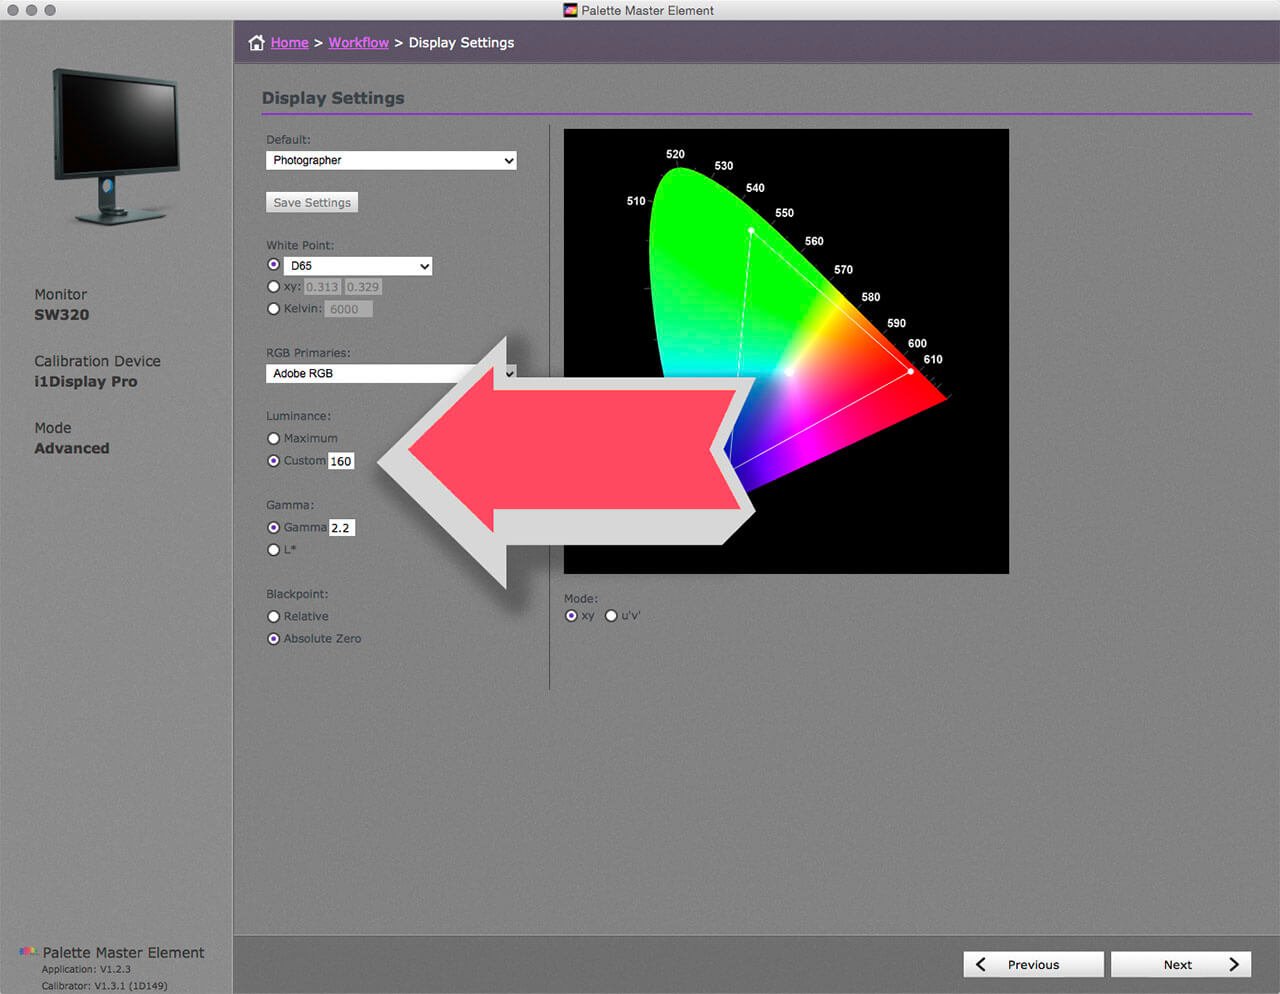
Figure 04: The Display Settings window has three Default options; Photographer, Web Design, and Graphics. As much of my work is photography I select Photographer. However the Luminance default is 160 cd/m2, which I find too high; I prefer 120 cd/m2.
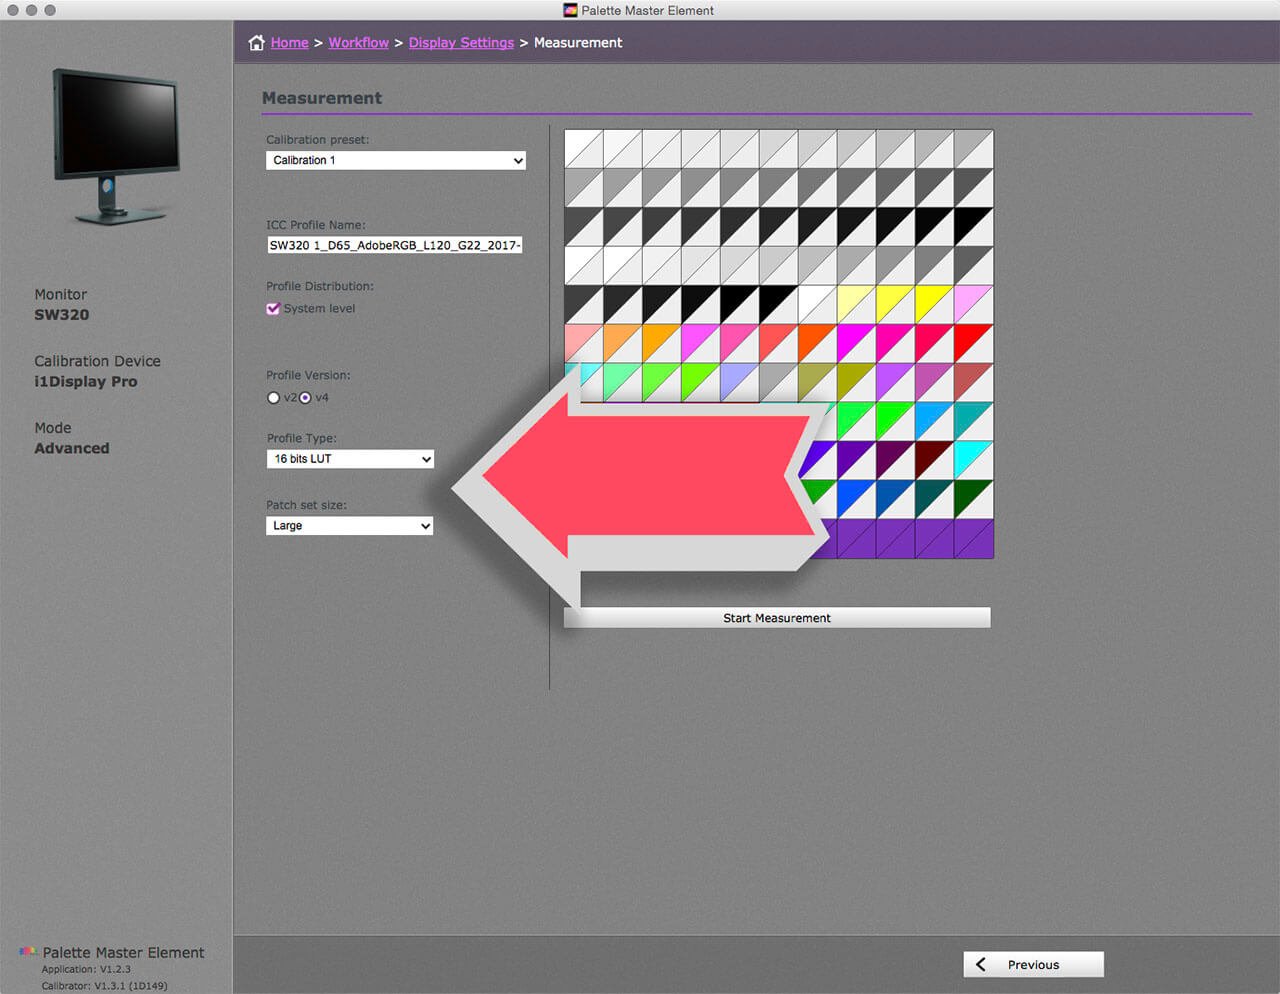
Figure 05: The next screen let you set which calibration you wish to use; you can set up to two. Leave this on Calibration 1 as your default. I check the Profile Distribution so that the profile is available system wide, rather than just in my User account this makes it available to all my colour aware applications. I leave the Profile Version set to v4. For Profile Type, I have added an arrow to help you locate it, using 16 bits LUT should return a better result than the default Matrix option. Finally for this window having the Patch set size to Large works best for me. Now click Start Measurement.
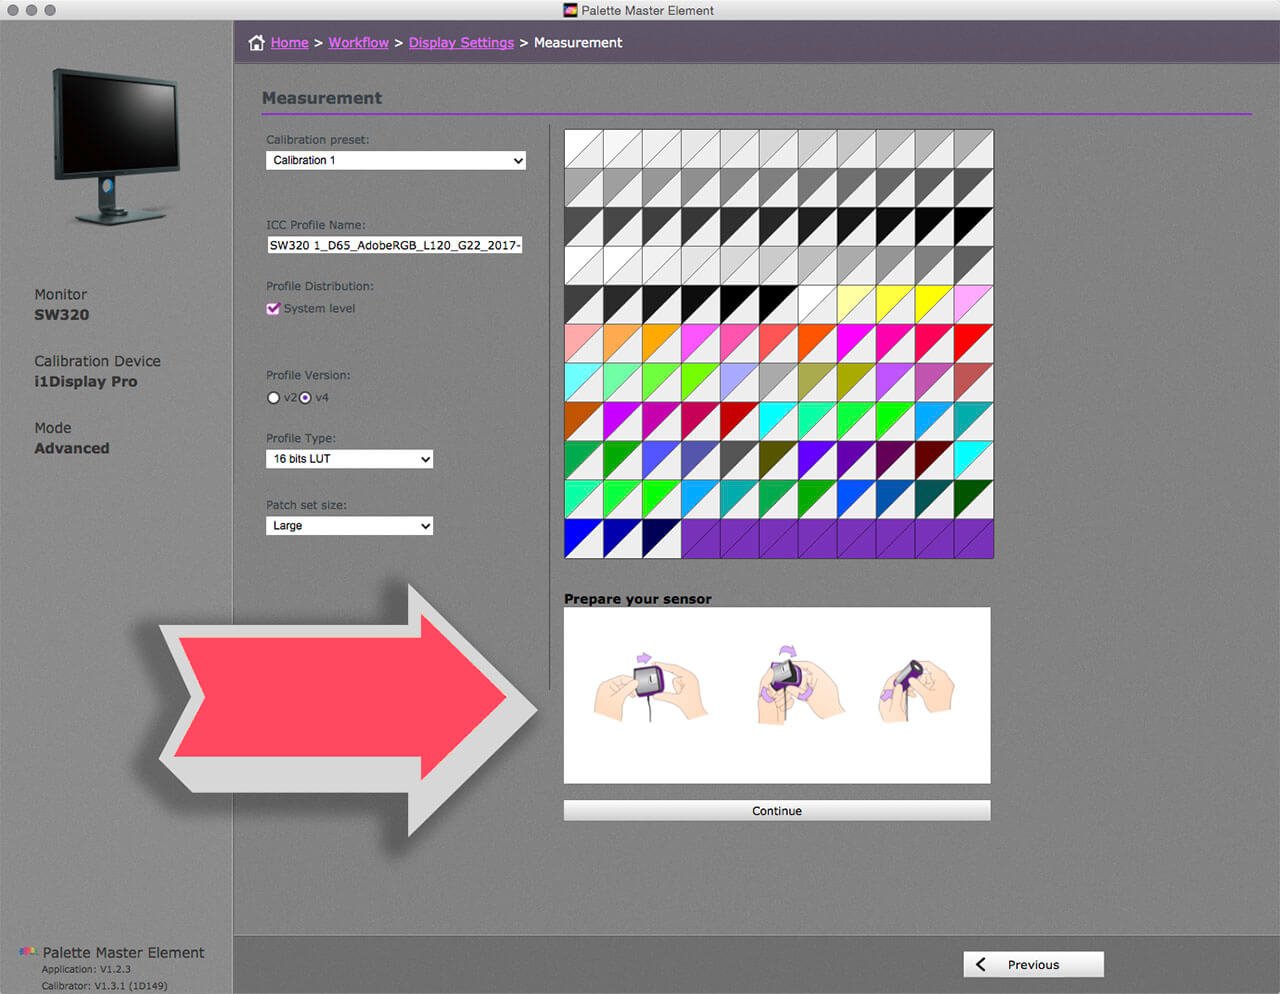
Figure 06: The next window shows how to configure your calibrator once you are ready click Continue. Place your calibrator on the surface of your monitor as indicated once you have pressed Continue.
The Palette Master Element software then runs through cycles of configuring Look Up Tables (LUTs). As long as energy and screen savers are disabled the software will quietly do its work. Take care not to knock your monitor as the calibrator has to remain in contact with the screen throughout this process.
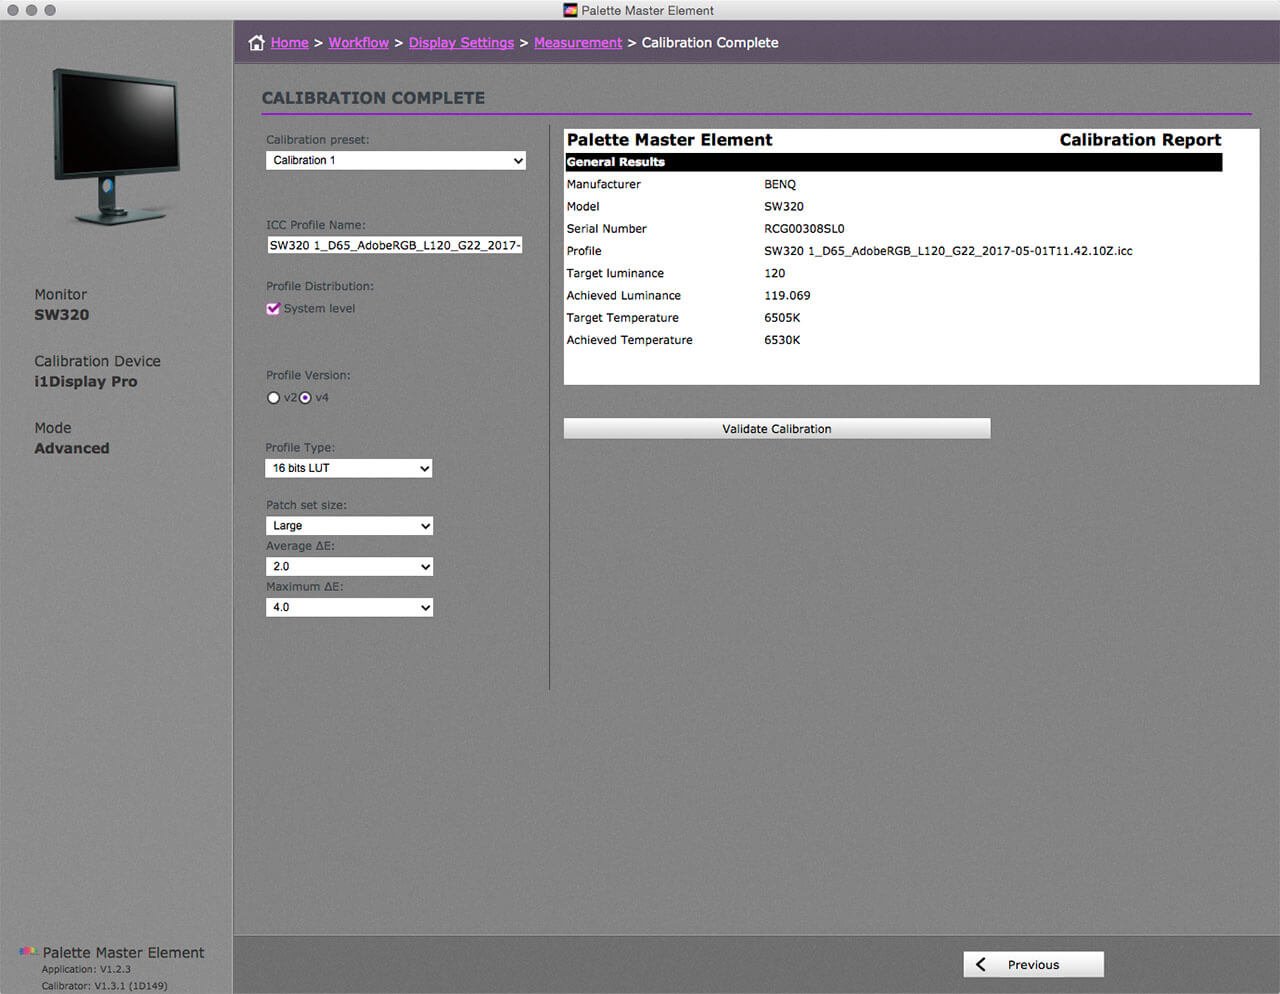
Figure 07: After several minutes the calibration will end and the Palette Master Element software will display a Calibration Report. You may wish to try and verify these results. To do so click Validate Calibration.
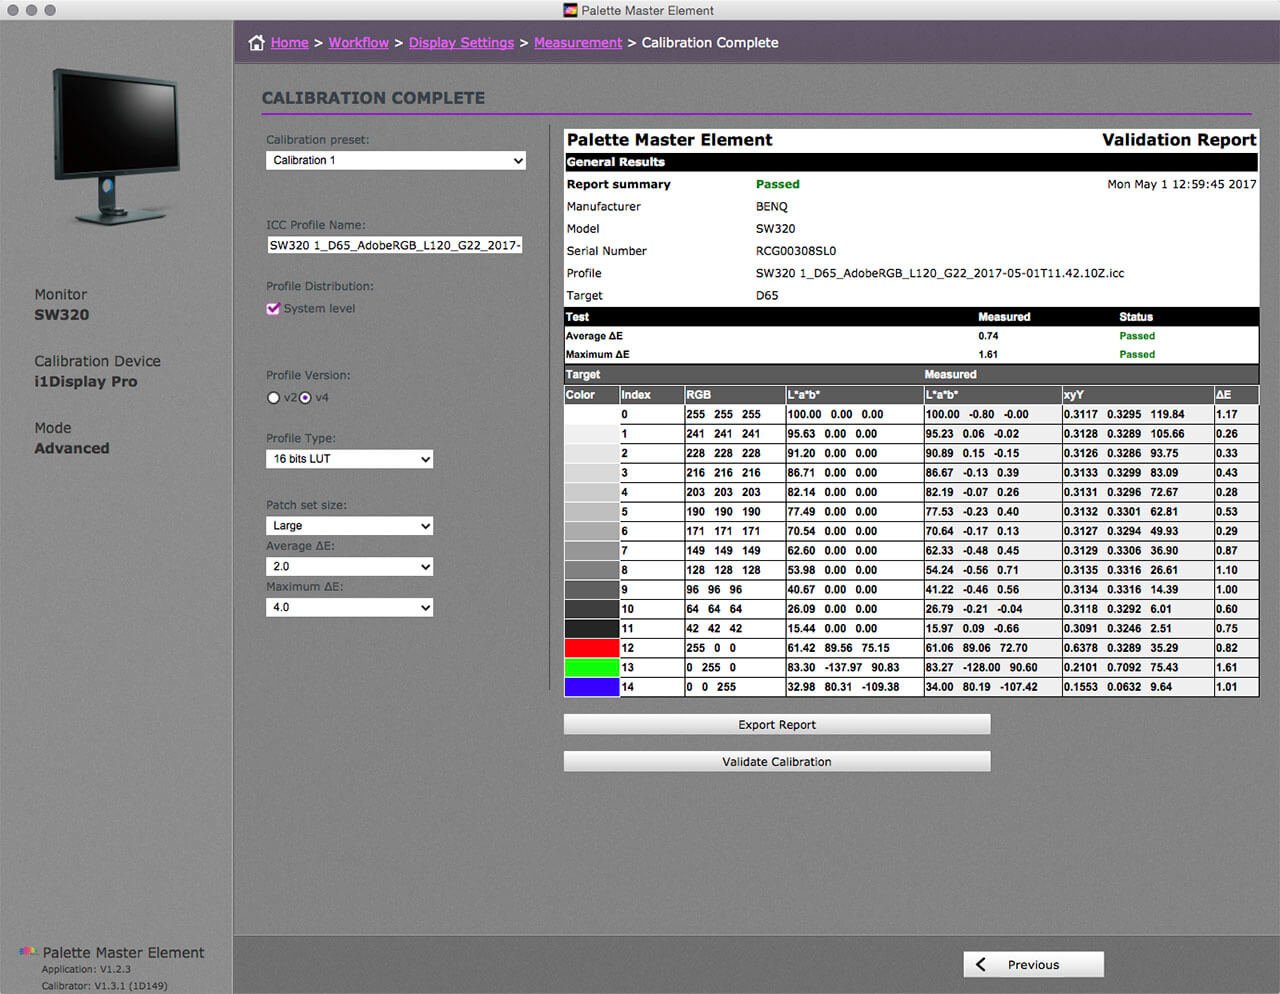
Figure 08: The Validation Report is more comprehensive than the Calibration Report shown in Figure 07. The most important thing to review is that the results have passed, as marked in Green in the Validation Report window.
You can now close the Palette Master Element software.
To conclude here are some important truths about monitor calibration
In 1996 I touched all four corners of the Photoshop universe, since then the application has grown exponentially. Many of Photoshop’s darkest places are rarely visited, here we will shine a light on Color Settings In Adobe Photoshop. The tutorial will require patience and careful reading. I repeat, this stuff is rather mundane as such it is rarely covered in magazines who prefer sassier subjects. If you feel unsure about doing the practical element of this tutorial please just read through it, and perhaps take a few Photoshop classes.
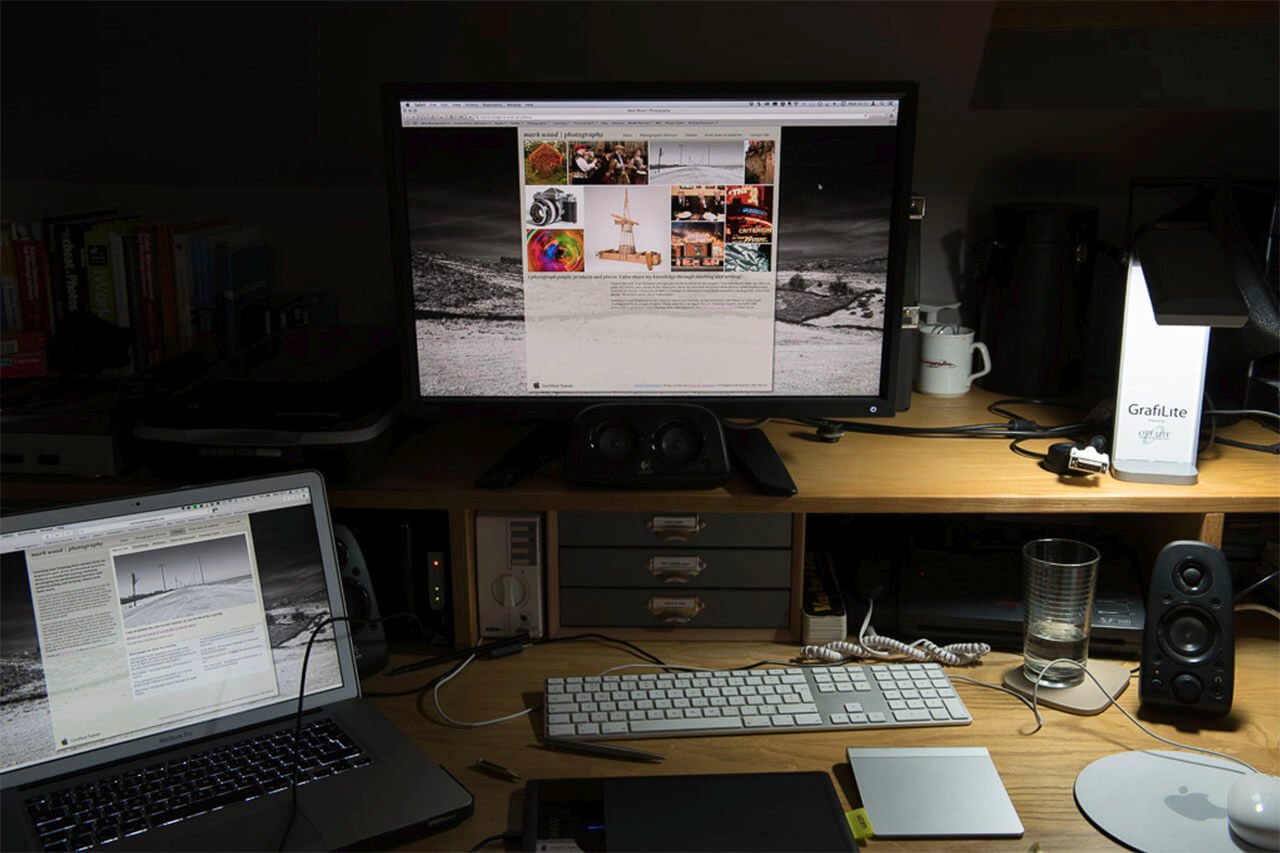
Figure 09: A representation of the digital darkroom conditions I work in. Working and viewing conditions have to be considered. The position of a monitor, and the colour and intensity of the ambient light have an effect on colour perception. In this low light scenario setting the monitor luminance can be set as low as 80cd/m2 but I prefer the higher level of 120cd/m2.
In my next post in this series I will share some thoughts on making fine-art prints
{{productsCount}}Result
{{item}}
{{item.productWordingTag}}
{{currency}}{{item.finalPrice| numberThousandsCommas | numberDecimalPoint}} Save {{currency}}{{item.saveAmount | numberThousandsCommas | numberDecimalPoint}} Save {{item.savePercent | numberThousandsCommas | numberDecimalPoint}}%
new device price {{currency}}{{item.regularPrice| numberThousandsCommas | numberDecimalPoint}}
{{item}}
{{itemTag.title}}
Max 4 products to compare reached.