{{item.name}}
Price: {{currency}}{{item.price| numberThousandsCommas | numberDecimalPoint}}
Qty: {{item.amount}}
Accessories

The SW320 is one of those few monitors with a size that most users have never seen because of its dramatically big size and its highest category. With the SW320, advanced professional photographers, video editors will have a screen for bigger needs: high-resolution photos, panoramas, HD and 4K video.
In December, BenQ announced that it would launch a new monitor that would bring some really eye-catching innovations. And then it launched the SW320, with new features such as the GamutDuo system, which allows you to split the screen in two and see each half with a different color range, and it also featured support for the latest UltraHD videos in 10-bit HDR video. After testing it for a few weeks, I can say that this is really an amazing monitor, not only because of its giant size but also because of its combination with 4K resolution, color gamut and wide variety of features that turns it into a well-rounded product.
As a competitor in performance and price, we have actually only Dell with its U3014 which has also a very wide range of colors and the same resolution, although it does not have the range of functions that the BenQ has, not even with hood.
This monitor has the following features (you can see the full specs here):
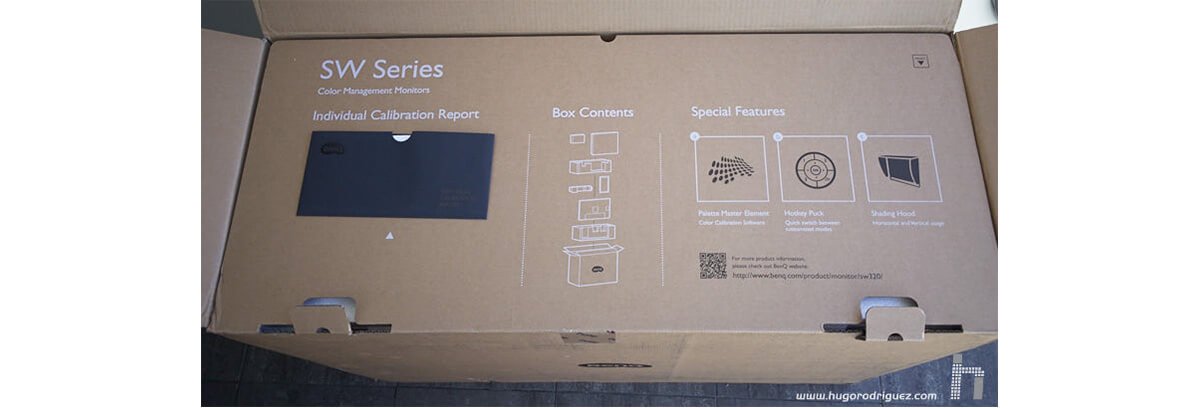
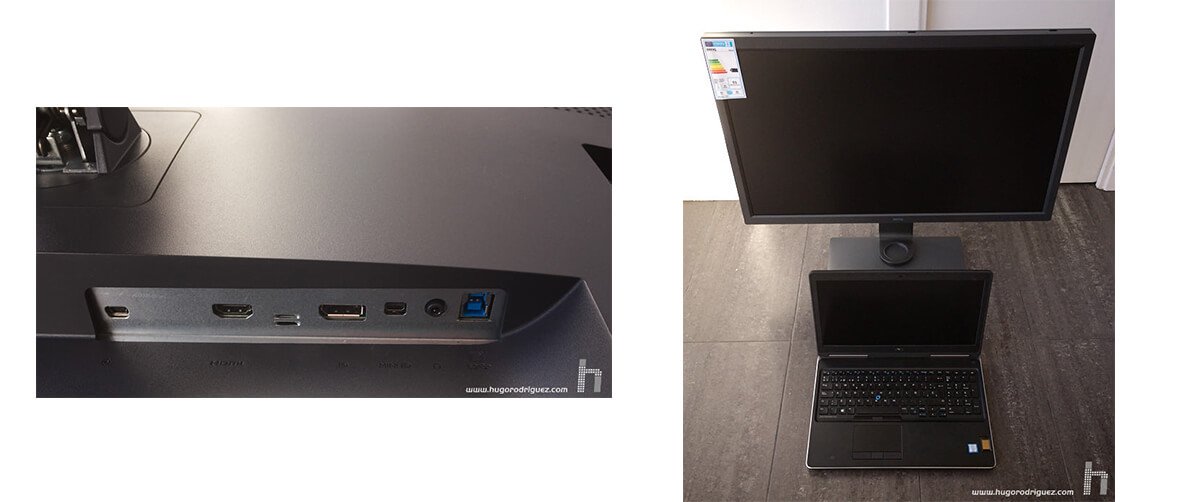
The first thing that strikes you is the size of the box. It is so great and so heavy that it is truly impressive. In order for you to have a clearer idea of its size, here you can see my 15.4" notebook on it:
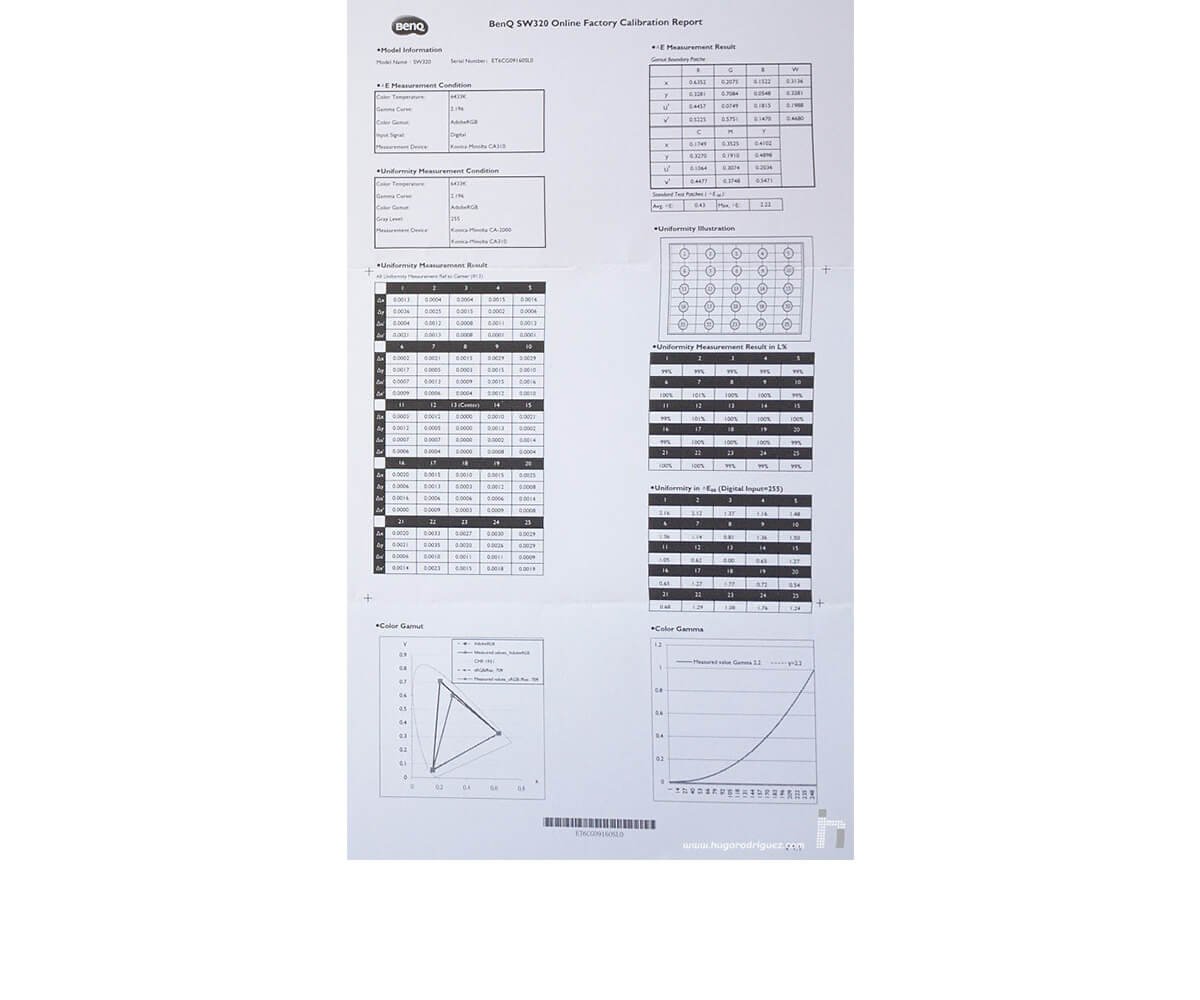
One of the things that surprised me as soon as I opened the box was a kind of welcome design pack containing a perfectly folded and placed calibration certificate stating its factory preset calibration:
This certificate shows the values measured for both the gamma curve and the AdobeRGB and sRGB Rec709 presets, which in principle ensures its very precise functioning. The certificate also includes uniformity measurements to ensure that the displayed picture is perfectly identical at any point on the screen:
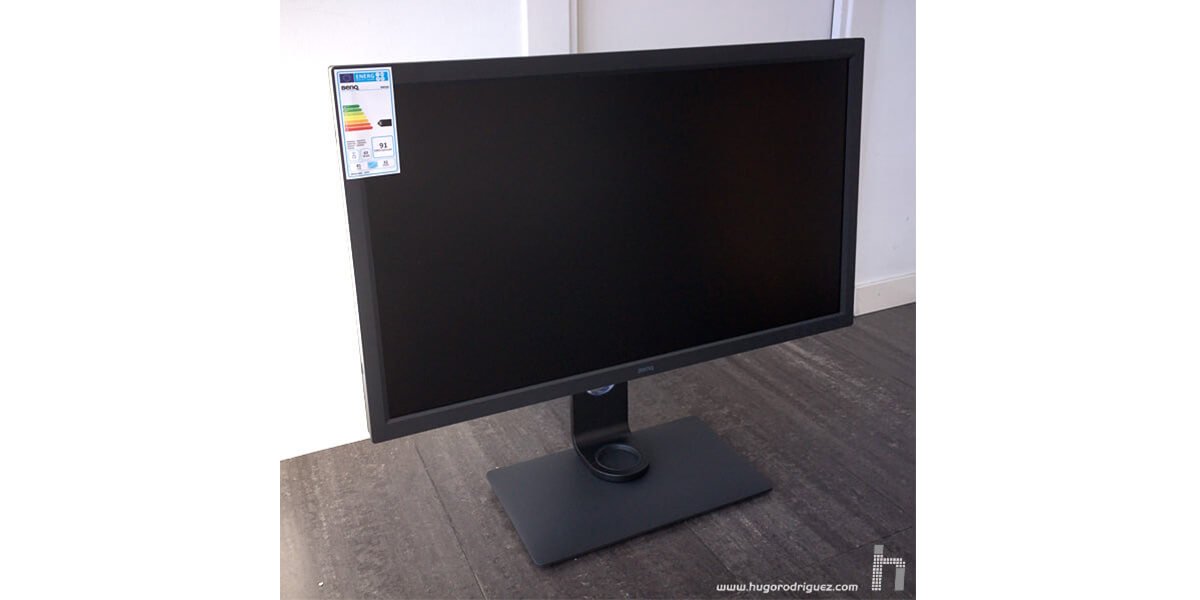
The design is rather classic, "edgy" and gives a sober and pleasant feeling. The materials used are of very good quality and the monitor is very robust and strong. In addition, it is quite heavy, which emphasizes this feeling.
With regard to the physical regulations, the monitor has all the settings in these ranges: height, tilt and 90°rotation. Regarding the connections, it has the usual ones but now dispenses with the DVI-D, focusing only on the modern ones (mentioned in the list above).
It has the side connection with two USB 3.0 slots and SD card slot, which is frankly convenient.
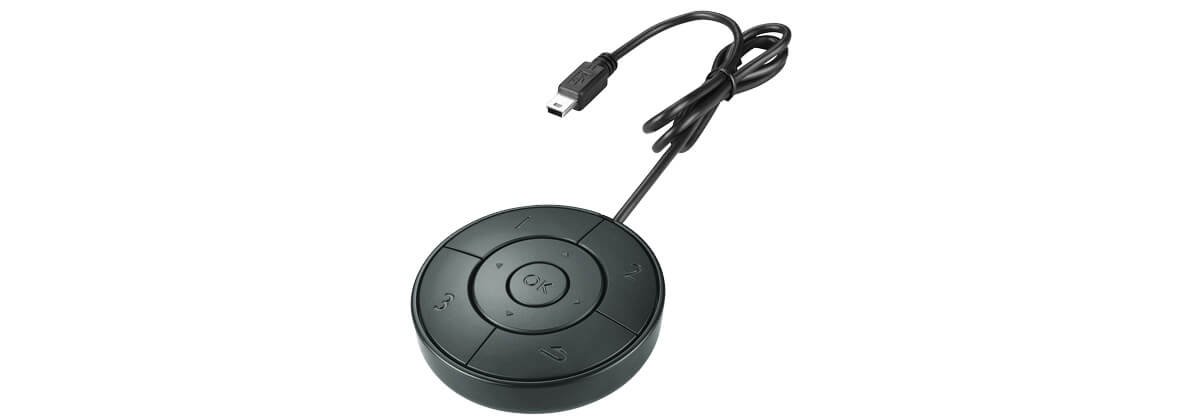
I used to complain about the inconvenient monitor “touch” buttons in the previous models, (and so I notified this problem to the marketing team and engineers of the Korean brand). It seems that they have done something in regard to this little problem here, since the latter model has replaced the buttons for some physical buttons, and finally it can be managed with much more comfort. Although in terms of convenience, I also have discussed here the built-in wired remote control which is identical to the one in the SW2700PT.
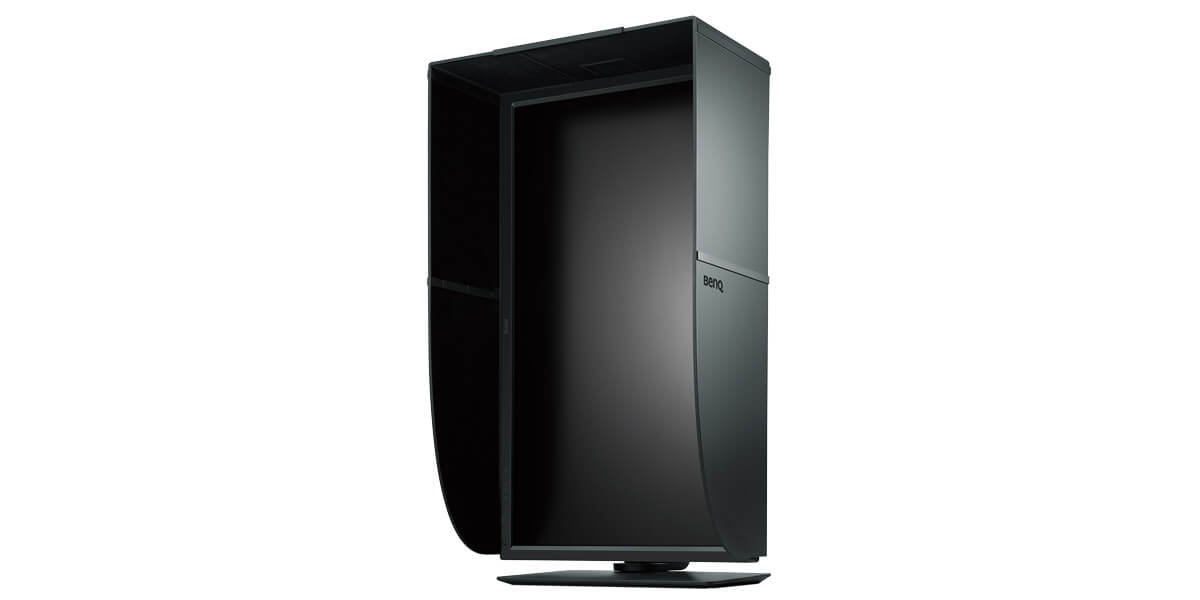
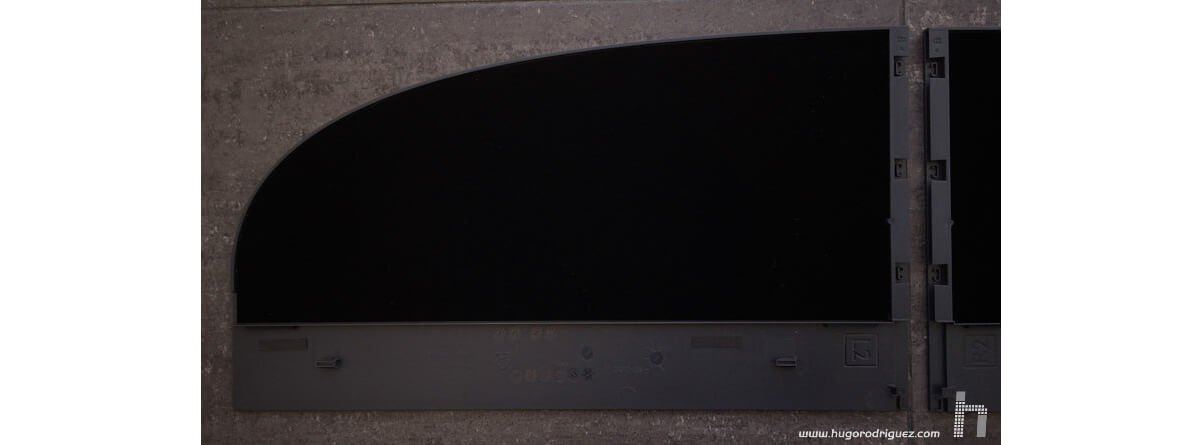
Like in the other models, this one incorporates a quite well built hood. It is quite sturdy, and includes details such as the top window to place and set the calibrator for use when necessary or the modular panels that allow you to use with the monitor in landscape or portrait position. This is another good point of this brand.
To conclude, the hood is lined internally with black velvet. Without question, it is magnificent.
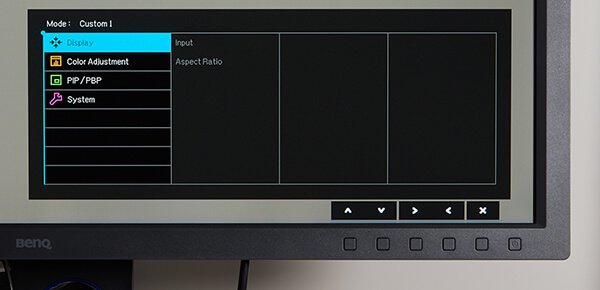
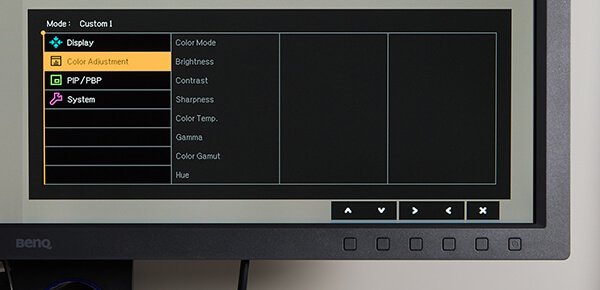
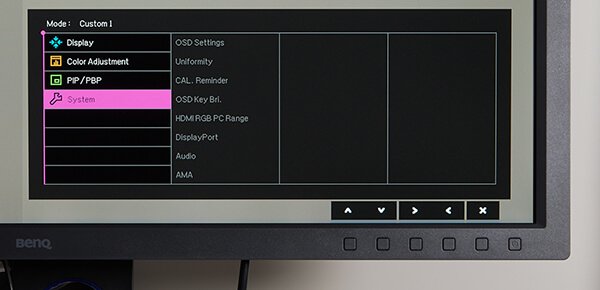
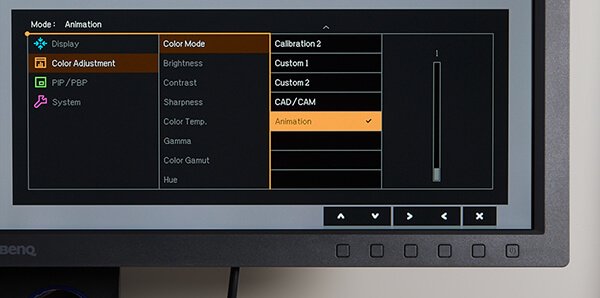
I have discussed about the menus on the models already on the market and I have found them to be excellent in all respects (regarding clarity, good organization and the amount of functions), but the SW320 goes a step further with larger menus (making them easier to read from far) and thanks to the built-in remote control, they are even more comfortable to use.
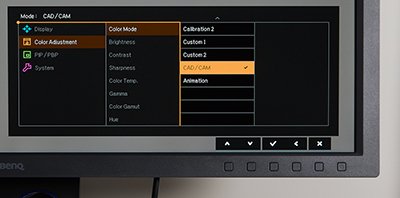
The SW320 menus are very similar to those in the PG2401PT and the SW2700PT, but with the following additions:
The echo menu, which was featured in other models, has disappeared in this model and that allows you to automatically regulate the brightness of the screen according with the light in the room.
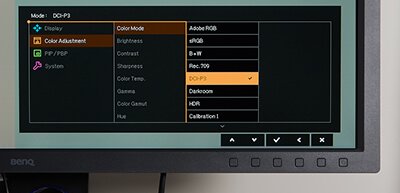
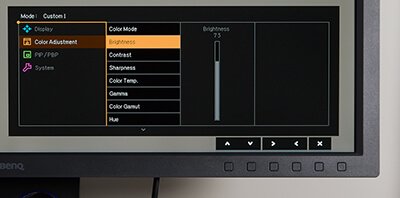
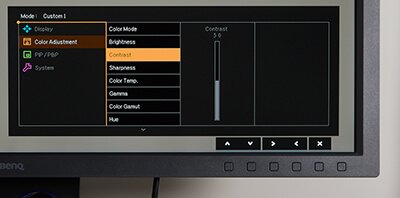
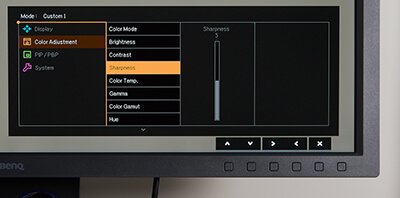
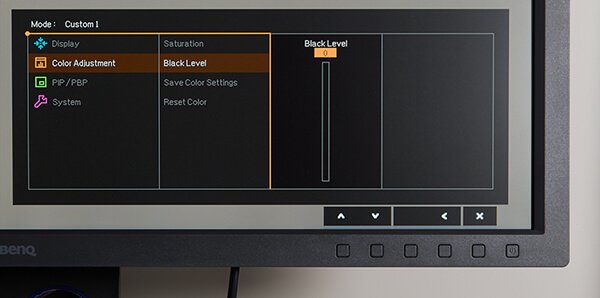
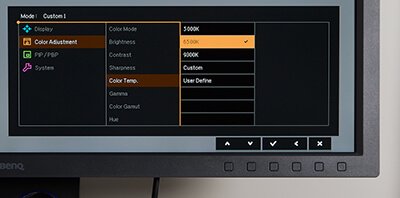
Now let's see the menus in deep. The Image menu allows you to adjust:
Then I remembered that selecting screen display settings whilst holding the option (alt) key down enabled all display settings.
One of the key aspects is this. For a newbie in the topic, the list of benefits can be overwhelming and confusing, but the purpose in the end is to get a really good picture and not only from the front. From the side, from above and below. One that doesn’t change the color and doesn’t lose brightness. Therefore BenQ's has really been amazing in this aspect because it is among the best on the market without a doubt.
The first thing that calls the attention to this monitor is the incredibly high resolution. With almost 4000 px width, it doubles the desktop width for a FullHD screen. Since the 4K video is so fashionable nowadays, many people search for screens with this resolution in order to edit this kind of video, although in my opinion there is no need for this resolution to edit this video because it is not necessary to appreciate each and every detail in order to edit it; in fact, the graphics card can work with more ease. On the other hand, it is perfect for FullHD display, which leaves you 3/4 of free desktop for the tools.
Taking into account the width in pixels, that leaves us an on-screen resolution of no less than 140 DPI, which makes it very interesting for all people whose works end up being printed, since this screen is capable of displaying an aspect much more similar to the paper, especially when taking into account that is observed from a distance greater than a 24" monitor, for example.
Thanks to the 10-bit panel, the gradients - even the most difficult ones- are perfectly uniform and without any visible gap.
The brightness tends to be high, something that is practically a standard nowadays. The maximum brightness stated in the specifications is 350 cd/m2, although in my tests I have measured 382 Cd/m2. The black is so deep that the maximum contrast has proven to be of 1090:1, frankly an excellent value, nearly triple compared with the most competitive monitors, even with the PG2401PT monitor. It is probably the highest value that I've ever seen on a monitor with IPS panel, the active screen brightness standardization system (sustracts too much contrast) and after being calibrated once. Fortunately, the brightness can be lowered a lot for those who prefer to work with softer lighting much more in line with the retouching rooms, down to about 90 or 100 Cd/m2.
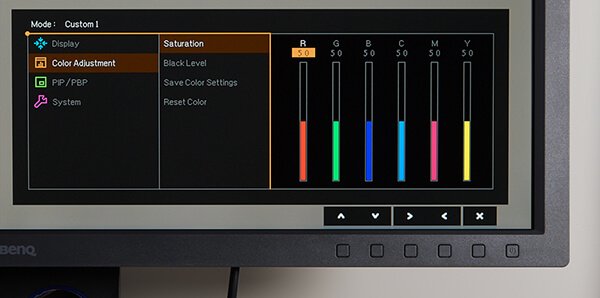
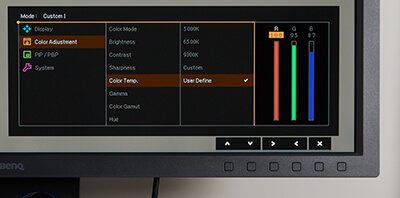
The quality of the 3D LUT is excellent, and enables you to adjust the tonal range through the hue and saturation controls, allowing the independent control of each one of the six primary ranges. I have to admit that it doesn't have the luxury of using settings from much more expensive models, such as the NEC Spectraview or EIZO CG, although it is also true that the difference in quality is not correlated with the difference in price.
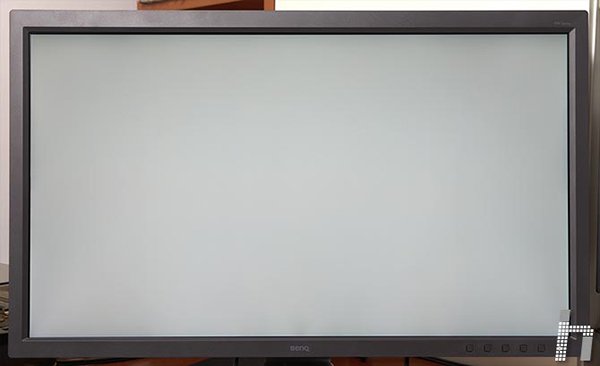
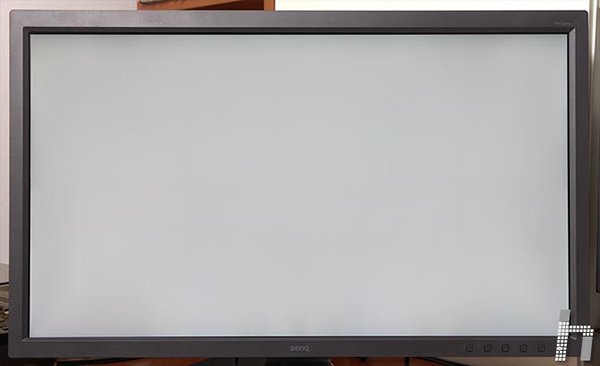
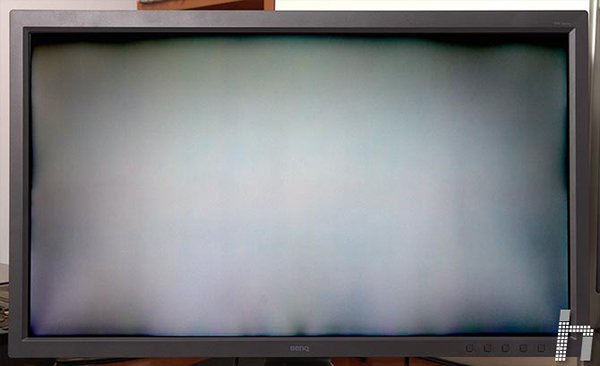
The screen brightness standardization system works perfectly, reducing practically to zero all variations of luminosity and colour cast from the source panel.
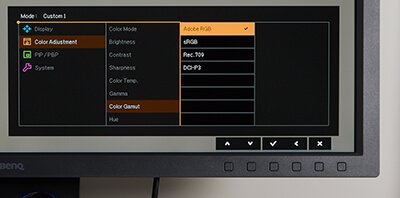
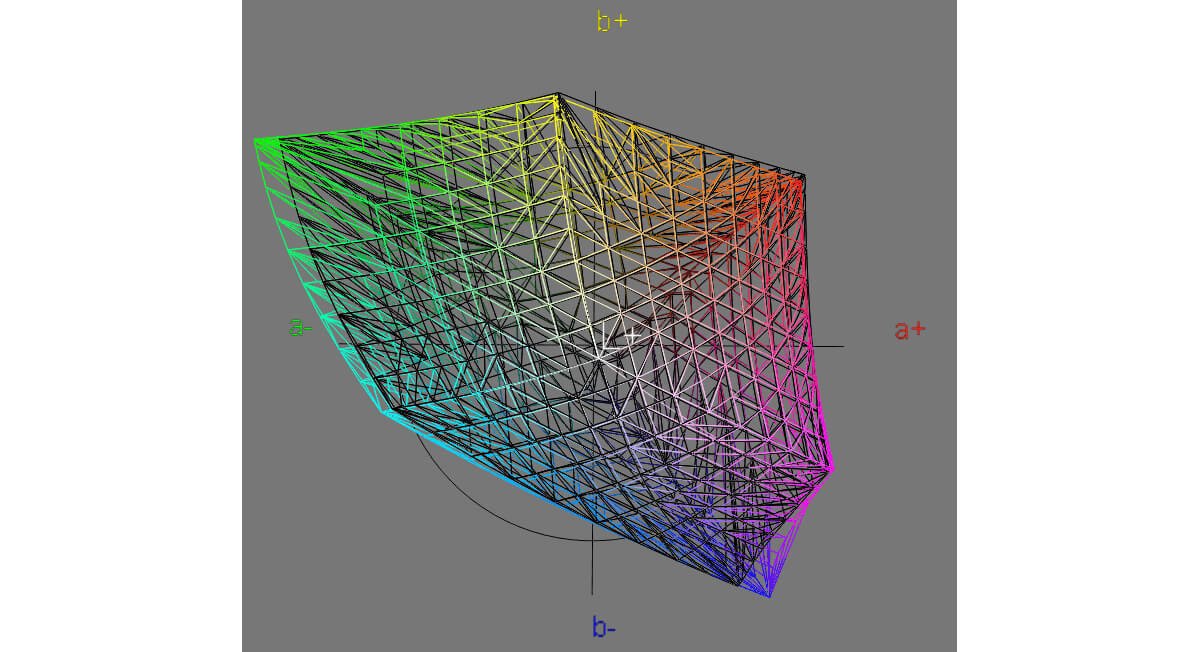
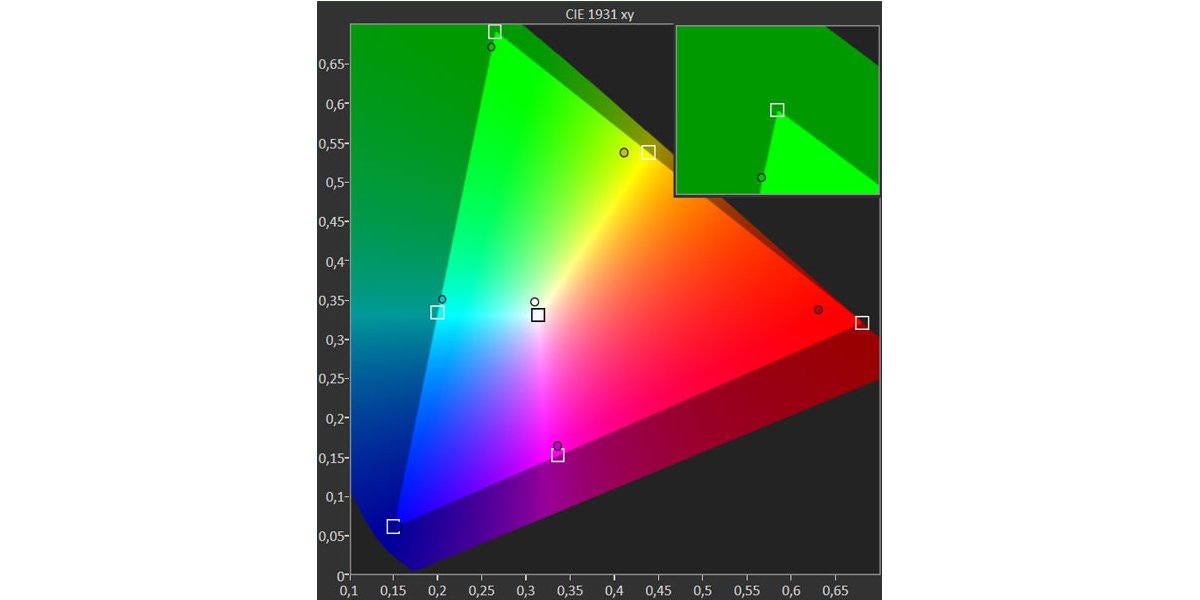
Most current monitors "for photography" are "wide range", which means that they have a range very similar to Adobe RGB, as it is also the case of this SW320.
In particular, and according to my measurements, the range of this monitor is a 2.2% bigger than the Adobe space.
It should be pointed out that it does not cover the Adobe RGB color space completely, as a tiny 1.4% remain without coverage (specifically in the more saturated red areas), which is negligible for practical purposes.
In the case of the sRGB, the range is 37.6% bigger and covers almost entirely (99.3%).
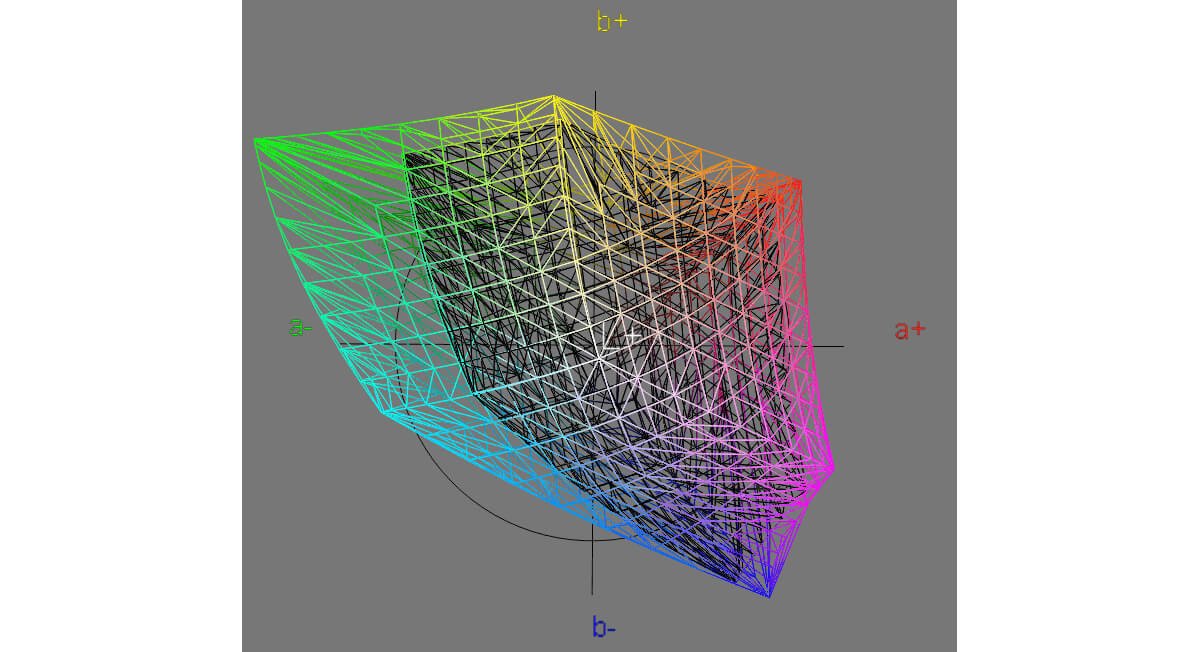
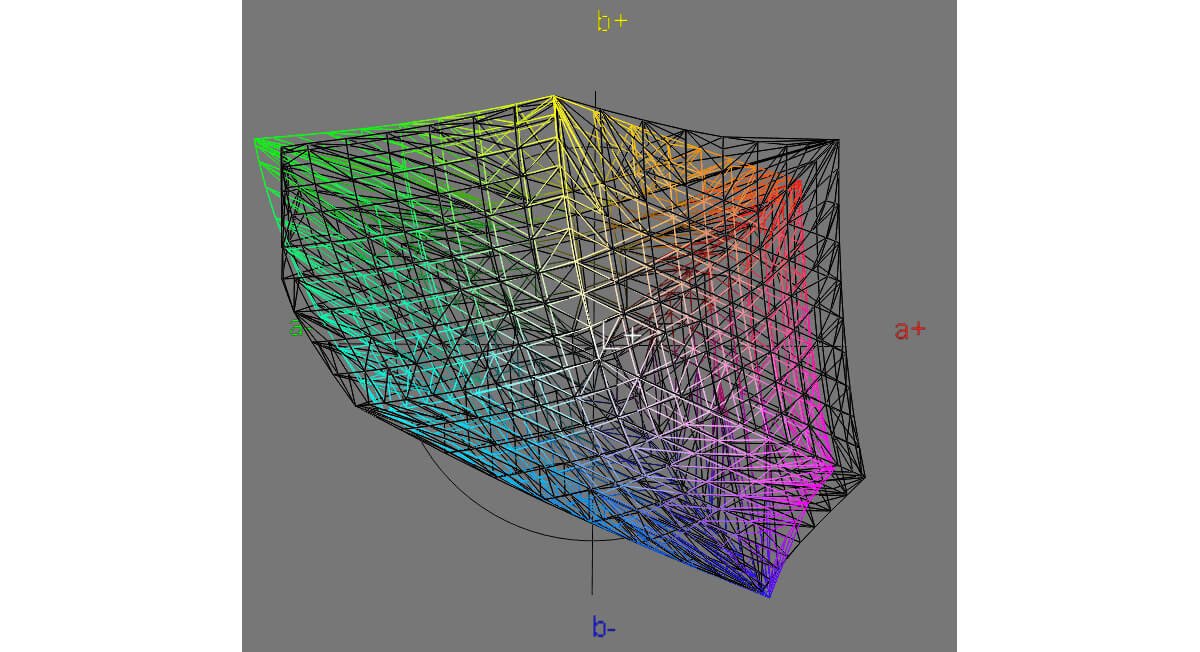
If I compare this with Dell U3014, it is clear that in this field, BenQ cannot surpass DELL, specifically with a range 11.3% lower (the 3014 has a range slightly higher than AdobeRGB):
The panel of the SW320 is 10-bit IPS and has a screen brightness standardization system supported by a circuitry of 14-bit color LUT (3D), so it is clear that we are faced with one of the best 30" panels today.
This monitor comes already calibrated by the factory, as it is almost the norm in all models of this category. This is not to say that there is no need to be calibrate it once you connect it to your computer. Now you'll be frowning because the previous sentence contradicts itself. Indeed, and that is because the key is in the meaning of the term calibrated. I will say it in another way, this time using the correct terms: this monitor has been calibrated by the factory, but that doesn’t mean that you don't have to profile it once you connect it to your computer.
That is because what has been calibrated by the factory is the gray curve response (the gamma curve), the color response in three of your Presets (sRGB and Adobe RGB, REC709) and the screen uniformity in 25 different areas to ensure that none of the 25 deviates by more than one DeltaE2.
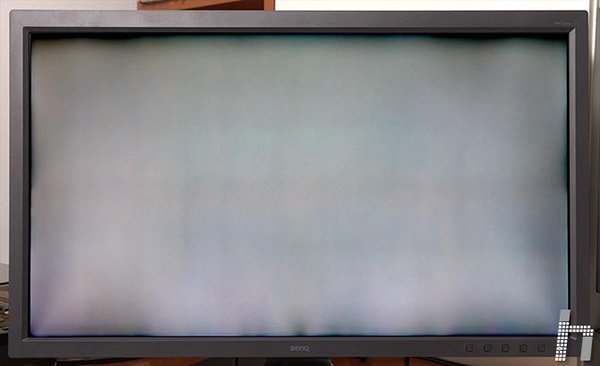
Here you can see the difference WITH and WITHOUT the screen brightness standardization system:
Since it is difficult to see with a glance, I have highlighted it to 1000% in order to be seen much more clearly:
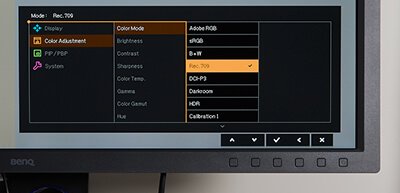
As I have said, the sRGB, Adobe RGB and Rec709 presets also come fully calibrated by the factory with a fairly high fidelity. The DCI-P3 preset doesn’t come calibrated, but it also works faithfully.
To check the quality of these factory settings, I have used my EyeOne Pro2 along with CalMAN 5, the reference software for screen analysis and calibration (no profiled), specifically designed for the film world.
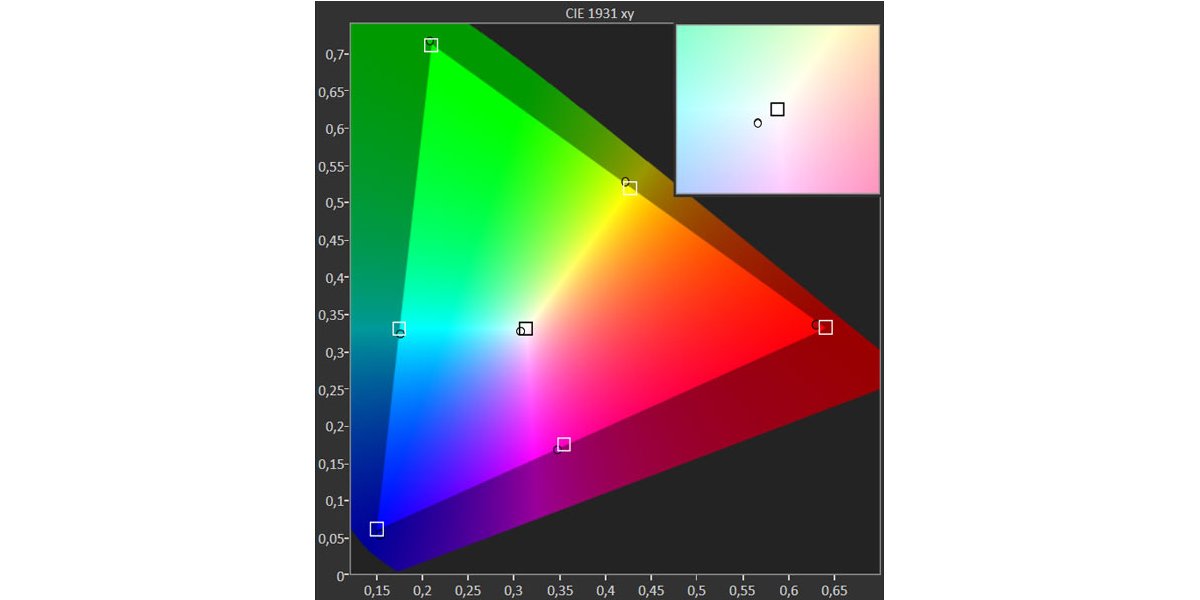
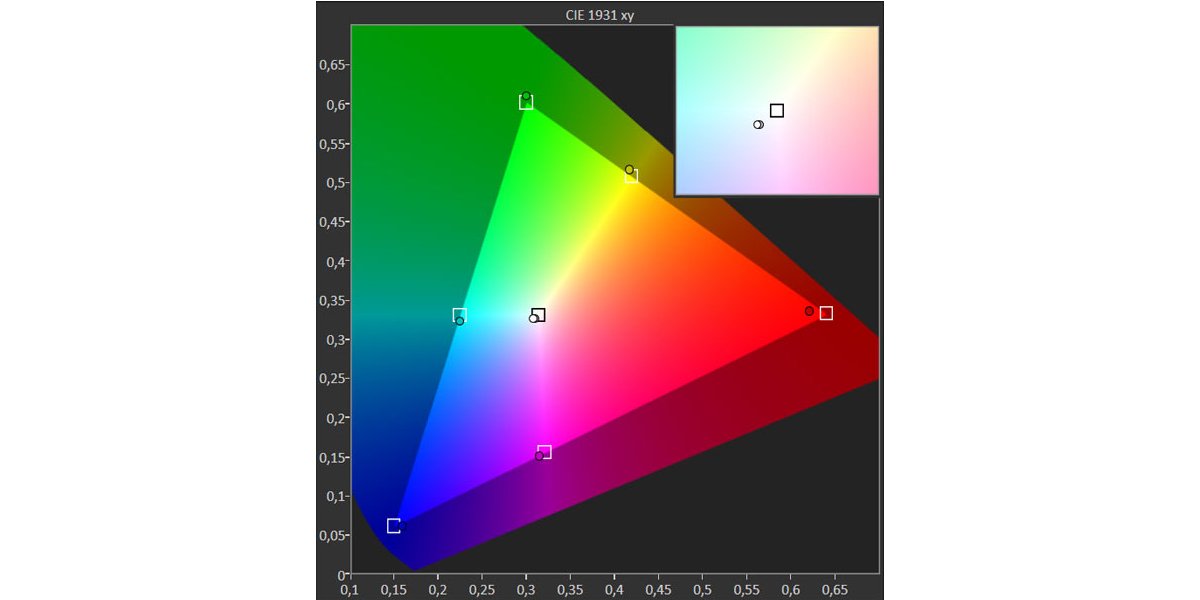
Starting with the Adobe RGB preset, here you can see it how good the response of the monitor color in this mode meets the very standard color space. In the graphic you can see the exact locations of the primary colors, represented with dots, on the color map reproduced by this mode, and the small squares where they should be according with standard definition. As you can see, the deviations are minimal and fall within the tolerance announced by the manufacturer (of Delta E2, which I have found in this case, that with the exception of the white, the rest of the colors fall below 1.7):
In the case of the sRGB mode, we can see that the results are very similar. Although it may seem that red is the color that undergoes the least deviation, it is in fact the blue which has a deviation of Delta E 2.4, which is a little over the value announced by the manufacturer. The rest of the colors fall all below 1.86, which means that this mode also fits well with the standard; in fact, both are close to perfection (whose value is DeltaE 1):
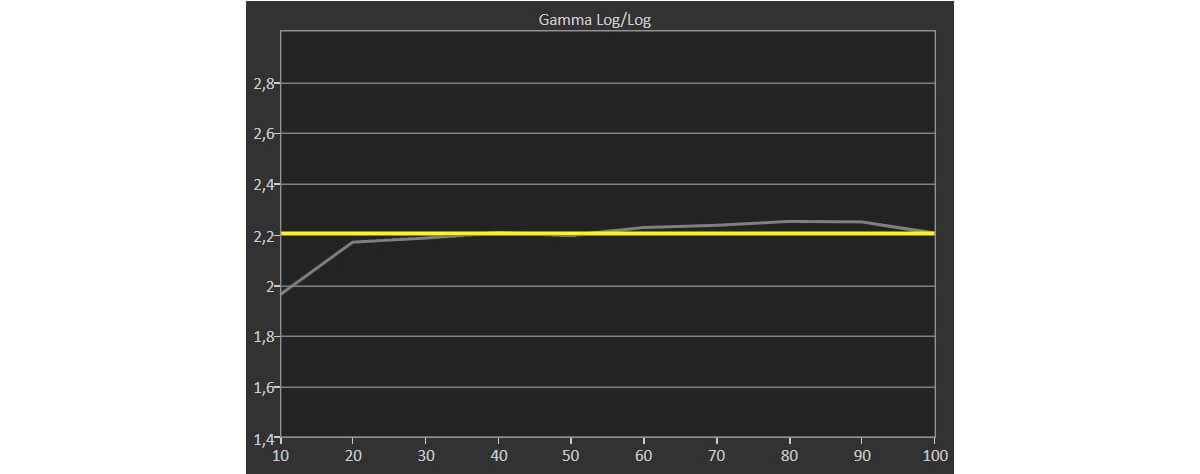
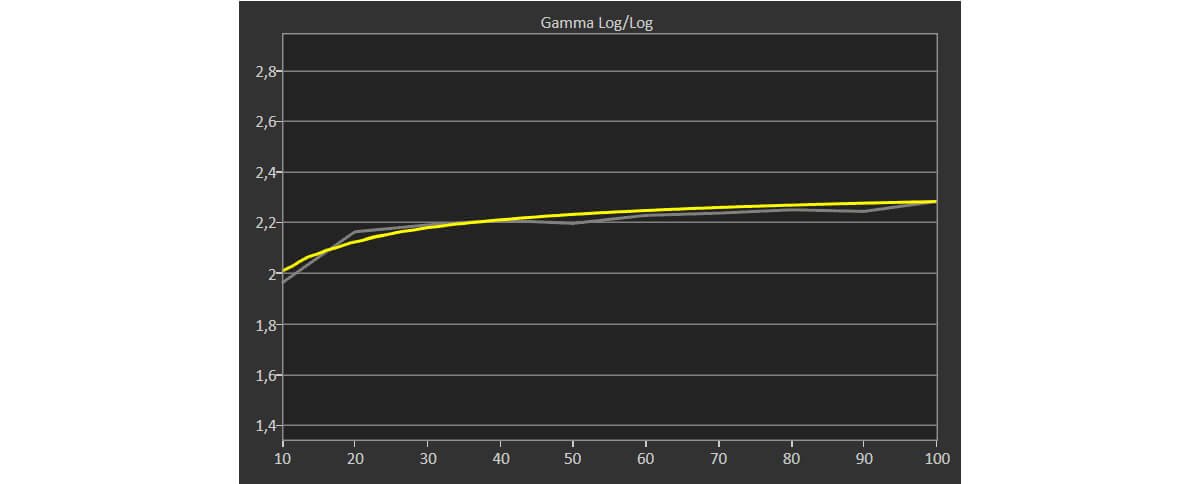
I have also checked the gray curve adjustment quality in both Adobe RGB and sRGB, and here you can see how well they conform to the respective standards. The colored curves show how is the monitor response from almost black (on the left, with brightness 10%) to white (on the right, with brightness 100%):
One of the novelties of the SW320 in this regard is the Rec709 (the well-known standard for high definition video) which comes also calibrated by the factory with similar deviation values, and as you can see in the chart, the results are virtually identical to the sRGB, which helps to turn this monitor into a very good reference point for those who edit video, regardless of whether is HD, 2K or 4K. Moreover, this monitor has official Technicolor certification, which gives you an idea of the seriousness with which the engineers of the brand take these aspects.
It is important to clarify that this is not a monitor suitable for video editing with video pro cards, because it doesn’t support signals less than 48Hz, so if you connect it to a video card to get a signal of 24, 25 or 30 Hz (both progressive and interlaced), you are not going to see anything. It is a monitor for video editing by using the graphics card, not a professional video card.
It also has the DCI-P3 preset, and although it is not calibrated, the result is not bad at all, but it does not reach the precision of the other modes:
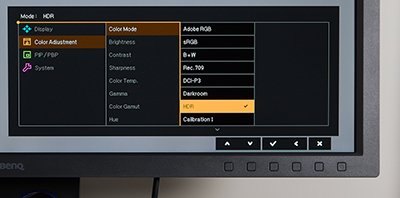
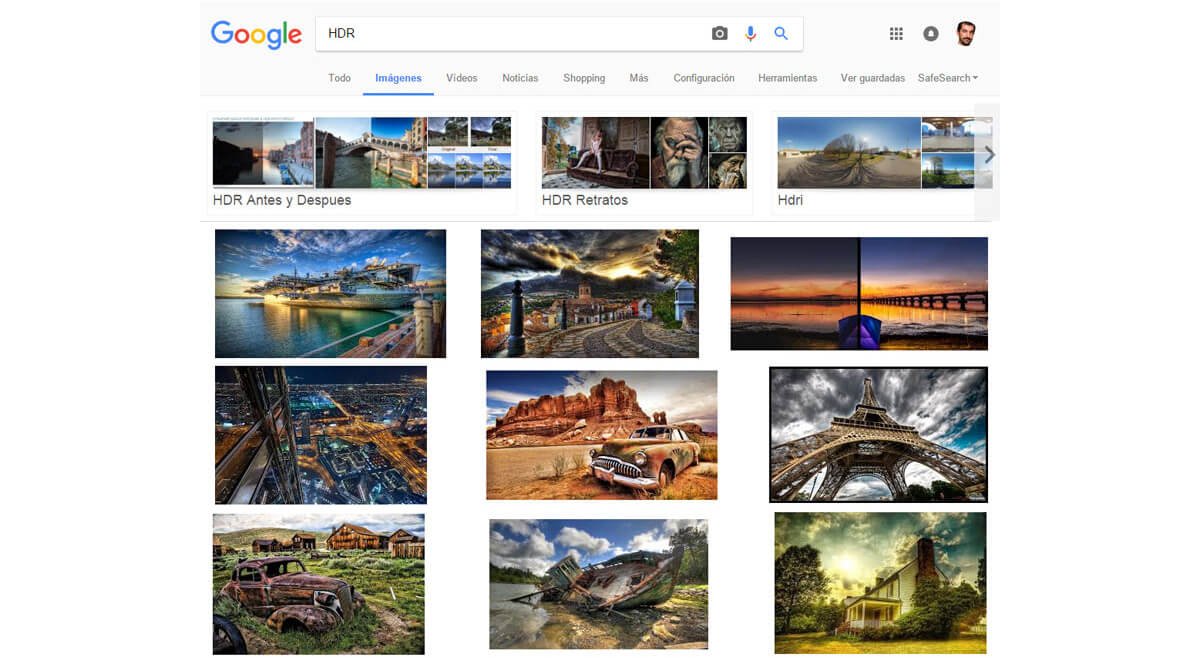
One of the great novelties of this screen is the HDR mode, which refers to the popular technique of high dynamic range. But no, this doesn’t mean that with this mode the monitor will go and destroy your photos to produce such horrific and unreal results such as these:
Photographs that certainly rarely are true HDR, but pseudo HDR. They are not even scenes with very high contrast, or pictures resulted from several shots. I would like to take this opportunity to remind you that I teach Natural HDR courses regularly, and I had just taught at the Nikon School last Thursday. Subscribe to my newsletter and you will receive timely information of my courses in case you are interested.
In reality the HDR mode is used in combination with the latest video format that is being distributed via streaming (Netflix...) and also on Blu-ray.
Unfortunately, I don’t have a Blu-ray player equipped with this technology or any disc, because it is still a very new system, therefore I have not been able to check the system operating at full work, but I have been able to see it in some shops that have TV demos.
Anyway, I have tried to play a few minutes of OBLIVION (in standard Blu-ray) with the mode on, and I’ve noticed two things: that the brightness increases to the maximum, and the contrast remains very high, with which the overall picture is more contrasted.
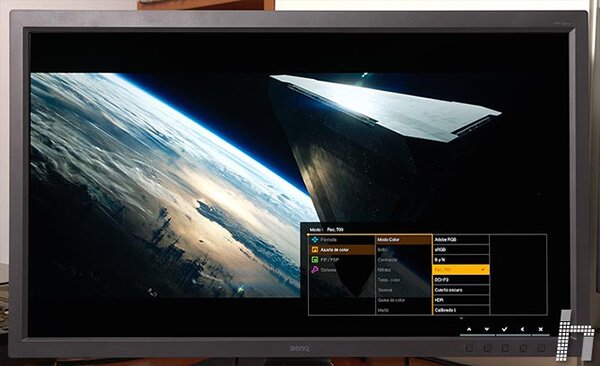
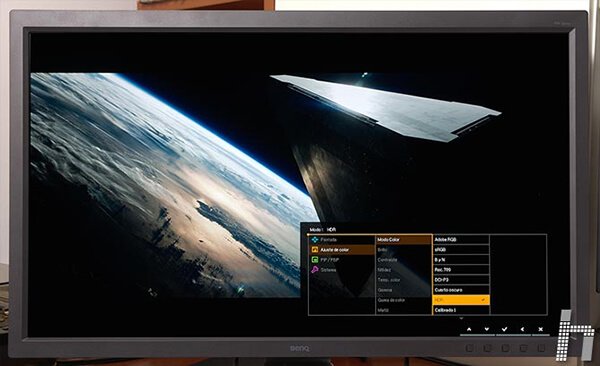
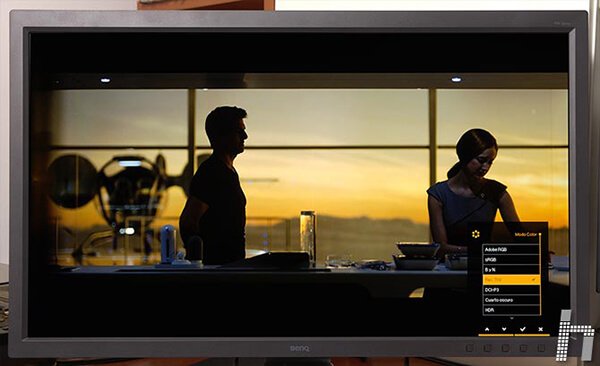
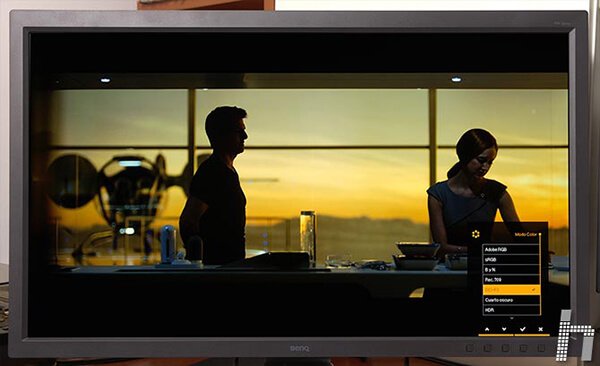
It is worth noting that thanks to the Rec709 and DCI-P3 modes, the films can be seen in this screen and the image quality is not just good… It is overwhelming!
If you don’t have a home theater or a good television and prefer to watch movies on your computer, do not hesitate: this is your screen!
Here you can discover how different moments of the movie look with the Rec709 mode (the suitable one for Blu-ray movies and streaming) and how to increase color when switching to the DCI-P3, which is equivalent to that in a movie theater (although in this case it produces oversaturation because the movie theaters do not use Blu-ray discs but specific formats that already bring out the color range of the DCI-P3):
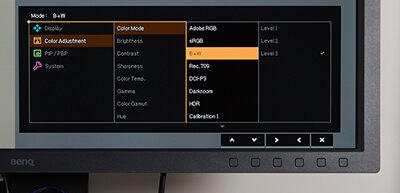
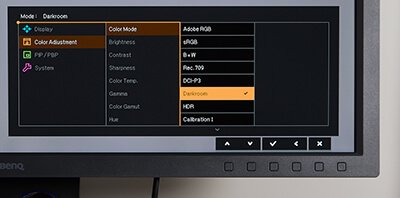
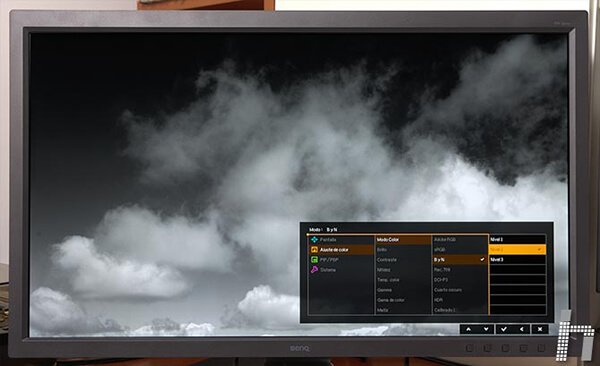
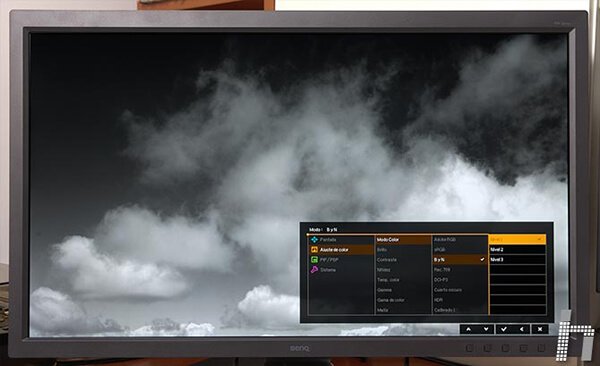
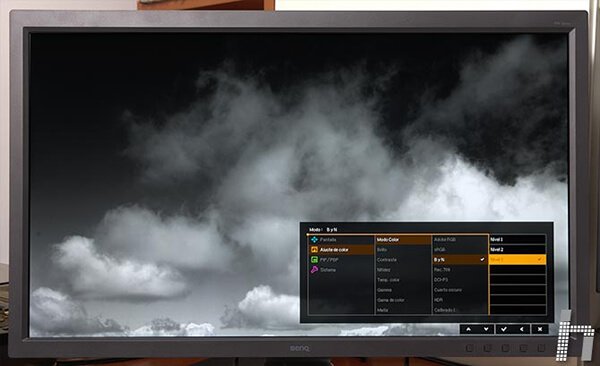
The new black and white mode can be quite interesting for those who enjoy this technique (now comes to mind my friend Gabriel Brau). With this mode, the image becomes a perfect black and white, and best of all is that you can choose from three different settings, in which the difference is the gray curve (gamma), that can produce more or less contrast. Here you can see the difference:
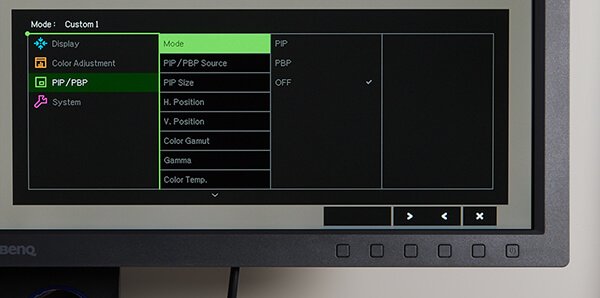
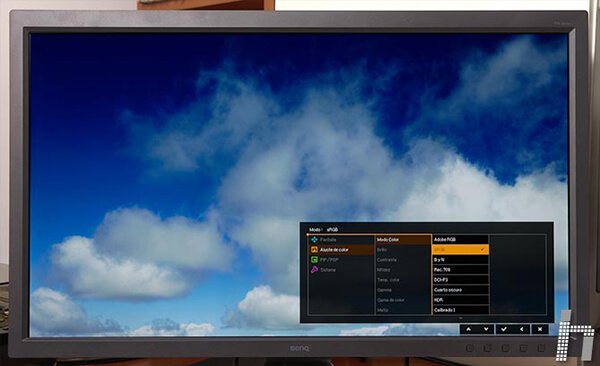
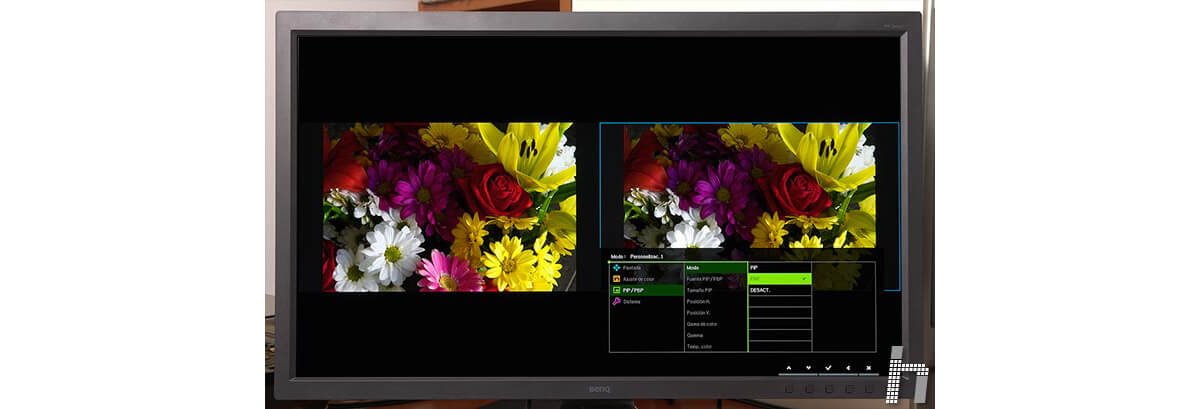
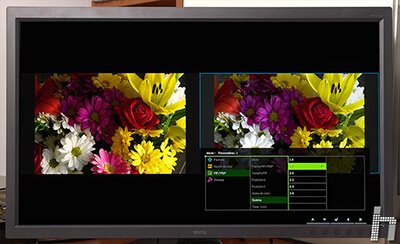
Another great novelty of the SW320 is the GamutDuo, which allows you to divide the screen into two and see the duplicated image; to the left you can see the original image and to the right you can choose from another available range of color: sRGB, AdobeRGB, Rec709 and DCI-P3. The truth is that the system has surprised me very pleasantly and I have found it very interesting for those who work their RAW in wide color (Adobe RGB and above) on projects that are intended mainly for Web (sRGB).
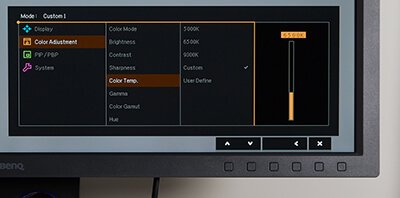
The system is quite easy to use. Simply enter in the menu, go to PIP/PBP tab, activate the PBP mode and then choose your preferred color range, the gray curve or the color temperature:
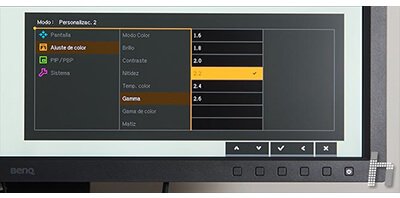
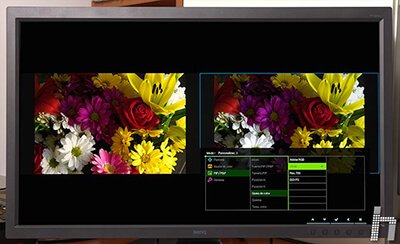
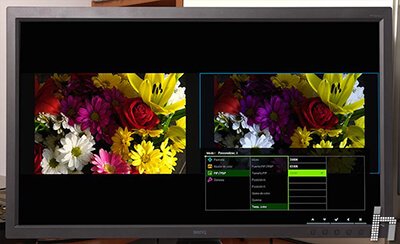
For example, here you can see the original image on the left (with the full range of the monitor), and to the right the sRGB in the first case, with a 1.8 gamma curve (like in an old Mac) or with a color temperature of 9300K:
It is also worth noting that the monitor can work indistinctly in the two numerical ranges of video signals: the full range (0-255) or the limited one, typical for broadcasting (16-235):
Since this monitor can be calibrated by hardware, it requires special calibration software, not only the gamma curve (to match the graphics card) but also its color space. To do this it is necessary to use a USB cable to connect your computer and monitor, to upload the first and to install the LUT that is going to change the color in the second.
The supplied software is based on the color engine Calibrite and is called Palette Master Elements, which is the same as that used by the SW2700.
It is similar to the i1Profiler from Calibrite, but not the same. It is interesting to note that in addition to being compatible with Calibrite calibrators, it is also compatible with the Datacolor calibrators (the Spyder).
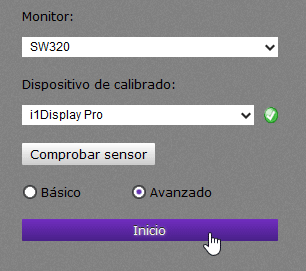
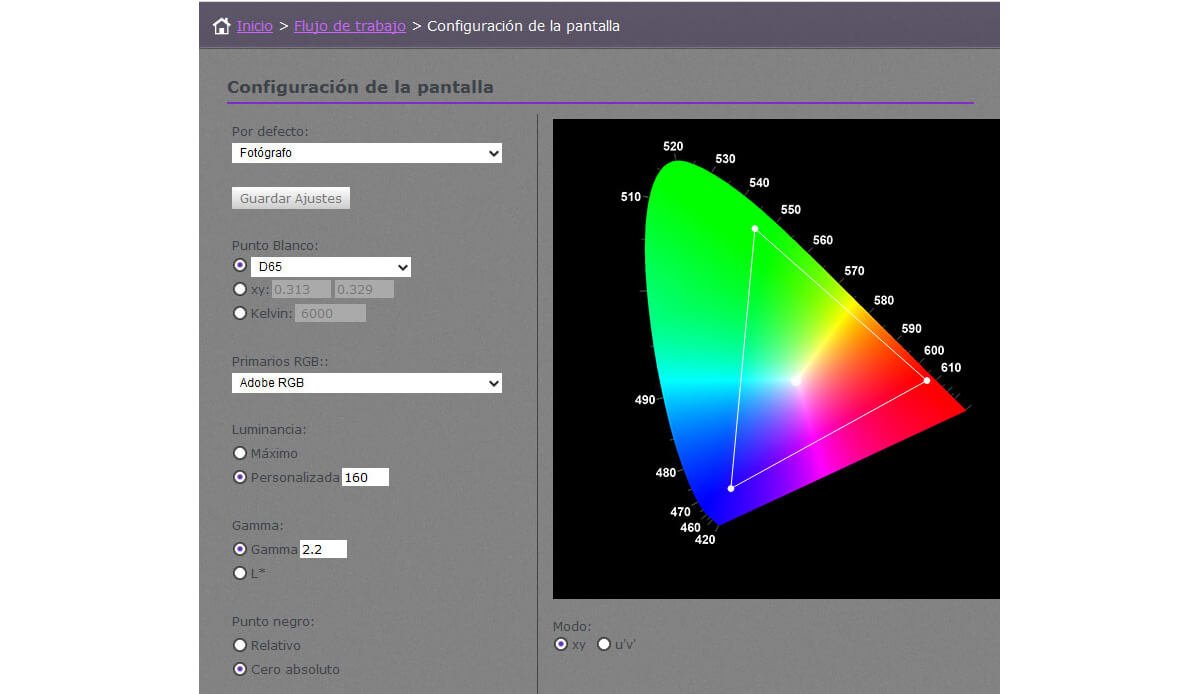
In the Home screen you choose the calibrator and choose between Simple or Advanced mode:
Then you can choose all the parameters: brightness, white point, gamma curve and black point (this last one is very interesting)
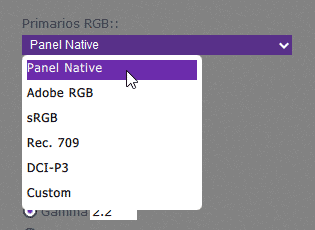
Furthermore, you can also choose the primary ones to adapt the gamut to your taste. Not only you can choose between the above-mentioned spaces (the same as in the presets), but you can also choose manually the coordinates of the primary ones. A very advanced feature that is not possible, for example, in i1Profiler.
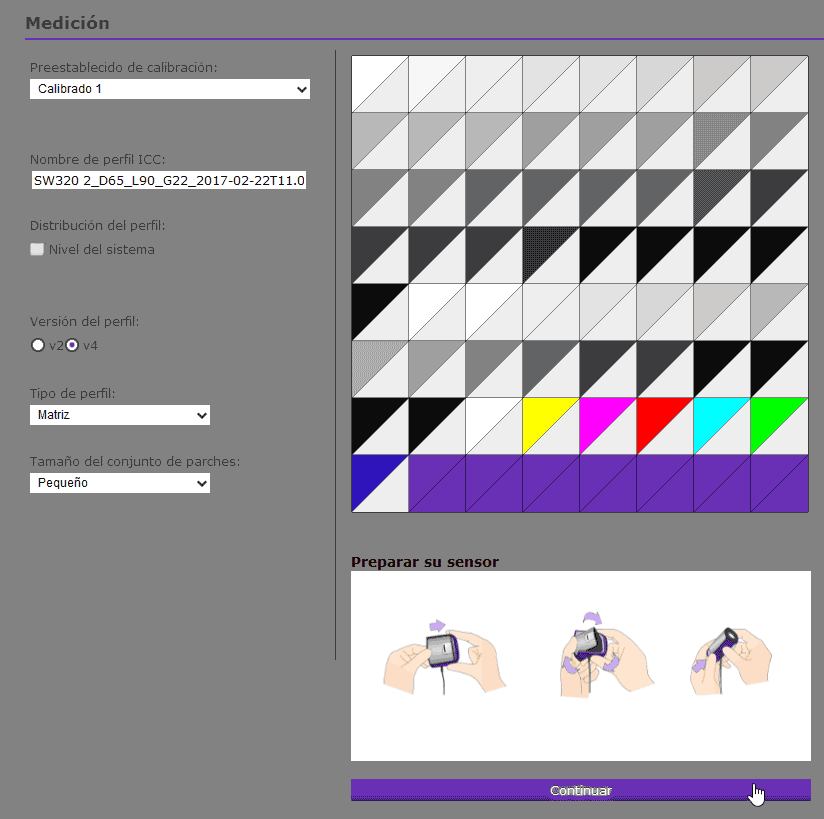
On the next screen you have to indicate which of the two memories you want for calibration storage (in the 1 or 2)
And the desired profile type:
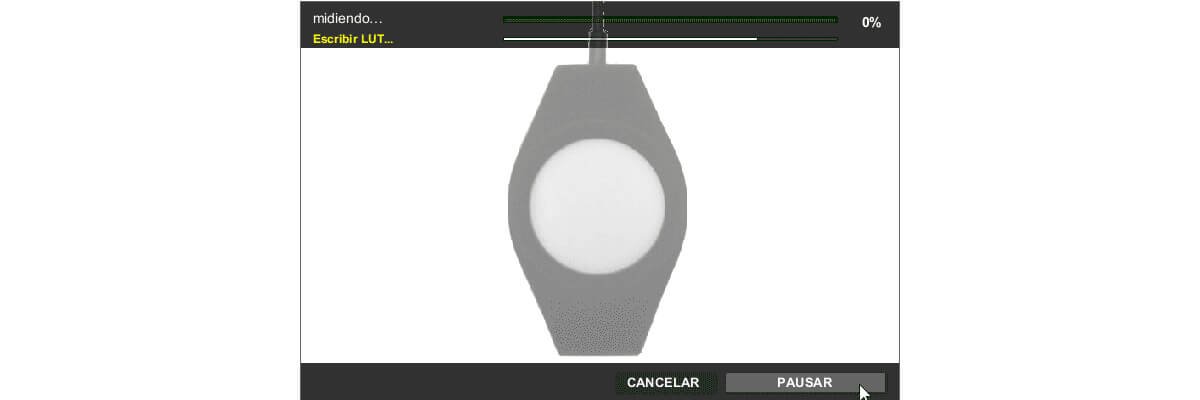
From here comes the measurement itself:
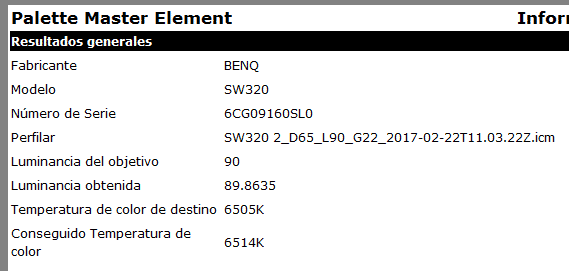
And, upon completion, the results:
In this case you can see that the purpose was to achieve 90cd/m2 and 6.505K, and it has achieved 89.86 and 6.514K respectively… not bad, right? (NOTE: it isn’t bad at all, actually it means that it is TOO good).
The SW320 is one of those few monitors with a size that most users have never seen because of its dramatically big size and its highest category. It is true that this is not a monitor suitable for all types of users due to its features or price, but it is also true that until now these monitors have rarely decreased from 2,000 €. With the SW320, advanced professional photographers, video editors will have a screen for bigger needs: high-resolution photos, panoramas, HD and 4K video. The designers will also enjoy it thanks to its 140dpi resolution, since the typographies and fine lines will be better seen here than in any other monitor, when it comes to see the printed aspect.
The combination of its 4K size with HDR, its 10-bit IPS panel, the Adobe RGB range, the calibrated presets and the easiness in moving through their menus allow you to enjoy it without so many high technology complications. If in addition we factor the accuracy of their factory calibrations, the remote control for the menus or the excellent hood, we will round out an already overly finished product. And for about 1400 €, you can't really ask for more…
{{productsCount}}Result
{{item}}
{{item.productWordingTag}}
{{currency}}{{item.finalPrice| numberThousandsCommas | numberDecimalPoint}} Save {{currency}}{{item.saveAmount | numberThousandsCommas | numberDecimalPoint}} Save {{item.savePercent | numberThousandsCommas | numberDecimalPoint}}%
new device price {{currency}}{{item.regularPrice| numberThousandsCommas | numberDecimalPoint}}
{{item}}
{{itemTag.title}}
Max 4 products to compare reached.